Installing Elementary OS: A Comprehensive Guide for Beginners

splash image elemantary os

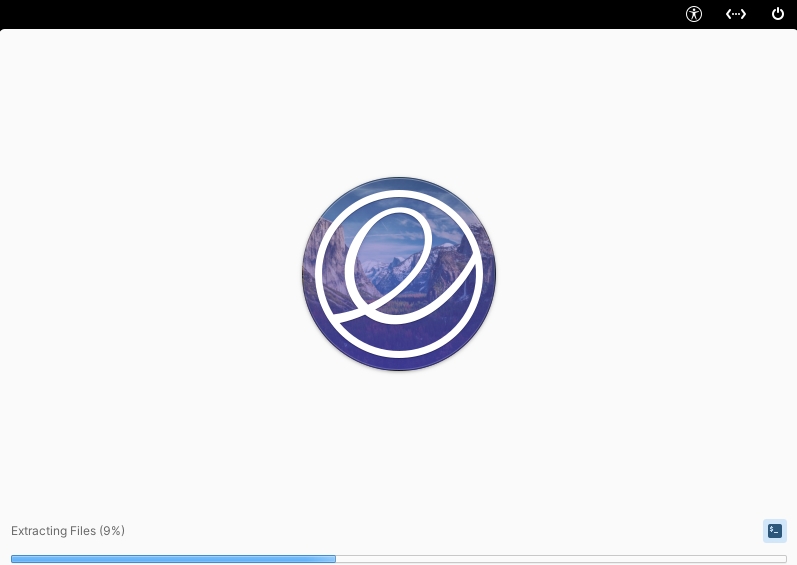
This guide will walk you through the process of downloading and installing Elementary OS. It is a popular Linux distribution originally released in March of 2011. It is designed to be lightweight and fast, making it suitable for older hardware. Based on Ubuntu, it offers a curated set of applications and a consistent design language. Elementary OS emphasizes simplicity and focuses on providing a seamless experience for users transitioning from other operating systems. After finishing this guide you will have all of the knowledge required to install Elementary OS on your own PC.

Download Elementary OS

The first thing you will need to do is download Elementary OS. Download it with the link below.

Download Elementary OS

After you download the ISO file you will need to write it to a USB drive. If you need instructions for that please read our How to Create a Bootable Linux USB tutorial. Once you have booted into the installer you can continue reading below.

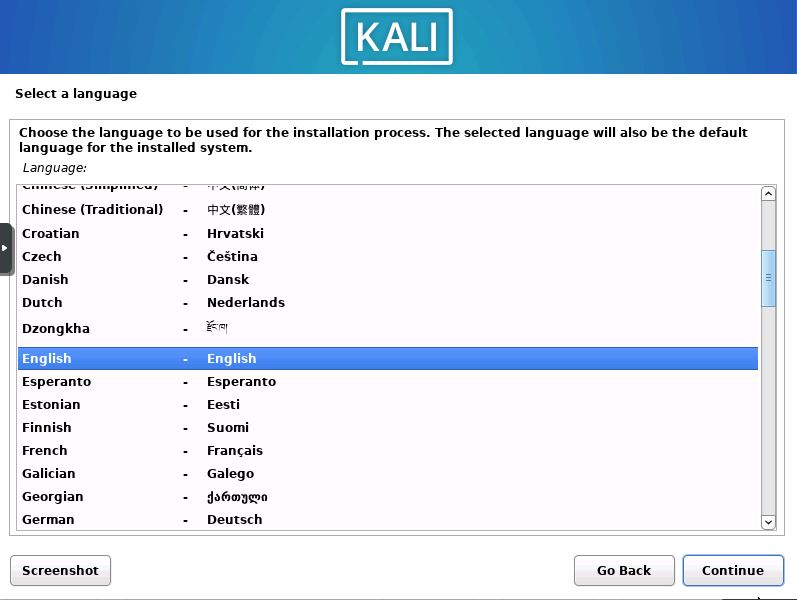
1. Choose the Installers Language

choose installer language

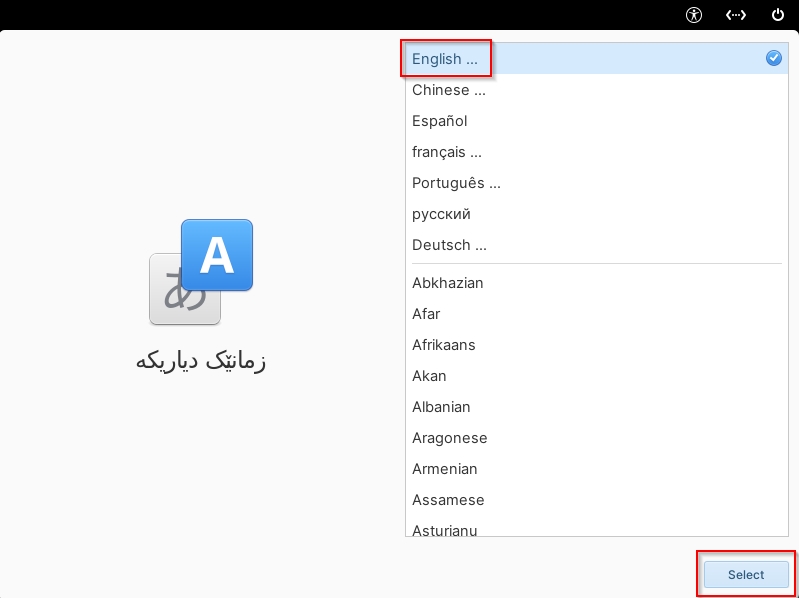
The first screen will ask you to choose the language for the installer. Choose your preferred language then press the select button.

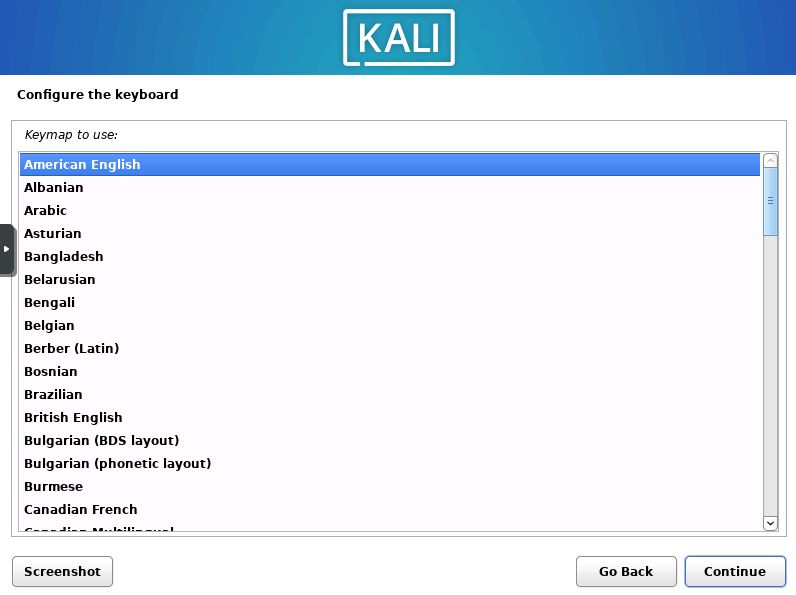
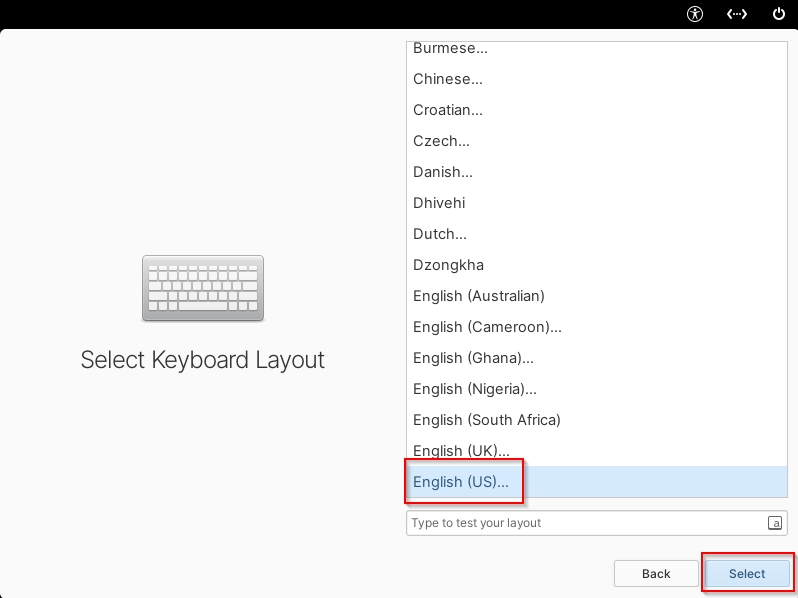
2. Choose Keyboard Layout

choose installer keyboard layout

Next you will choose the keyboard layout to use during the installation. Choose your preferred layout then press select.

3. Select Custom Install

custom install Elementary OS

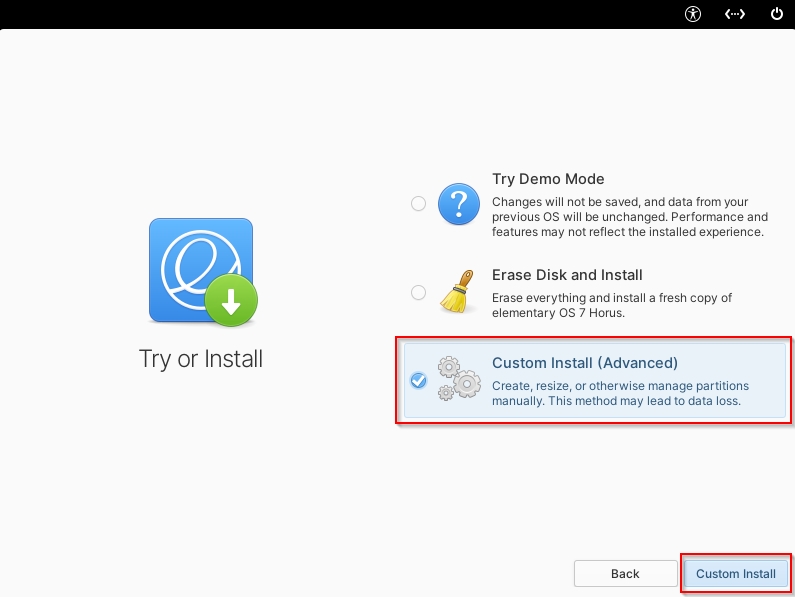
Now you will be asked if you would like to try Elementary OS, or install it to the disk. We will be using the Custom Install option. Select it then click on the “Custom Install” button.

4. Create a Partition Table

create a partition table

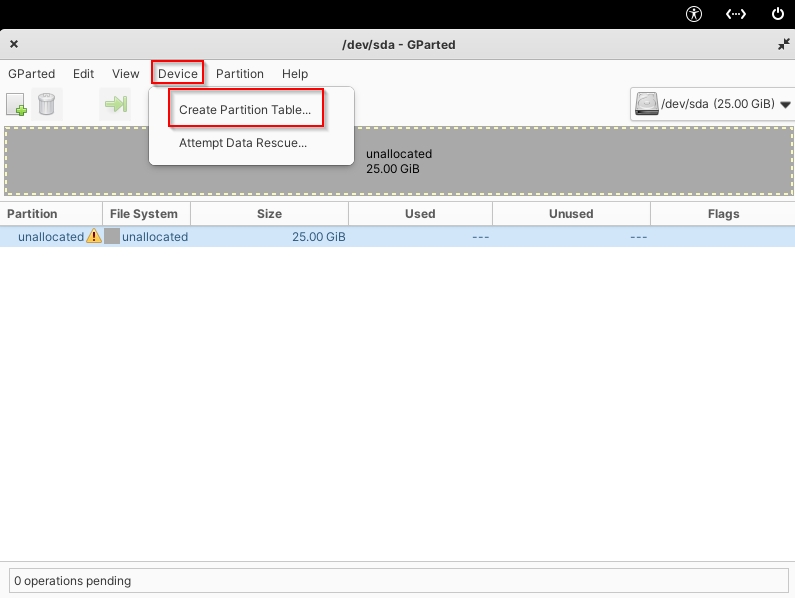
After clicking install the GParted partition manager will open. Click on “Device” at the top of the screen, then click “Create Partition Table”. (make sure your disk is selected below)

5. Modify the Partitions

modify the partitions

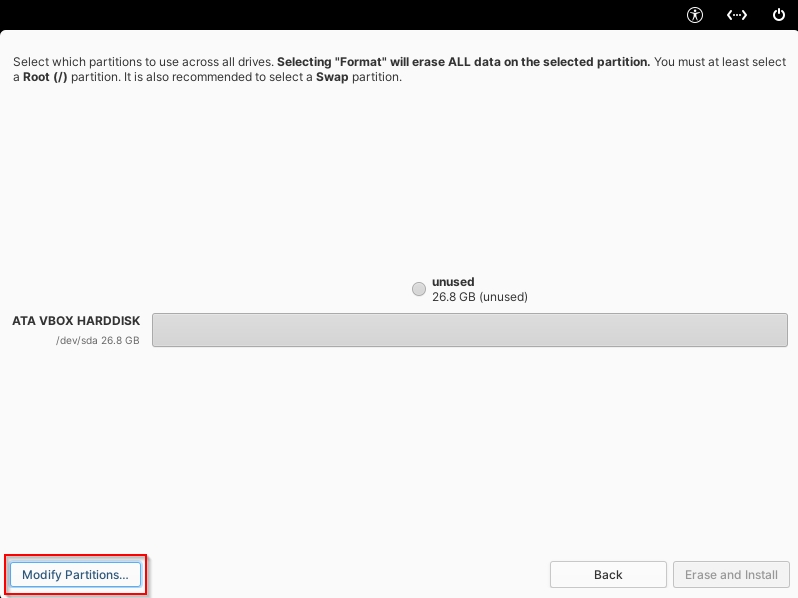
Next you will have to click the “Modify Partitions” button highlighted in red.

6. Apply the Partition Table Changes

apply partition table changes

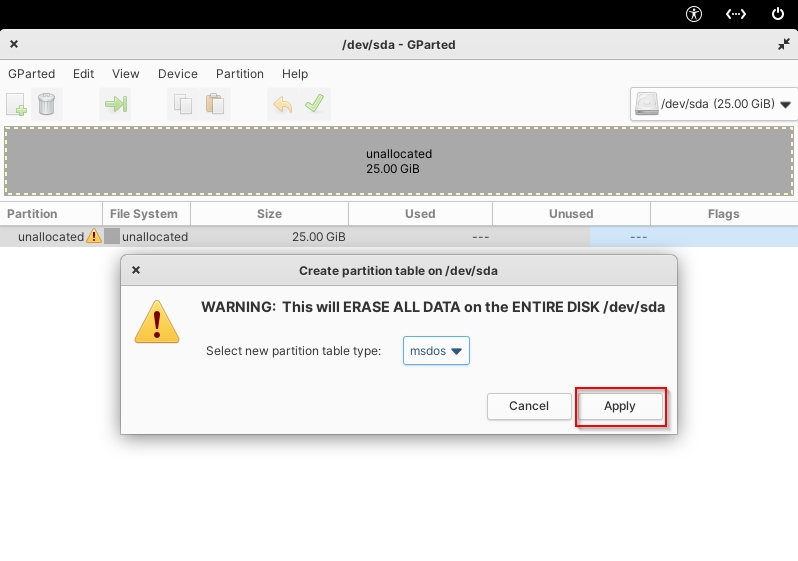
Now click “Apply” to save your partition table to the disk.

7. Create a New Partition

create a new partition

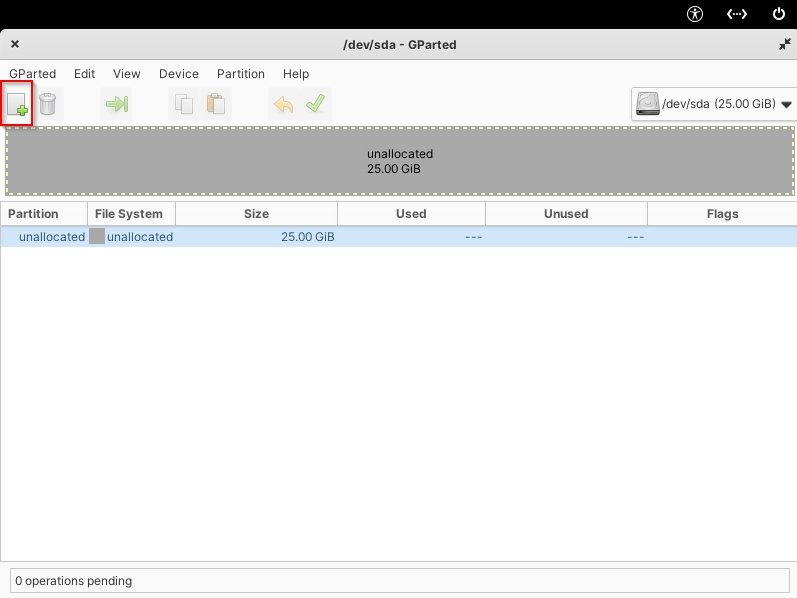
After creating our partition table we can create the partition. We will be using a single partition for the easiest setup. Click on the green plus button highlighted above.

8. Configure the Partition

configure the new partition

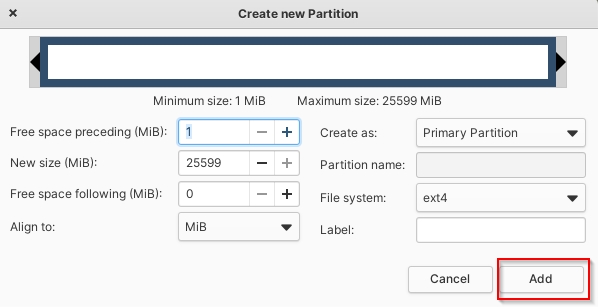
We will use all of the default options which will use 100% of the available space. Click the “Add” button to continue.

9. Confirm the Partition Changes

confirm partition changes

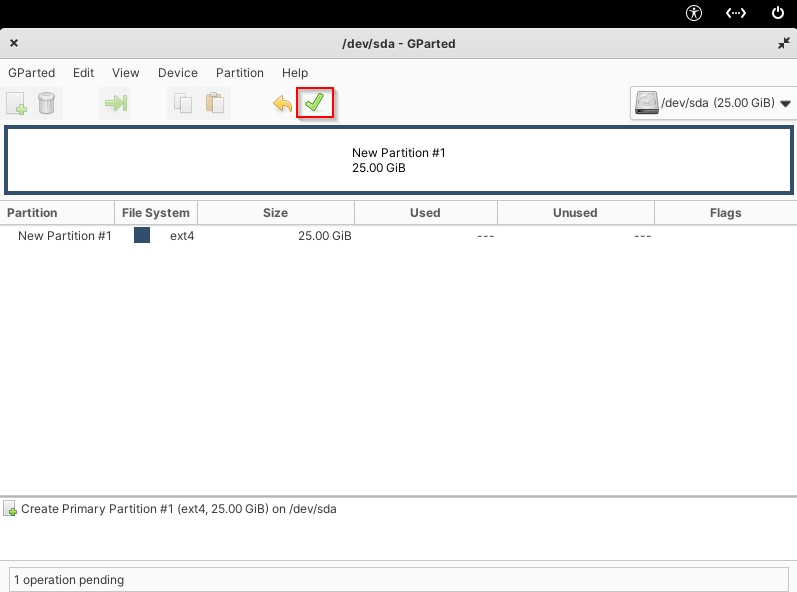
Next click on the green check mark to save the partition changes.

10. Confirm the Operation

apply partition to device

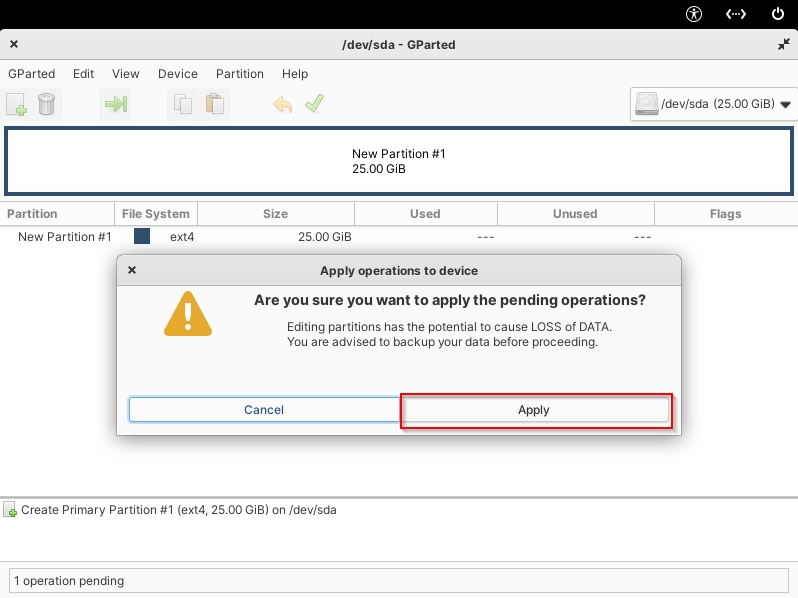
Now click the “Apply” button to apply all of the pending operations in GParted.

11. Close the Dialog Window

close confirmation window

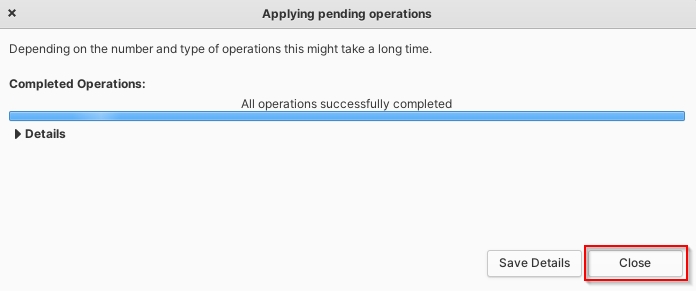
After the pending operations complete you can close the window.

12. Close the GParted Application

close gparted

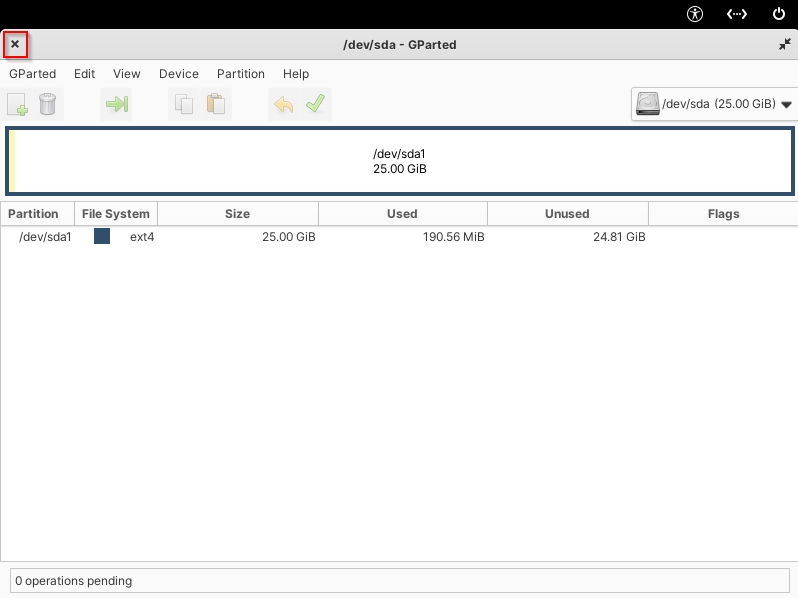
Finally close the GParted window to finish the partitioning process.

13. Erase and Install

choose Elementary OS partition

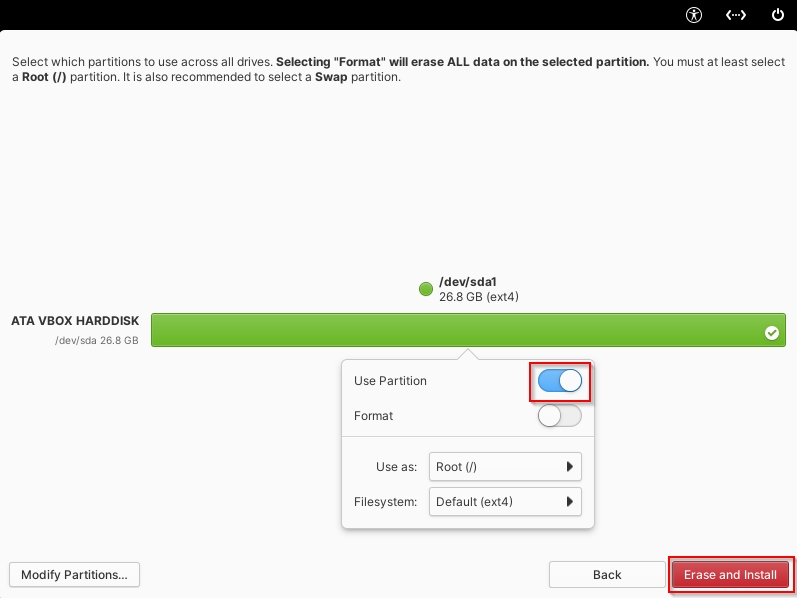
Now you need to select the new partition we just created. Click on the green bar, then slide the slider on “Use Partition” as shown in the red box. Next click on “Erase and Install” to begin the installation.

14. Wait for Elementary OS to Finish Installing

wait for Elementary OS to install

Wait for the install process to complete. Once it finishes it will ask you to remove your installation media. Remove your USB drive, then press “Enter”. After your PC reboots you will be brought to the final setup screen.

15. Initial Setup

choose system language

Now you need to select the language for your user account. After you do that press “Select”.

16. Select the Keyboard Language

choose keyboard language

Repeat the same process for selecting your accounts keyboard layout.

17. User Profile Setup

set up user profile Elementary OS

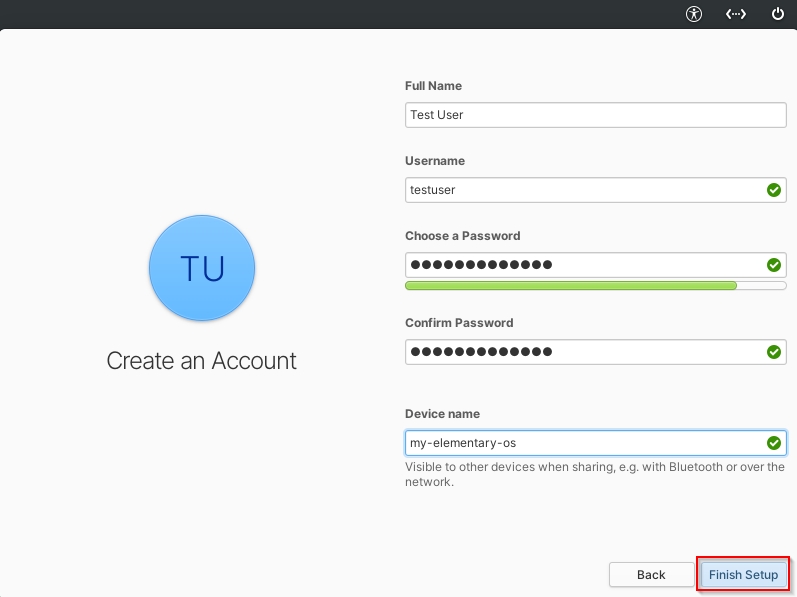
Finally you will be able to setup your user profile. Fill out all of the fields including the device name. After you are finished click “Finish Setup”.

18. Login to Elementary OS

login to Elementary OS

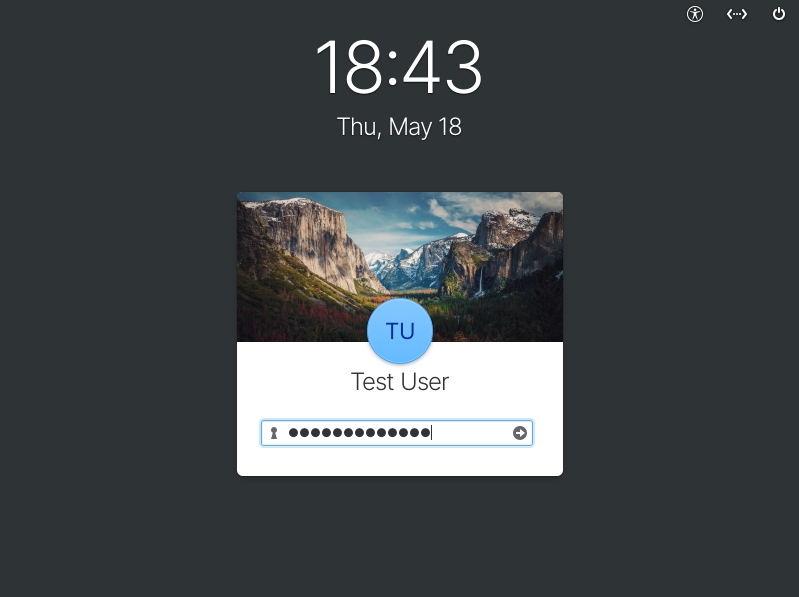
You will now be able to login to your new Elementary OS account. Type your password and press the “Enter” key to continue,

19. Installation Complete

Elementary OS install complete

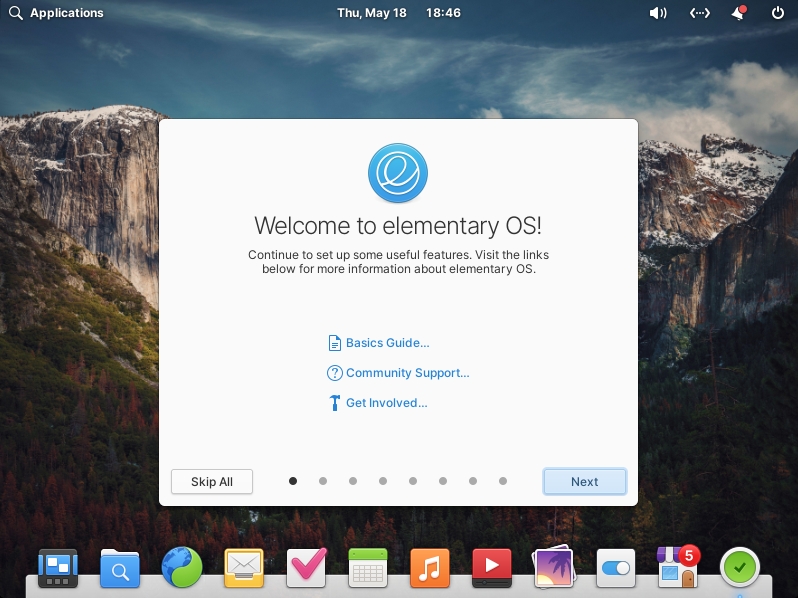
You have now successfully installed Elementary OS. If you are interested in additional operating system install tutorials you may like our OS Installs, and Linux Tutorials blog categories.

Additional Questions?

If you have any additional questions or thoughts feel free to comment them below.

Related Resources

View our How to Install an Nginx RTMP Server in Ubuntu 22.04 guide.

Learn How to Create a Mapped Network Drive in Windows 10.

Click here to learn How to Easily Create a Bootable Linux USB Drive using Rufus.

View our How to install Kali Linux 2022.3 tutorial.

Learn more the Windows operating system with our Windows Tutorials.

View all of our available online tools and converters at Formatswap.com.

How to install Kali Linux 2022.3 [step by step]

install kali splash image

In this tutorial you will learn how to install the Debian based Kali Linux operating system. Kali is designed for digital forensics as well as penetration testing. Kali is very useful to have installed if you are currently in or entering into the cyber security field. One of the main benefits of Kali Linux are its approximately 600 penetration testing tools preinstalled.

Download Latest Kali Version

The first step is to download the latest version of Kali Linux from the official website.

Download Kali Linux 2022.3

Boot USB or Select ISO

kali install screen

Next you will need to make a bootable USB drive using the Kali ISO file. You can read this tutorial on creating a bootable Linux USB drive using Rufus to learn more. After you create the bootable Kali USB drive, insert it into your computer and select the USB at boot. If you are using a virtual machine, simply select the Kali ISO as your boot device. Once you are booted into the installer, select “Graphical Install”.

Select System Language

kali select language

Now you will select the language you would like to use.

Select Location

select location

Next select your location.

Select Keyboard Layout

select keyboard layout

Afterwards you will need to select a keyboard layout.

Choose Hostname

choose a hostname

Now you will choose a hostname for the installation. You can enter any name you would like into the box.

Enter Domain Name (optional)

enter a domain name

The next step is to select a domain name. This step is optional, and usually unused. So I will be skipping it.

Set Account Name

set up accouont

Now you will enter the full name for the new user, afterwards press the “Continue” button.

Enter a Username

choose a username

Next you will need to set the username for the account. Enter it into the box and then press “Continue”.

Choose a Password

choose a password

After setting the username you will need to create a password for the new user. Enter the password and confirmation password.

Select the Timezone

select a timezone

Now you will set the system timezone. This will set the clocks to the correct time.

Set Partitioning Method

partition the disks

Next you will choose from four different partitioning schemes. Select “Guided – use entire disk” unless you want to encrypt the disk, then press “Continue”.

Select the Disk for Installation

select hdd

Now the installer will ask you which disk you would like to install Kali onto. (note, all data will be deleted from the selected device)

Choose Partition Scheme

partition scheme

The installer will then ask if you would like a separate home partition, or all files in the same partition. I recommend new users choose the all files in one partition option.

Confirm Partition Changes

finish partitioning

Now you will be shown a overview of the changes that are due to take place. Look them over then press “Finish partitioning and write changes”.

Confirm Write Changes

confirm write changes

You will then be prompted with a confirmation asking if you want to write the changes to the disk. Click “Continue”.

Wait for the Base System to Install

install base system

Wait for the base system to finish installing. This can take a while depending on the performance of your computer.

Software Selection

select kali software to install

Now you will be asked which desktop environment you want. As well as what software you would like installed. I recommend keeping all options to default as displayed in the above screenshot.

Install Grub

install grub bootloader kali

You will then receive a prompt asking you if you would like to install the Grub boot loader. Select the Yes checkbox and press “Continue”.

Select Grub Device

select a grub device

Now you will need to select which device to install Grub onto. Select the /dev/x device and then “Continue”.

Reboot the System

reboot kali system

Once you see this screen you are almost ready to begin using Kali. Simply remove your installation media and reboot the system.

Installation Complete

test login to kali

Once the system has rebooted you will see the login screen. You have now completed the installation of Kali 2022.3. Enter the credentials that you created earlier to start using Kali.

Additional Questions?

If you have any additional questions or thoughts feel free to comment them below.

Related Resources

View our 5 Reasons to Switch from Windows 10 to Linux.

Learn How to Create a Mapped Network Drive in Windows 10.

Click here to learn How to Easily Create a Bootable Linux USB Drive using Rufus.

View our OS Installs Category.

Learn more cool things in Windows with our Windows Tutorials.

View all of our available online tools and converters at Formatswap.com.

How to Install Ubuntu Server 22.04 [Step by Step]

ubuntu splash image

In this beginner friendly tutorial you will learn how to install Ubuntu Server 22.04 LTS. Ubuntu Server is currently one of the most popular Linux based server operating system. One of the biggest advantages to using Ubuntu Server is the stability that it brings. As an LTS release it will provide you five years of security updates and support by default. This will ensure your server is always secure and has the latest software. To start this tutorial make sure you have a virtual machine, an unused hard drive, or a empty partition to be able to install the operating system. If you want to learn how how to make a bootable installation flash drive click here. You will also have to download the Ubuntu Server ISO file. You can do that by clicking this link. Download Ubuntu Server 22.04 LTS

Language selection

ubuntu install window

The first step after booting into your Ubuntu Server or ISO is to select the language. Choose your language and then press “Enter”.

Update the installer

ubuntu install window

Next the installer will ask you if you want to update. I recommend updating to the latest installer. Select “Update to the new installer” then press “Enter”.

Keyboard configuration

ubuntu install window

After that you will be brought to the keyboard configuration page. If you are okay with the default (automatic) keyboard layout, select “Done” and press “Enter” to continue.

Installation type

ubuntu install window

This page will ask you if you want to do the default Ubuntu Server installation or the minimal version. I recommend the first option. Select your choice then select “Done” and press “Enter”.

Network configuration

ubuntu install window

Next we have the network configuration page. By default the installer will automatically detect your IP address settings. If you want to change it select the network adapter “ens18” and press “Enter”. I recommend just keeping it at its default settings. Select “Done” and press “Enter”.

Configure network proxy

ubuntu install window

Afterward you will be brought to the proxy configuration page. If you have a proxy you would like to use enter its information. Else just select “Done” and press “Enter”.

Guided storage configuration

ubuntu install window

Now we will need to setup the storage configuration. Luckily the installer does the hard part for us. If you are using a full physical or virtual disk, select “Use an entire disk” and press “Space” to mark it. Afterwards select “Done” and press “Enter” to proceed.

Review storage configuration

install ubuntu 22.024

This next page will show you a review of the storage configuration changes that will take place. Review the disk and partition names, and if everything looks correct proceed to the next step.

Confirm storage configuration

install ubuntu 22.024

Now you will be asked to confirm the storage configuration options. Select “Continue” and press “Enter” to proceed to the next step.

Setup Ubuntu user account

install ubuntu 22.024

Afterwards you will need to setup your user account. Enter a name, server name, username, and password. Then click on “Done” and press “Enter”.

Install SSH

install ubuntu 22.024

This step is optional. If you would like to enable the SSH server select “Install OpenSSH server” then press “Space” to mark it. Afterwards press “Done.” and press “Enter”.

Wait for system to be installed

install ubuntu 22.024

Now the system will begin installing. This can take anywhere from 20-30 mins to fully install Ubuntu Server. Wait for it to complete.

Installation complete

install ubuntu 22.024

Once the installation is complete you will see this screen. Select “Reboot Now” and press “Enter” to reboot the system and continue.

Unmount USB drive or ISO file

install ubuntu 22.024

After the system reboots you will get a message telling you to “Please remove the installation medium, than press Enter”. Remove your USB drive or ISO file if you are using a virtual machine. Once you have completed this step press “Enter” one final time to reboot.

Login to Ubuntu Server 22.04

install ubuntu 22.024

You will be brought to the Ubuntu Server login screen. Type in the credentials you created for your account. You will then be logged into the system. You have now successfully installed Ubuntu Server 22.04. If you are looking for other Linux tutorials check out our articles below.

Related Resources

View our list of The Top 5 Programming Languages to Learn in 2022.

Check our our The Best Mechanical Gaming Keyboards to Purchase in 2023 article.

How to Install VeraCrypt and Encrypt a Flash Drive on Ubuntu 22.04.

Click here to learn How to Install MySQL on Ubuntu Server 22.04 LTS.

View our Programming Articles and Tutorials.

Learn more cool things in Linux with our Linux Tutorials.

View all of our available online tools and converters at Formatswap.com.