
In this tutorial I will teach you how to download and install MySQL server on Ubuntu 22.04 LTS. Additionally you will learn how to secure your installation and setup a root account. MySQL is vital to have installed if you want to work with storing and receiving data on your website or web application. The first version of MySQL was released on the 23rd of May 1995 by a Swedish company MySQLAB. The other popular database manager MariaDB was created by the same company. Ever since MySQL has grown to be one of the most popular database software’s on the web. Before we begin make sure you have a Ubuntu 20.04 server installed onto a computer or a virtual machine. Also don’t forget to install the openssh-server package if it is not installed. This will give you the ability to ssh into the machine to setup MySQL.
Update and upgrade Ubuntu
sudo apt update && sudo apt upgradeThe above commands will both update and upgrade your Ubuntu install to the latest package versions.
Install the MySQL Server & Client to Ubuntu 20.04
sudo apt install mysql-server && sudo apt install mysql-clientThis will install both the MySQL Server and the MySQL Client to your machine. Unlike previous versions of Ubuntu Server you do not have to add any SQL repository’s before installing. This is because Ubuntu 22.04 LTS contains the packages in the standard system repository.
Confirm the installed MySQL version
To confirm which version of MySQL you have installed run the following command. You will receive an output with the version number.
mysql --versionUpdate MySQL security settings
The default installation of MySQL has several security issues. We need to run the following commands to fix these issues.
sudo mysql_secure_installationThis will open the MySQL secure installation wizard. We need to answer a few questions in the wizard to continue. The first question will be:
Would you like to setup VALIDATE PASSWORD COMPONENT?Type in “Y” on the keyboard and press “Enter”. This will bring us to the next question which will have us enter a password validation policy.
There are three levels of password validation policy:

LOW    Length >= 8
MEDIUM Length >= 8, numeric, mixed case, and special characters
STRONG Length >= 8, numeric, mixed case, special characters and dictionary                  file

Please enter 0 = LOW, 1 = MEDIUM and 2 = STRONG:
Choose any one of these options. I will be using option #2 MEDIUM. After you type in the number press “Enter” and you will be brought to the following screen to set your password.
Please set the password for root here.

New password:

Re-enter new password:

Do you wish to continue with the password provided?
Type in the password you would like to use and press enter. Next re-enter the password you have chosen. Finally type “Y” than press “Enter” to continue with the password provided. There is the possibility you will receive the following error.
Failed! Error: SET PASSWORD has no significance for user 'root'@'localhost' as the authentication method used doesn't store authentication data in the MySQ L server. Please consider using ALTER USER instead if you want to change authent ication parameters.If you get this error you will have to exit the script by pressing Ctrl+C. After you exit out login to MySQL.
sudo mysqlThen set the MySQL password.
ALTER USER 'root'@'localhost' IDENTIFIED WITH mysql_native_password by 'SuperSecure1';*Change the password SuperSecure1 to something secure* Afterwards exit the program by running exit;
exit;Then just rerun the secure installation setup script again.
sudo mysql_secure_installationThe secure installation setup script will then ask you the following questions. Answer them as you see below.
Enter the password for user root: type your root password and then press "Enter".
Change the password for root? Press N, then press "Enter".
Remove anonymous users? Press Y, then press "Enter".
Disallow root login remotely? Press Y, then press "Enter".
Remove test database and access to it? Press Y, then press "Enter".
Reload privilege tables now? Press Y, then press "Enter".
Testing MySQL Server login
Once you have finished running the MySQL secure installation script and have set up the root password you will need to test the login. This will allow us to login as the root user and setup a database ,tables and or users to go with it. Type the following to login.
sudo mysql -u rootEnter the root password you created in the above steps.
Managing your Ubuntu 22.04 MySQL service
There are several commands worth knowing for managing your MySQL service. One of the most important is the command to check the status of the service.
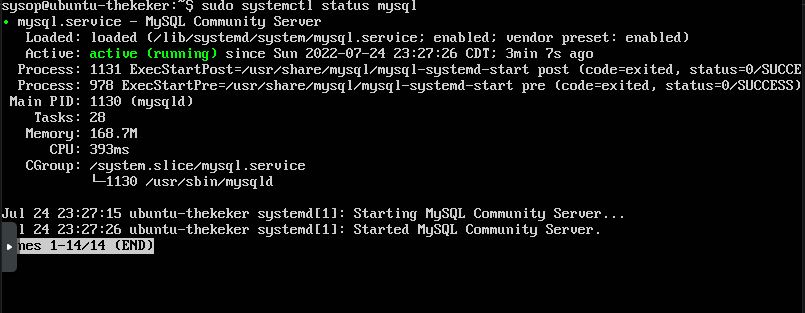
sudo systemctl status mysqlThis will generate an output similar to this. It will tell you if it is running or stopped. Furthermore it will also output any errors.
You will also want to know how to stop the MySQL service. You can do this with the following command.
sudo systemctl stop mysqlTo start the MySQL service run:
sudo systemctl start mysqlTo restart the MySQL service run:
sudo systemctl restart mysqlTo disable the MySQL service run:
sudo systemctl disable mysqlUpdating or removing MySQL on Ubuntu 20.04
If you are having any issues with your current version of MySQL or just want the latest features, just run the update command. This will update MySQL and your Linux system to the latest version.
sudo apt update && sudo apt upgradeIf you no longer want MySQL server installed you can easily remove it with the following command.
sudo apt autoremove --purge mysql-serverWhen you get the message “Do you want to continue?” just type “Y” than press “Enter”. MySQL will be purged and uninstalled.
Related Resources
View our list of The Top 5 Programming Languages to Learn in 2022.
You may also like The 5 Best Linux Distributions to Install in 2022.
If you want to learn how to generate images with neural networks click HERE.
View our Programming Articles and Tutorials.
Learn more cool things in Linux with our Linux Tutorials.
View all of our available online tools and converters at Formatswap.com.
https://t.me/s/portable_1WIN