How to Install and Configure YouTube ReVanced on Android

revanced article splash image

YouTube ReVanced is a continuation project based on the original Vanced team, designed as an open-source project to enhance your YouTube experience on Android devices. With features like ad-blocking, SponsorBlock, and the return dislike counter, it brings the best of YouTube to your fingertips. In this comprehensive step-by-step tutorial, we’ll guide you through the process of installing YouTube ReVanced on your Android device. While some knowledge of the Android operating system is helpful, following this tutorial should be a straightforward experience.

Download the ReVanced Manager APK

download revanced manager from github

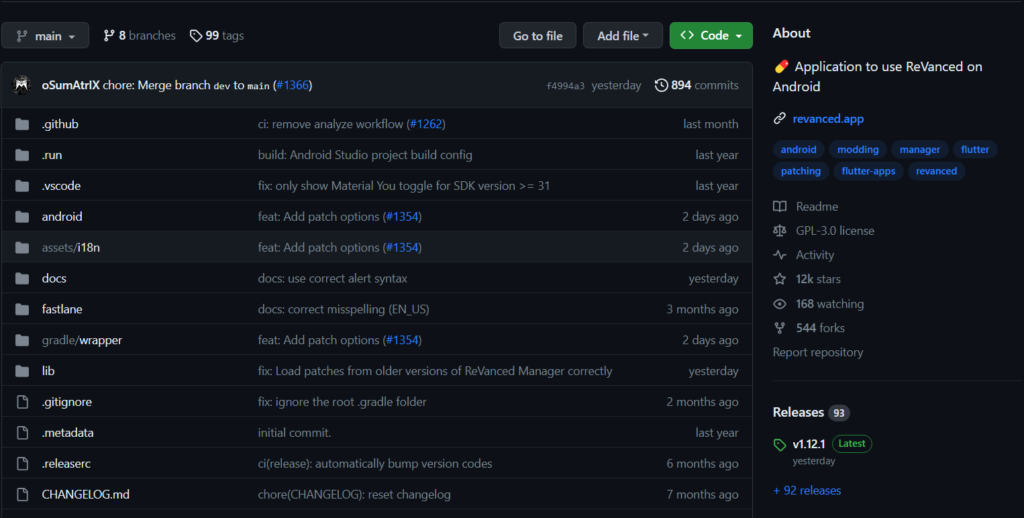
Go to the GitHub releases page for ReVanced Manager: ReVanced Manager Releases.

2. Download the ReVanced Manager APK file to your Android device. This file will serve as the gateway to installing and managing YouTube ReVanced.

Allow Installation from Untrusted Sources

allow trusted sources in android

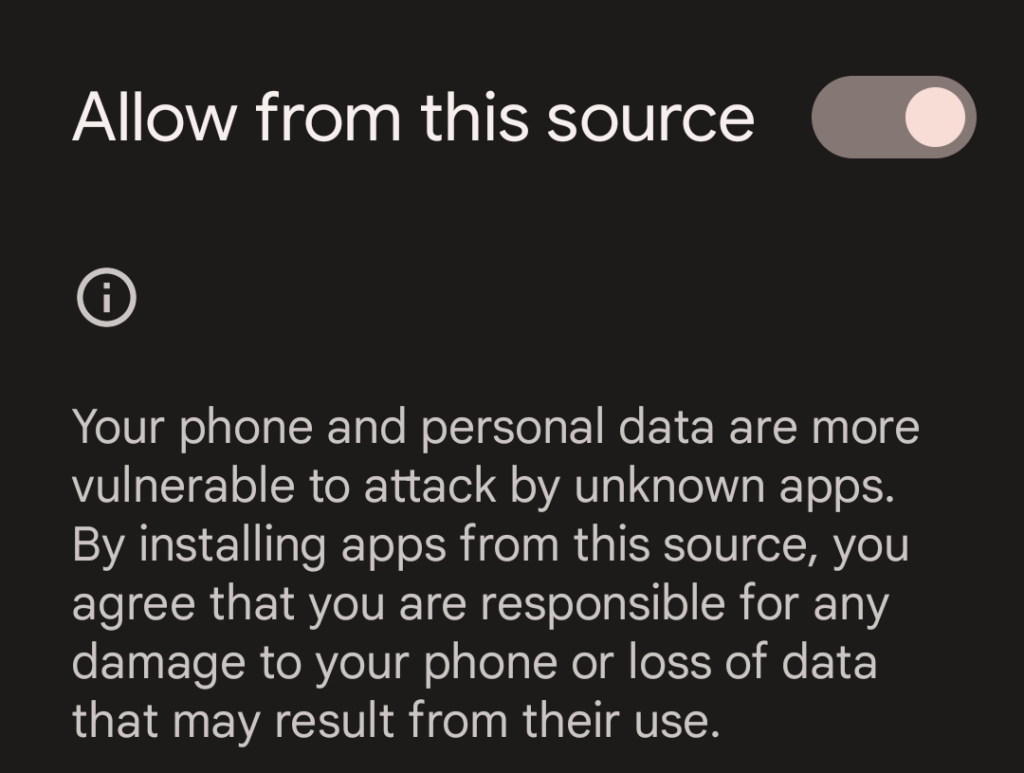
3. If you haven’t already, enable the option to “Allow installation from untrusted sources” in your device’s settings. This step is crucial to install apps from sources other than the Google Play Store, as ReVanced Manager is not available on the official app store.

Install and Open ReVanced Manager

install revanced manager

4. Install the ReVanced Manager APK you downloaded in step 1. This application will act as your control center for managing YouTube ReVanced.

5. Open the ReVanced Manager app on your device, which will serve as a hub for controlling YouTube ReVanced features and patches.

Check and Update Patches

check and update patchs

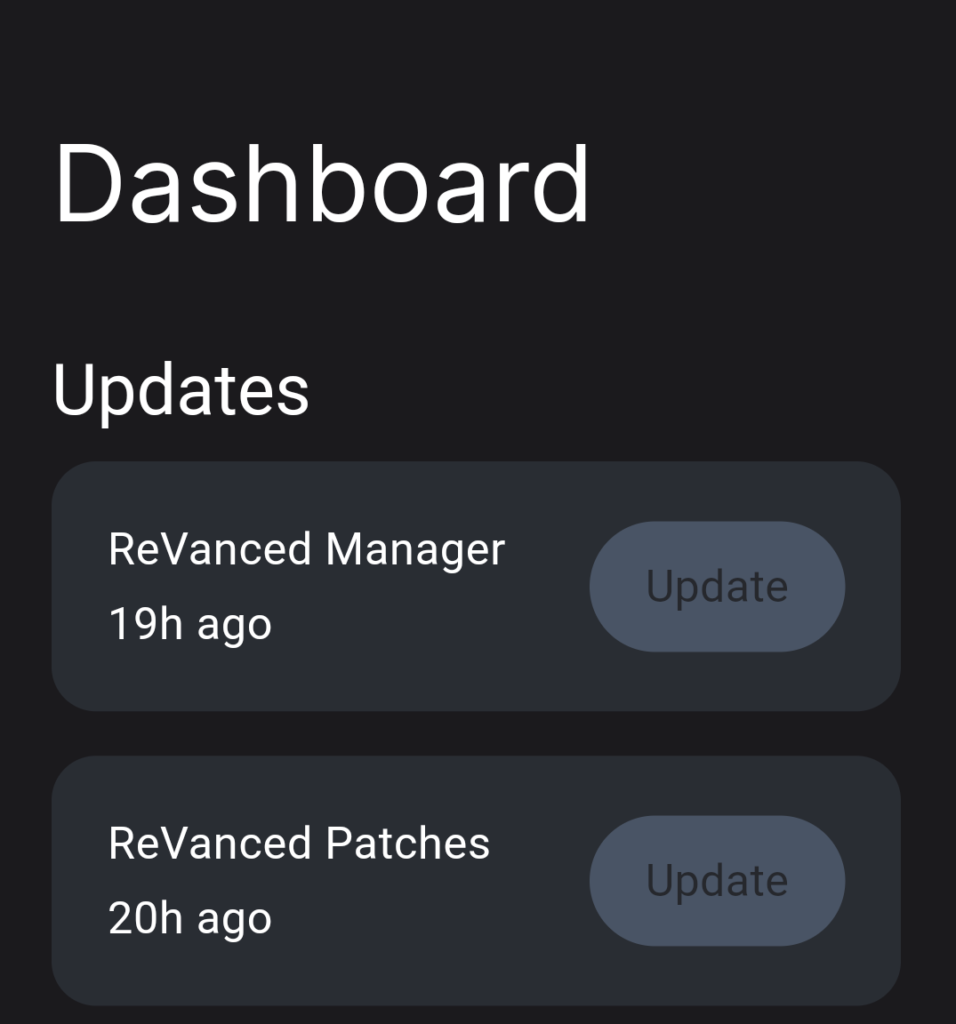
6. Make sure that the app’s patches are up to date. This ensures that you have the latest enhancements for YouTube ReVanced. Periodic updates to the patches will ensure that you continue to enjoy all the features ReVanced has to offer.

Downgrade the Official YouTube App

locate application
uninstall default youtube app

7. You will need to downgrade the version of the official YouTube app you are running. This can be done using the Google Play Store by following these steps:

· Access the Google Play Store using your device.

· Search for the YouTube app in the search bar.

· Once you find the YouTube app, tap on it.

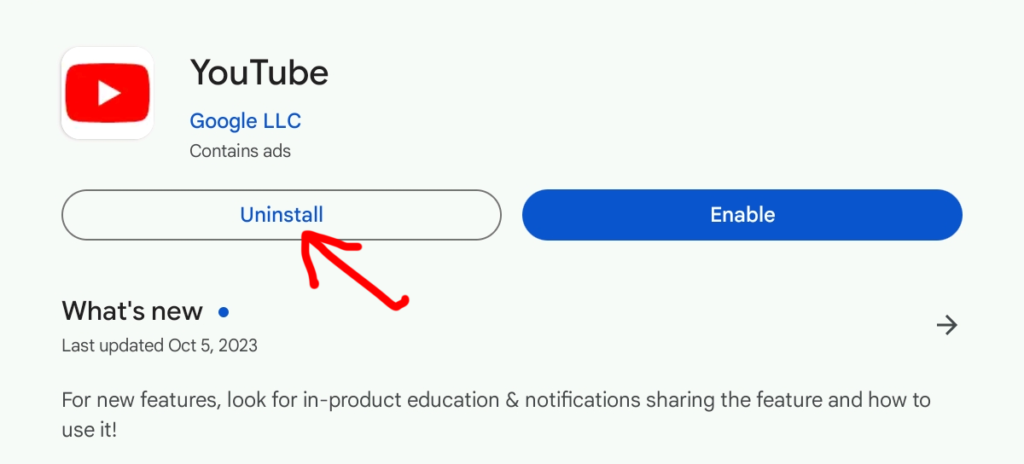
· On the app’s page, scroll down, and you’ll find an option to “Uninstall” or “Update.” If an update is available, tap on “Update” to ensure you have the latest version of the YouTube app.

· If you want to revert to a specific older version you might need to consider uninstalling the app and then proceeding to the next step. This may involve downloading the desired version from a trusted source.

Download the Recommended YouTube App Version 8

download the apk
download the apk

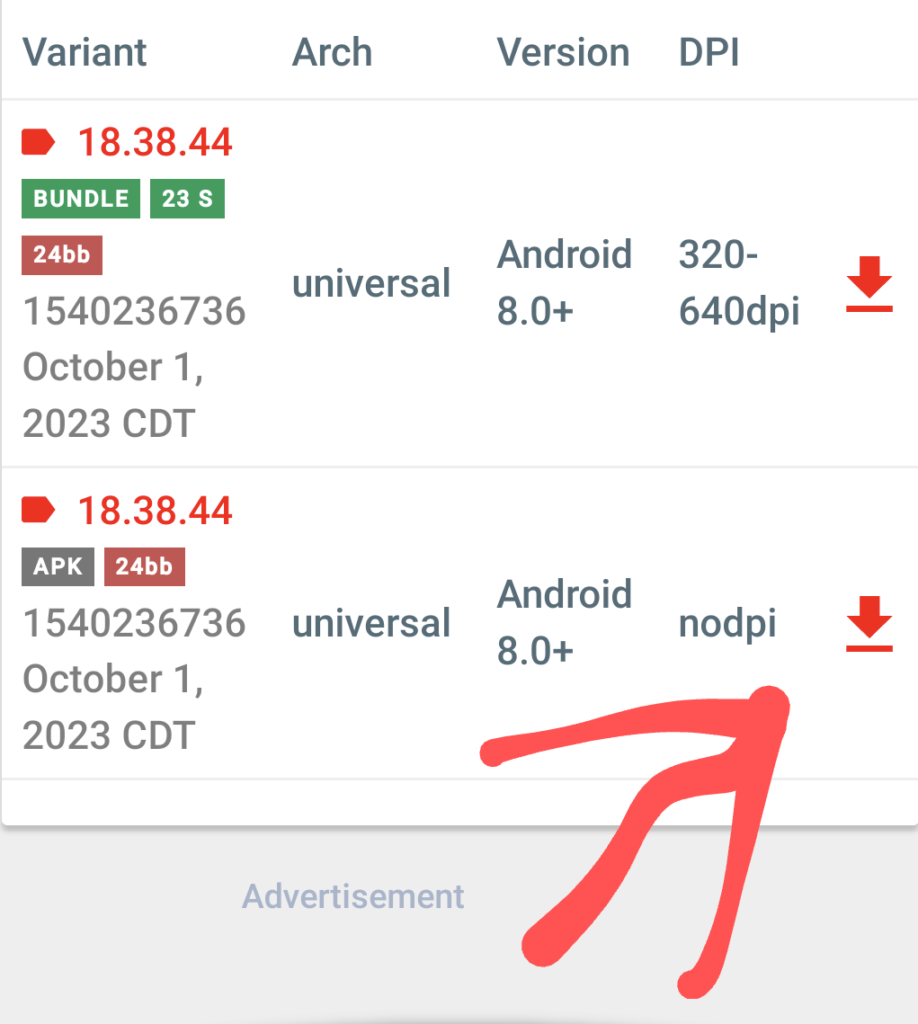
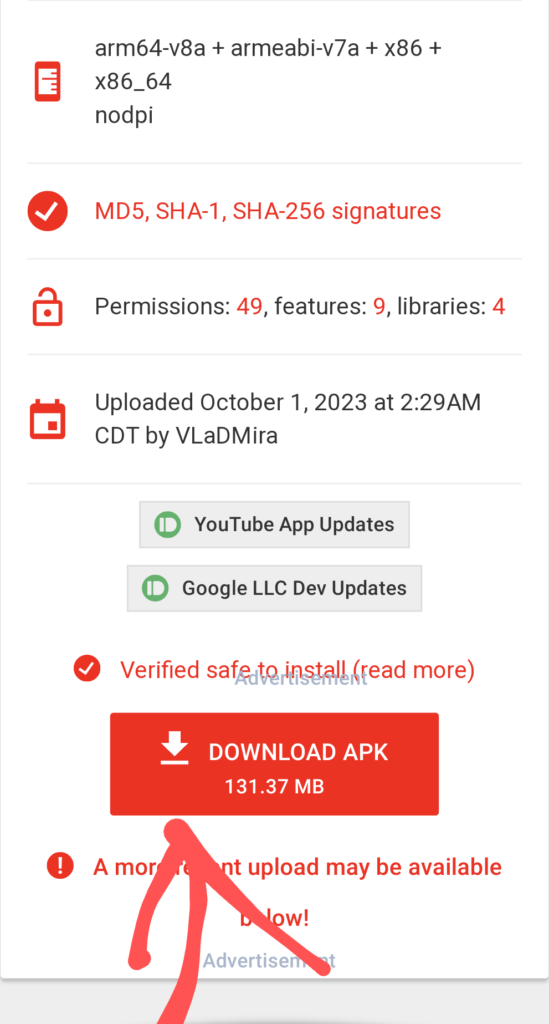
Go to a trusted mirror site for Android apps, such as APKMirror.

9. As of writing this article, version 18.38.44 is the recommended version (nodpi variant). Download and install this version on your device.

10. Check to ensure that the YouTube app loads properly. This specific version is recommended because it is known to be compatible with YouTube ReVanced and offers a stable experience.

Install Vanced MicroG Version 11

install vanced microg

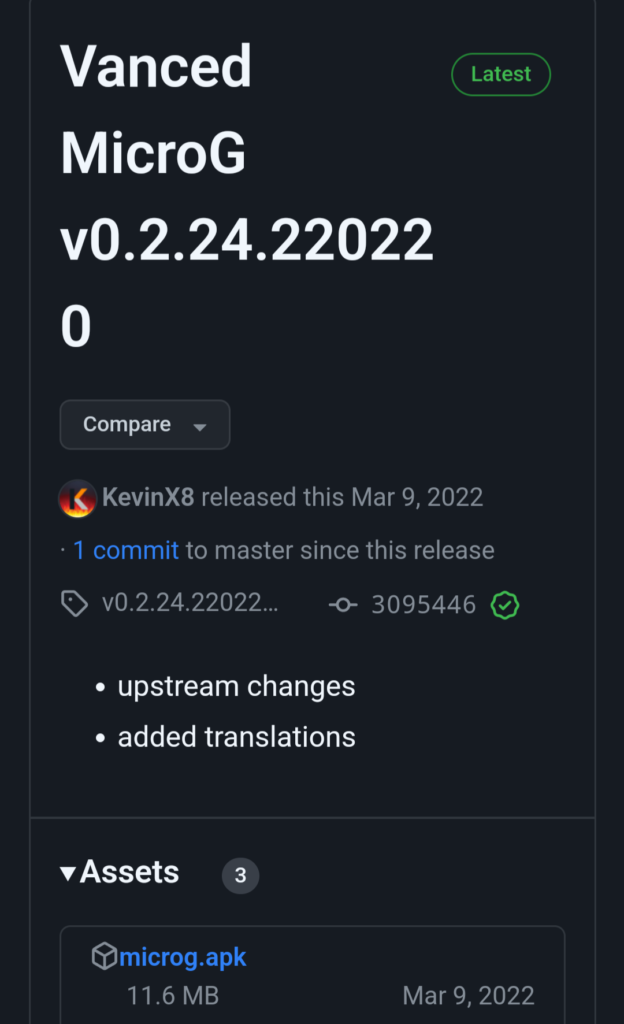
Download and install the latest Vanced MicroG APK from this source. Vanced MicroG enables Google services to work seamlessly in the patched YouTube app. This component is essential for a fully functional YouTube ReVanced experience.

Patch YouTube with ReVanced Manager

install vanced microg

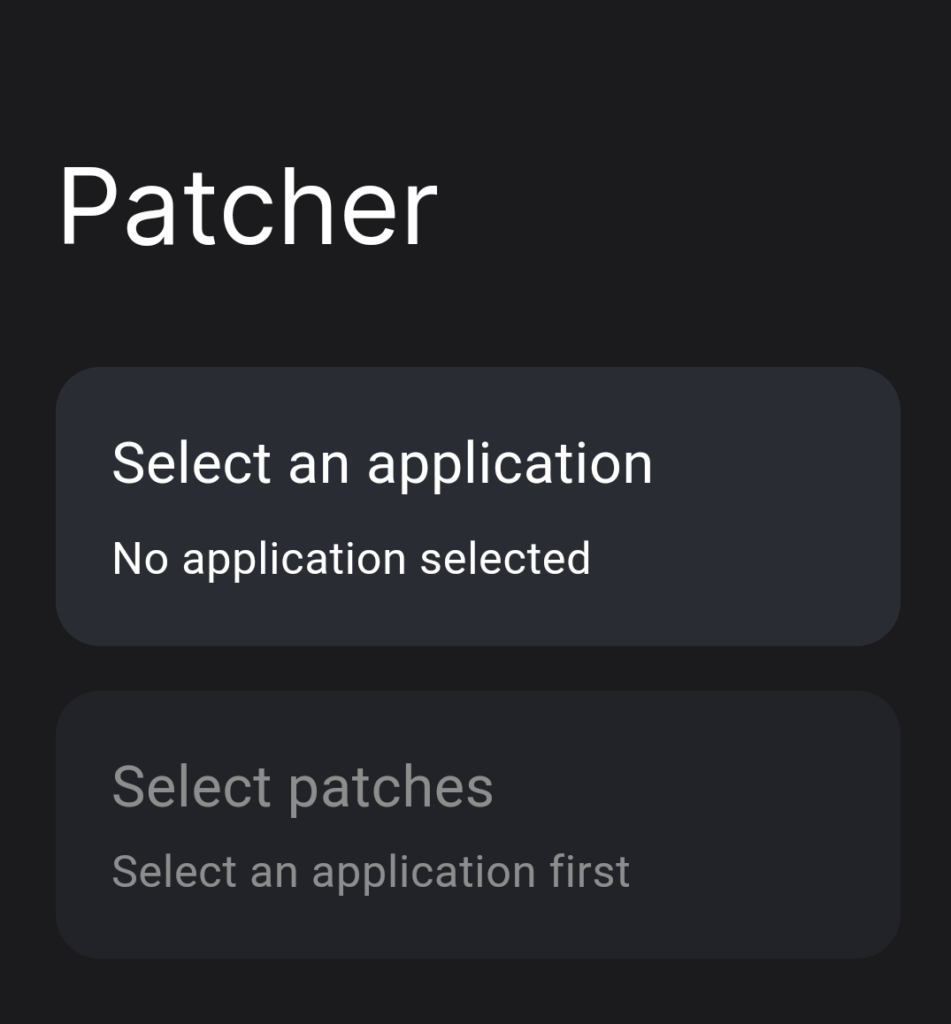
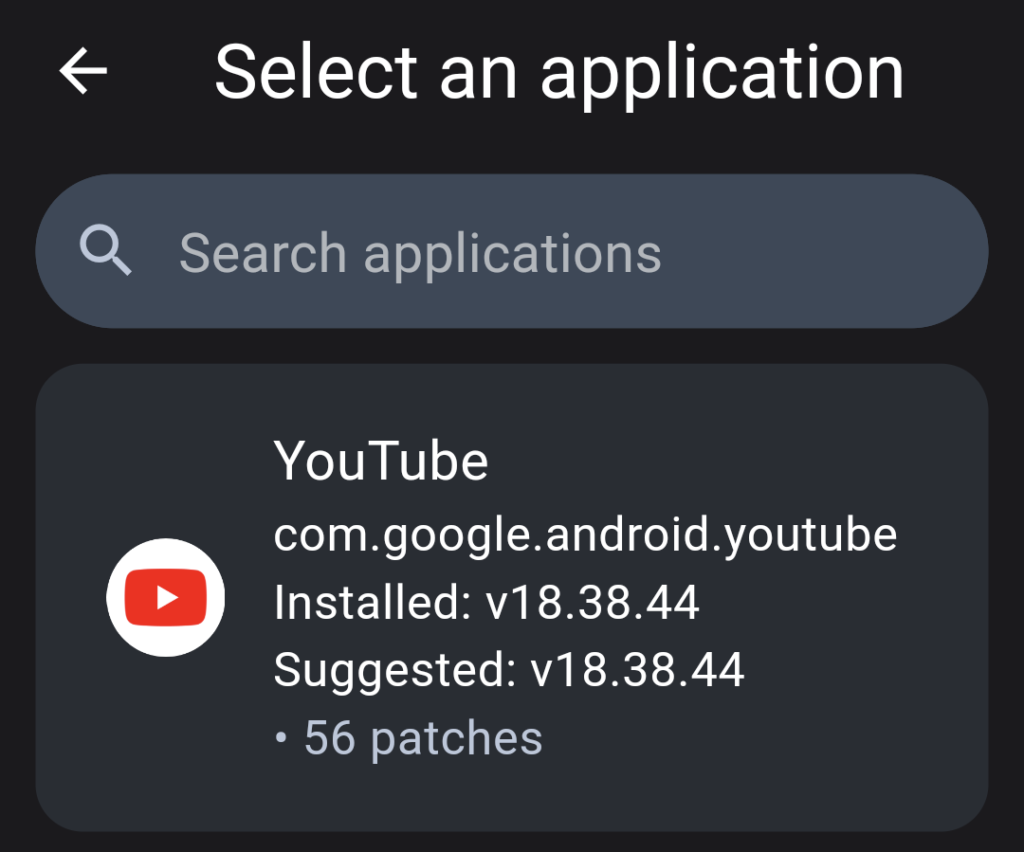
12. Launch the ReVanced Manager again and navigate to the “patches” tab.

13. Select YouTube from the list of apps to patch. Double-check to make sure you have the right version, which should match the version you downloaded in step 6.

14. Optionally, choose which patches you want to be selected (the installation recommends keeping the defaults). These patches include features like ad-blocking, SponsorBlock, and the return dislike counter.

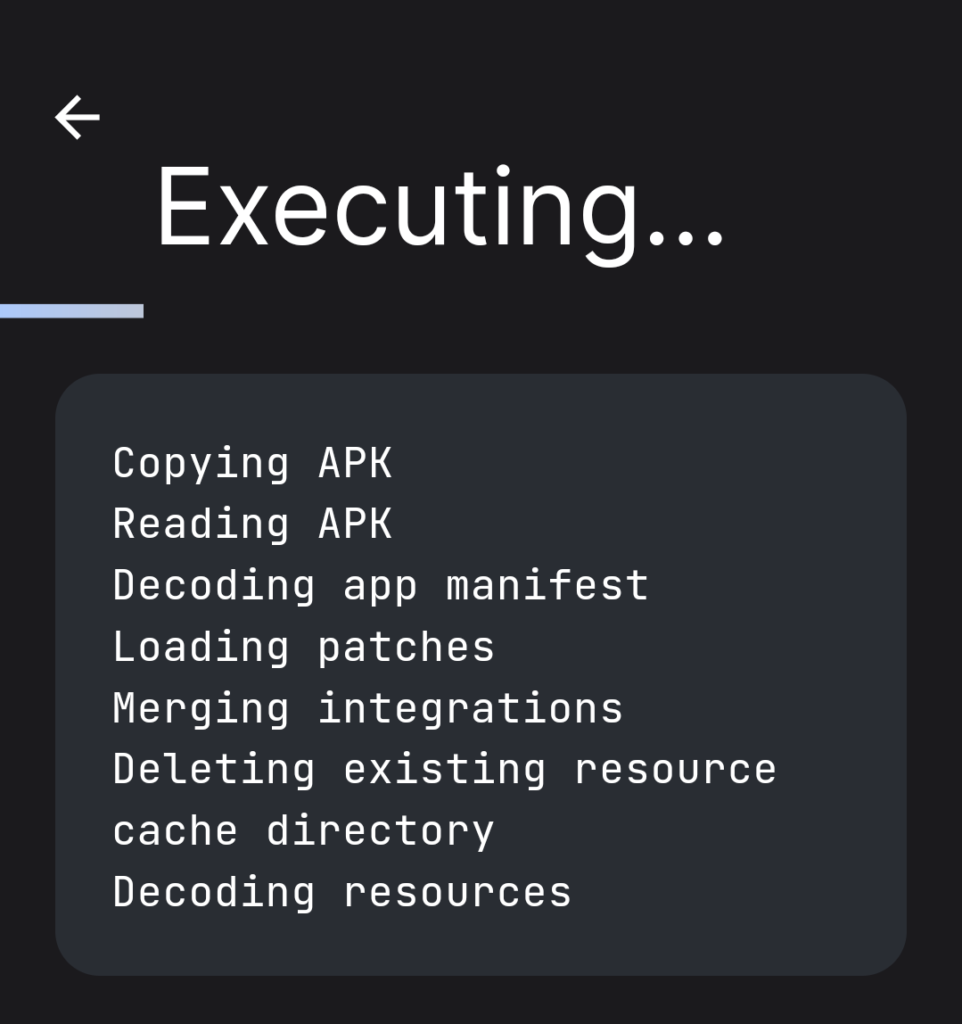
15. Press the “Patch” button and patiently wait for the app to complete the patching process. Be sure not to exit the app during this process, as it can prolong the patching duration. The patching process may take a few minutes, depending on your device’s performance.

16. If the patching process indicates a failure, double-check that you are patching the correct YouTube version and try again. Ensure that you have followed all the previous steps meticulously.

17. Once the app is successfully patched, install the YouTube app you downloaded in step 6. Verify that everything is working as intended. Your YouTube ReVanced app should now offer a seamless, ad-free, and enhanced YouTube experience.

Disable the Default YouTube App (optional)

18. Optionally, go into your device’s settings and disable the default YouTube app. This ensures that YouTube links open the “patched” version of YouTube installed via ReVanced Manager, not the original YouTube app. Here’s how to do it:

· Open your device’s settings.

· Scroll down and tap on “Apps” or “Applications.”

· Find the official YouTube app and tap on it.

· Look for the option to “Disable” or “Turn Off.” This will prevent the default YouTube app from opening when you tap on YouTube links.

Conclusion: Congratulations on Installing YouTube ReVanced

You’ve successfully installed YouTube ReVanced on your Android device, unlocking a range of powerful features and enhancements for your YouTube experience. Enjoy ad-free viewing, SponsorBlock, and more while exploring the world of YouTube without interruptions. Your journey into a better YouTube experience is now complete. Feel free to explore the settings within ReVanced Manager to further customize your experience and make the most of this incredible tool.

With YouTube ReVanced you can take full control of your YouTube experience, tailor it to your preferences, and enjoy all the content you love without the annoyances of ads and other distractions. It’s a powerful addition to your Android device providing an enhanced ad-free experience.

Questions?

If you have any questions or comments feel free to leave them below.

Related Resources

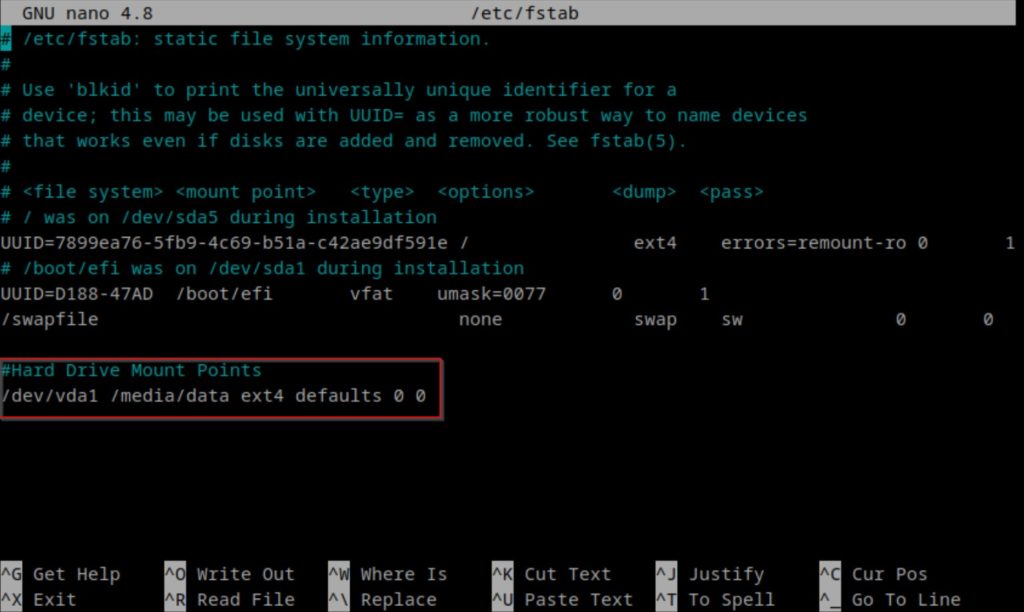
View our How to Mount a Hard Drive at Boot in Ubuntu 22.04 tutorial.

Learn How to Install Ubuntu Server 22.04 [Step by Step].

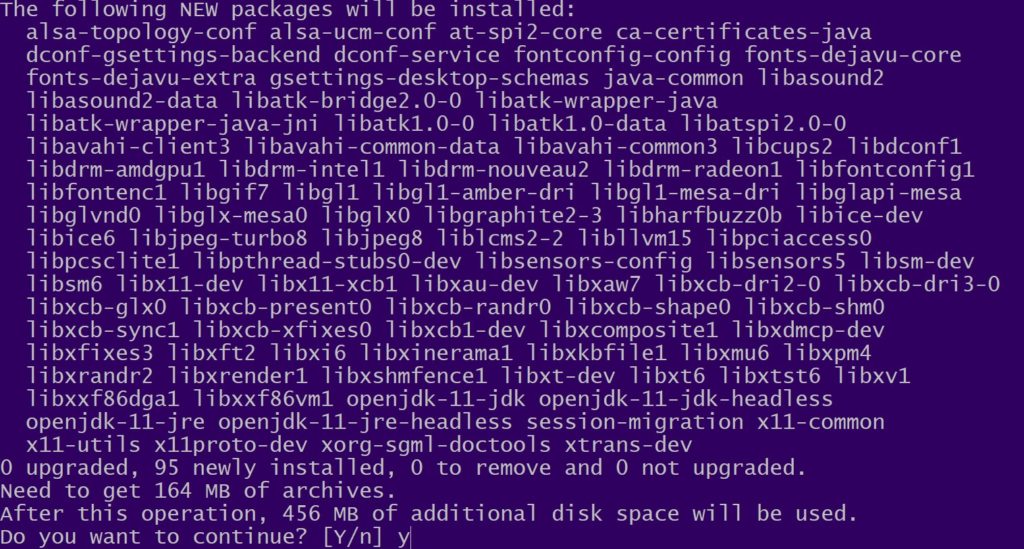
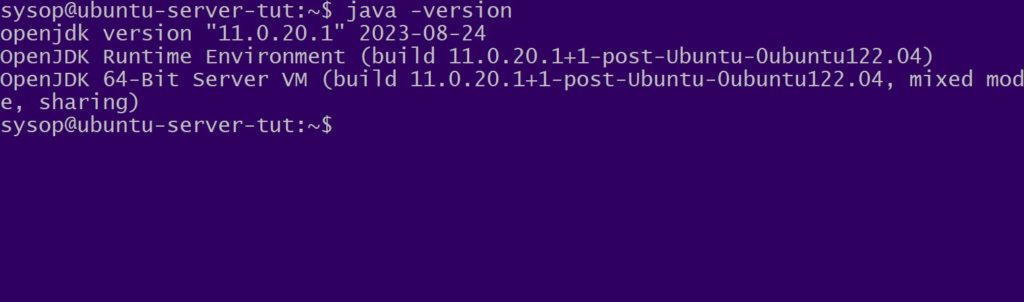
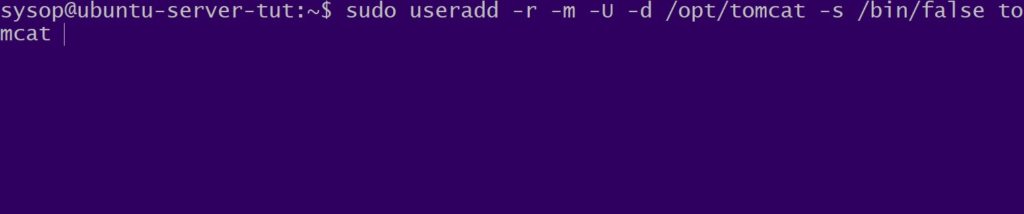
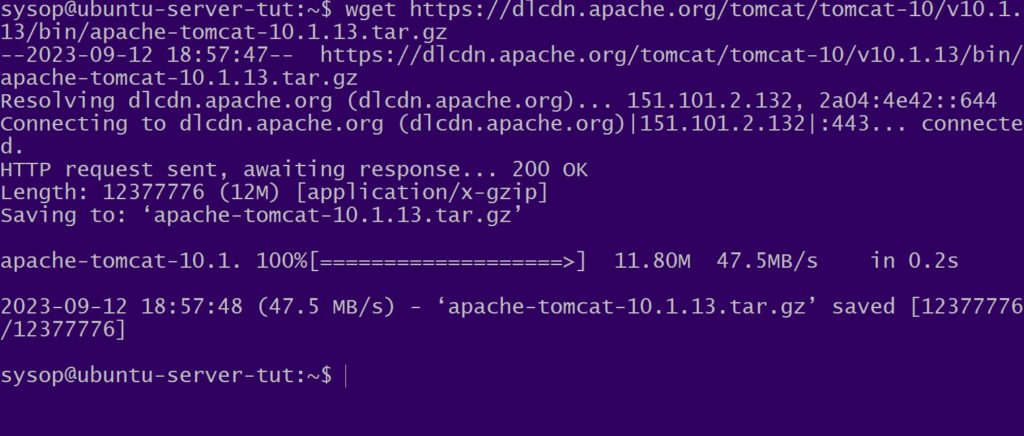
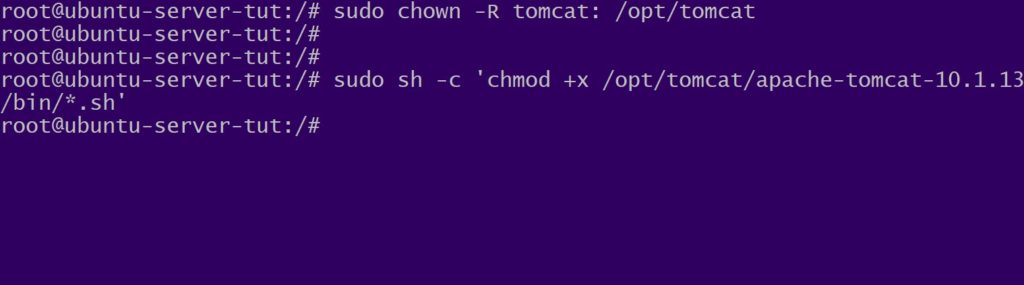
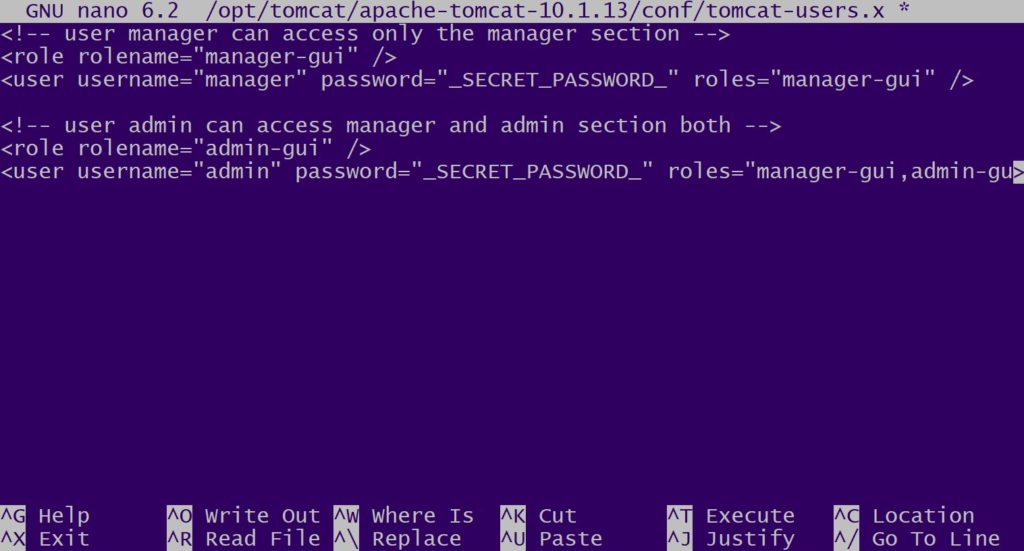
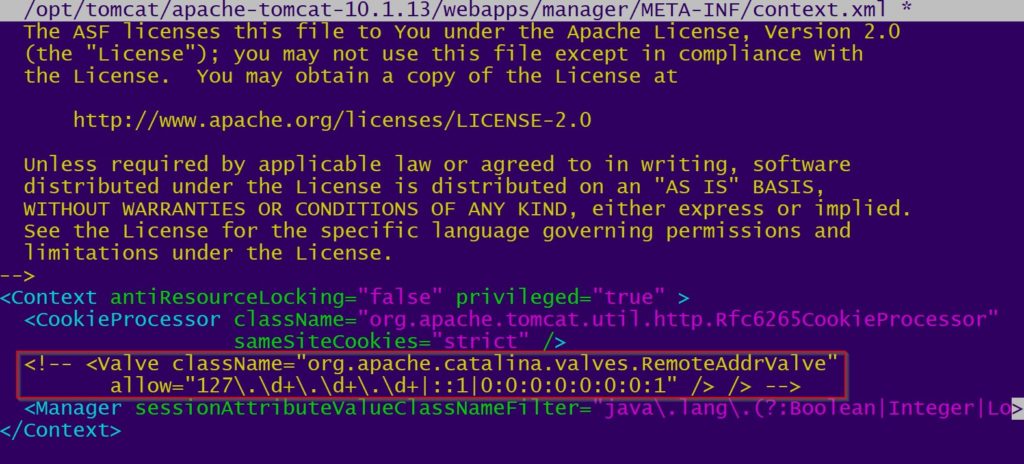
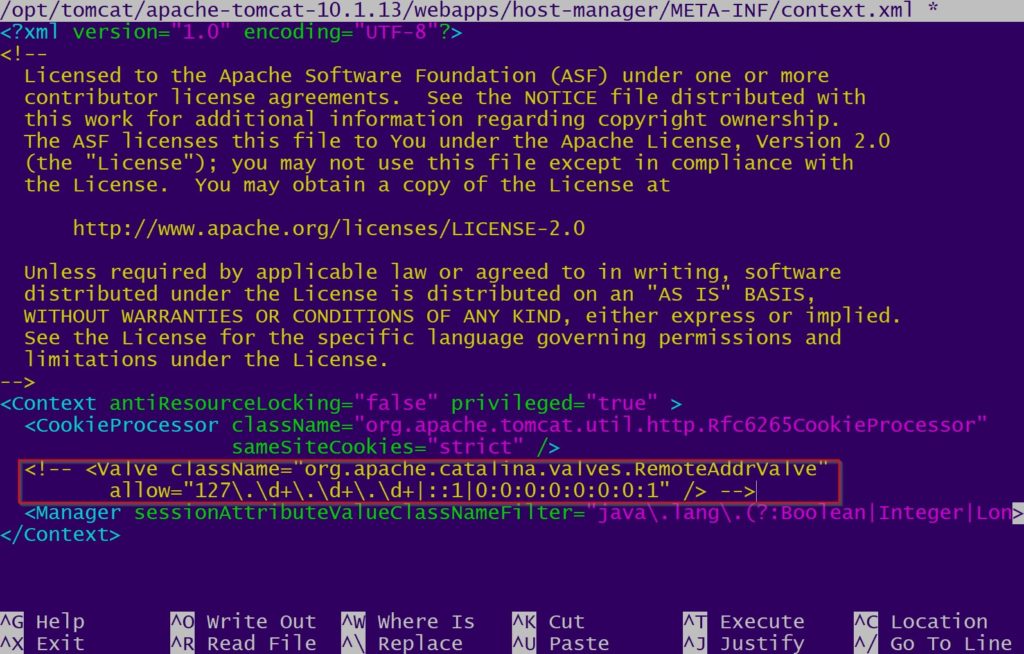
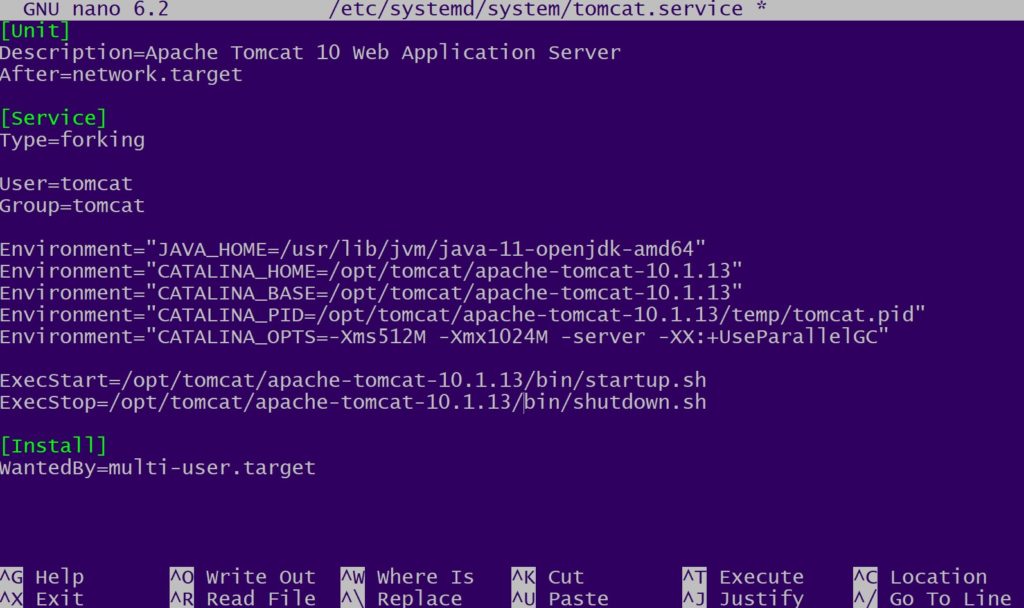
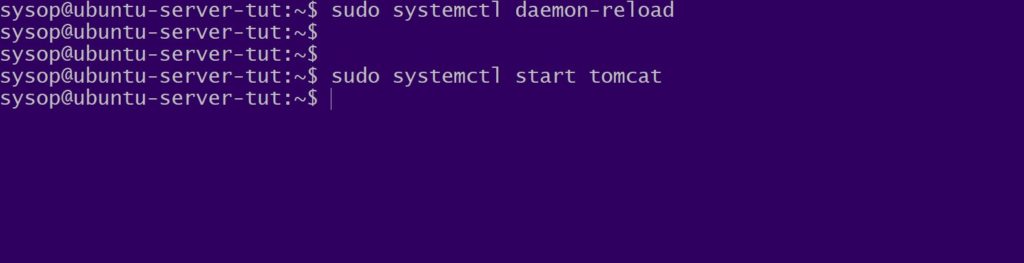
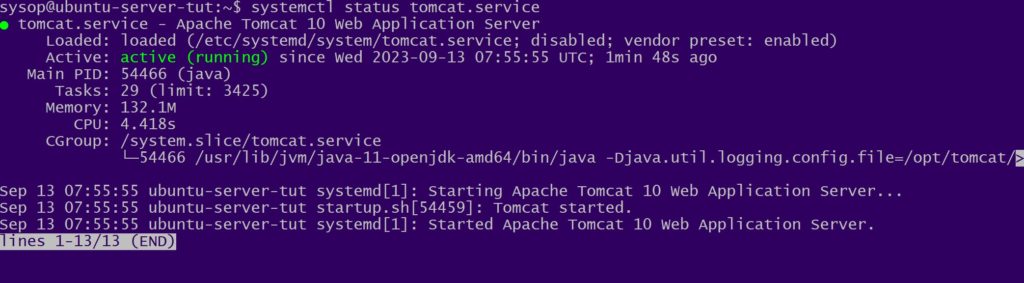
Check out our How to Install and Configure Apache Tomcat 10 on Ubuntu 22.04 article.

View our How to Setup an SFTP Server on Ubuntu 22.04 using OpenSSH tutorial.

Learn more cool things in Windows with our Linux Tutorials.

View all of our available online tools and converters at Formatswap.com.

How to Mount a Hard Drive at Boot in Ubuntu 22.04

mount hard drive boot ubuntu 22.04 splash image

Efficiency and convenience are at the heart of any well optimized operating system experience. Imagine every time you start your Ubuntu 22.04 system having all of your hard drives automatically mounted at boot. This is where the power of configuring /etc/fstab comes into play.

In this article we will explore automatic drive mounting in Ubuntu 22.04 using fstab. You’ll gain the skills to ensure your system efficiently recognizes and mounts your hard drives as part of its boot sequence. Whether you’re an experienced Linux user or just getting started, this guide will walk you through the process. This will make your daily computing tasks smoother and more efficient. So let’s dive in and improve your Ubuntu hard drive mounting experience.

List Drives and Partitions

list all partitions and disks

The first step to mounting you hard drive at boot is finding its name. You can list out all hard drive and partition names using the lsblk command. Our drive is the 32GB one labled “vda”. The partition we want to mount is “vda1”. Locate your drive and partition name from the list as it may differ. In most cases it will be sdb or sdc.

lsblk -a

Create Mount Point

create a mount point directory

The next step is creating the folder for the drives mount point. We will be using the media folder but feel free to use the mnt folder instead. Use the following command to create a mount folder called data in the media folder.

sudo mkdir /media/data

Open The fstab File

open /etc/fstab file

After we create the mount directory we will edit the fstab file. Open it using the nano command below.

sudo nano /etc/fstab

Add Mount Point Line

add mount point line

Once the fstab file is open we will navigate to the bottom of the file and add a new line. Replace /dev/MOUNT_POINT with the partition from the disk you want to mount. You will also need to replace /media/MOUNT_DIR with the directory you want to mount it in. After you have added the line save and close the file. In our case we will be using /dev/vda1 and /media/data.

#Hard Drive Mount Points
/dev/MOUNT_POINT /media/MOUNT_DIR ext4 defaults 0 0

Mount All Partitions

mount all drives

After editing the fstab file we need to remount all of the partitions. Use the mount -a command to mount them.

sudo mount -a

Verify Mounting

verify you can see mounted files

Now we want to check if the disks partition was mounted successfully. Use cd to navigate to the mount point you used in the fstab file, and verify that you can see your files. You can use the ls command to list all files. If you can see your files in the mount directory you have successfully configured a partition to mount at boot in Ubuntu 22.04.

cd /media/data && ls

Reboot System

reboot system

After verifying that we can see our files in the mount directory the last step is to reboot the system. Use the reboot command to proceed. Once your system reboots you should see you hard drives partition mounted in the mount directory automatically. This concludes the guide on automatically mounting hard drives at boot.

Fstab FAQ

What is fstab in Linux and what is its purpose?

fstab stands for “file system table” and is a configuration file in Linux that specifies how various storage devices, such as hard drives and partitions should be mounted on the file system at boot. It defines the mounting points, file system types, options, and other parameters essential for device mounting. Essentially fstab ensures that your storage devices are accessible and functional every time your Linux system starts up.

Can I mount network shares and remote filesystems using fstab in Linux?

Yes, you can use fstab to mount network shares and remote filesystems in Linux. To do this you would typically use entries that specify the network location (such as NFS or Samba shares) along with the mount point and other necessary parameters. By configuring fstab in this way you can ensure that these network resources are automatically mounted at boot. This will provide you with seamless access to remote data or networked storage devices. View our tutorial on How to Mount an SMB (Samba) Share in Linux with cifs-utils for additional information.

What should I do if I encounter errors or issues after editing the fstab file?

If you encounter errors or issues after editing the fstab file it’s important to address them promptly to prevent disruptions to your system. Here are some steps to follow:

  • Double-check your fstab entries for accuracy. Ensure that the device paths, mount points, and options are correctly specified.
  • Use a rescue or live Linux environment to access your system if it fails to boot due to fstab errors. From there you can make corrections to the fstab file.
  • If you’re unsure about a specific entry consider commenting it out (adding a “#” at the beginning of the line) temporarily to see if the issue resolves.
  • Always keep a backup of the original fstab file before making changes so that you can easily revert to a working configuration if needed.
  • Seek assistance from Linux forums, communities, or experienced users if you encounter persistent issues as fstab errors can impact system stability.

Questions?

If you have any questions or comments feel free to leave them below.

Related Resources

View our How to Mount an SMB (Samba) Share in Linux with cifs-utils guide.

Learn How to Install Ubuntu Server 22.04 [Step by Step].

Check out How to Setup OpenSSH with Keys on Ubuntu 22.04.

View our How to Create a Mapped Network Drive in Windows 10 tutorial.

Learn How to Install and Configure Grafana on Ubuntu 22.04.

View all of our available online tools and converters at Formatswap.com.

How to Install and Configure Apache Tomcat 10 on Ubuntu 22.04

apache tomcat ubuntu splash image

Apache Tomcat 10 is a powerful tool for deploying Java-based web applications, and if you’re running Ubuntu 22.04 you can easily harness its capabilities. In this easy to follow tutorial we’ll walk you through the straightforward process of installing and configuring it on your Ubuntu 22.04 system.

Whether you’re a seasoned developer or new to web development, this guide simplifies the installation and setup. By the end of the tutorial you’ll have Apache Tomcat 10 up and running on your Ubuntu 22.04 machine. This will have you ready to host your Java web applications.

Let’s get started with this quick guide to Apache Tomcat 10 on Ubuntu 22.04. Tomcat 10 will open up a new world of possibilities for your web development projects.

Update and Upgrade Ubuntu 22.04

update ubuntu 22.04

The first step to installing Apache Tomcat is to update and upgrade your system. Use the following apt command.

sudo apt update && sudo apt upgrade -y

Download and Install Java Development Kit

download java jdk

Next we need to install the Java Development Kit (JDK) package. Install the latest version will the apt command below.

sudo apt install openjdk-11-jdk 

Verify Java Version

verify java version

After installing the Java JDK we will want to verify the version, and that it was installed correctly. Use the java command shown below.

java -version

Create a User for Tomcat

create linux user for tomcat

The next step will be to create a Linux user account to manage our Apache Tomcat installation. Use the useradd command to create the user.

sudo useradd -r -m -U -d /opt/tomcat -s /bin/false tomcat 

Download Apache Tomcat 10

download apache tomcat 10

Once we have finished creating our user we will download Tomcat. Use wget to download the latest version with the below command.

wget https://dlcdn.apache.org/tomcat/tomcat-10/v10.1.13/bin/apache-tomcat-10.1.13.tar.gz

Extract Apache Tomcat

extract apache tomcat

Now that we have downloaded Tomcat we need to extract it. Use the tar command below to extract the archive into the /opt/tomcat folder.

sudo tar xzf apache-tomcat-*.tar.gz -C /opt/tomcat

Executable Files and Permissions

set permissions and make files executable

The next thing we will do is set the permissions of the /opt/tomcat folder.

sudo chown -R tomcat: /opt/tomcat

After you set the permissions you will need to make all of the .sh files in the /opt/tomcat folder executable. Use the following sh command.

sudo sh -c 'chmod +x /opt/tomcat/apache-tomcat-10.1.13/bin/*.sh'

Create Tomcat Users

create a user for tomcat

Next we will create the Tomcat user accounts using the tomcat-users.x file. First create the file with the nano command.

sudo nano /opt/tomcat/apache-tomcat-10.1.13/conf/tomcat-users.xml 

Then add the following text replacing _SECRET_PASSWORD_ with the passwords you wish to use. Save the file when finished.

<!-- user manager can access only the manager section -->
<role rolename="manager-gui" />
<user username="manager" password="_SECRET_PASSWORD_" roles="manager-gui" />
 
<!-- user admin can access manager and admin section both -->
<role rolename="admin-gui" />
<user username="admin" password="_SECRET_PASSWORD_" roles="manager-gui,admin-gui" />

Allow External Connections to Tomcat

allow external connections in manager context.xml file

After you had created the users you will want to make Apache Tomcat accessible externally. The first thing is to open the context.xml file with nano.

sudo nano /opt/tomcat/apache-tomcat-10.1.13/webapps/manager/META-INF/context.xml

Once the file is open comment out the following section shown in the red box of the above screenshot.

<!-- <Valve className="org.apache.catalina.valves.RemoteAddrValve"
         allow="127\.\d+\.\d+\.\d+|::1|0:0:0:0:0:0:0:1" /> -->

Additionally Edit the Host Manager Context.xml File

allow external connections in host manager context.xml file

Additionally we have to comment out a section of the host manager context.xml file. This is also needed to allow external access. Open the file with nano.

sudo nano /opt/tomcat/apache-tomcat-10.1.13/webapps/host-manager/META-INF/context.xml

Then comment out the following line. After saving the file your Tomcat should be accessible from outside your network.

<!--<Valve className="org.apache.catalina.valves.RemoteAddrValve"
         allow="127\.\d+\.\d+\.\d+|::1|0:0:0:0:0:0:0:1" /> -->

Create Systemd Service File

create a systemd service file

Next we will created a systemd service file to manage Apache Tomcat. First create the file with the nano text editor.

sudo nano /etc/systemd/system/tomcat.service 

Then add the following text. Save the file after adding it.

[Unit]
Description=Apache Tomcat 10 Web Application Server
After=network.target
 
[Service]
Type=forking
 
User=tomcat
Group=tomcat
 
Environment="JAVA_HOME=/usr/lib/jvm/java-11-openjdk-amd64"
Environment="CATALINA_HOME=/opt/tomcat"
Environment="CATALINA_BASE=/opt/tomcat"
Environment="CATALINA_PID=/opt/tomcat/temp/tomcat.pid"
Environment="CATALINA_OPTS=-Xms512M -Xmx1024M -server -XX:+UseParallelGC"
 
ExecStart=/opt/tomcat/bin/startup.sh
ExecStop=/opt/tomcat/bin/shutdown.sh
 
[Install]
WantedBy=multi-user.target

Reload Systemctl Daemon

reload systemctl daemon

After creating the service file we will reload the daemon.

sudo systemctl daemon-reload

As well as start the Apache Tomcat application.

sudo systemctl start tomcat

Check Tomcat Status

check status of tomcat

Next we will check the current status of Tomcat to make sure it started correctly.

sudo systemctl status tomcat.service

Enable Tomcat to Start at Boot

enable tomcat at boot

After that set Apache Tomcat to start at system boot with the systemctl enable command.

sudo systemctl enable tomcat

Configure UFW Firewall

allow tomcat port through firewall

Now we can allow Tomcat through the ufw firewall. Use the following command to allow it.

sudo ufw allow 8080

Test Tomcat Configuration

test apache tomcat

The final step of installing Apache Tomcat is to navigate to the application. Open a web browser and go to http://UBUNTU_IP_ADDRESS:8080/ replacing the IP with the IP of your box. If everything is successful you should see a page similar to the above. You have now successfully installed Apache Tomcat 10 on Ubuntu 22.04.

Questions?

If you have any questions or comments feel free to leave them below.

Related Resources

View our How to Setup Nginx as a Reverse Proxy on Ubuntu 22.04 LTS.

Learn How to Install Ubuntu Server 22.04 [Step by Step].

Check out our How to Easily Create a Bootable Linux USB Drive using Rufus article.

View our How to Setup an SFTP Server on Ubuntu 22.04 using OpenSSH tutorial.

Learn more cool things in Linux with our Linux Tutorials.

View all of our available online tools and converters at Formatswap.com.

How to Install and Configure Grafana on Ubuntu 22.04

grafana splash image

In this tutorial you will learn the installation process of Grafana on Ubuntu 22.04. Grafana is renowned for its versatility and powerful data visualization capabilities. It has become an essential tool for monitoring and analyzing data across various industries and applications. Whether you’re a seasoned systems administrator or a curious enthusiast eager to use the potential of Grafana for your data driven needs, this guide will provide you with clear instructions to set up Grafana on your Ubuntu 22.04 system. Let’s dive in and unleash the potential of Grafana for your data visualization and monitoring endeavors.

Install Prerequisite Packages

install prerequisite packages

The first step for installing Grafana is to download and install all of the prerequisite packages. Install them using the apt command below.

sudo apt install apt-transport-https software-properties-common wget

Import Grafana GPG Key

install grafana gpg key

Next we need to import Grafanas repository GPG key. First create a keyrings folder with the mkdir command. Then download the key with the wget command.

sudo mkdir -p /etc/apt/keyrings/

wget -q -O - https://apt.grafana.com/gpg.key | gpg --dearmor | sudo tee /etc/apt/keyrings/grafana.gpg > /dev/null

Add The Grafana Repository

add the grafana repository

Now we will add the stable Grafana repository. Use the echo command to add it to your sources.list file.

echo "deb [signed-by=/etc/apt/keyrings/grafana.gpg] https://apt.grafana.com stable main" | sudo tee -a /etc/apt/sources.list.d/grafana.list

Update Ubuntu 22.04

update ubuntu 22.04

Afterwards we will use apt to update Ubuntu 22.04.

sudo apt update

Start and Enable Grafana Service

enable and start grafana service

Next we will start and enable the grafana-server package. Use the systemctl start and enable commands to complete this step.

sudo systemctl start grafana-server

sudo systemctl enable grafana-server.service

Test Grafana Login

login to the test grafana account

Navigate to the login page of your new Grafana installation by navigating to http://SERVER-IPADDRESS:3000 . Replace SERVER-IPADDRESS with the IP address of the server you installed Grafana onto. Then login using the default credentials below.

Username: admin
Password: admin

Start Using Grafana

start using grafana

Once you login you have successfully installed Grafana on Ubuntu 22.04. You can now create a dashboard and get started with Grafana. For more information on getting started see the Grafana Build Your First Dashboard article.

FAQ

What is Grafana, and what is its primary purpose?

Answer: Grafana is an open source platform for monitoring data. Its primary purpose is to visualize and analyze data from different sources, including databases, cloud services, and monitoring systems. This help users gain insights into the performance of their applications and infrastructure.

What data sources can Grafana connect to?

Answer: Grafana can connect to a wide range of data sources, including but not limited to:

  • Time series databases like InfluxDB, Prometheus, and Graphite.
  • Relational databases such as MySQL, PostgreSQL, and Microsoft SQL Server.
  • Cloud monitoring services like AWS CloudWatch and Azure Monitor.
  • Log management systems like Elasticsearch and Loki.
  • Custom APIs through HTTP requests.
  • Many other data sources through community-supported plugins and integrations.

How can I create dashboards in Grafana?

Answer: Dashboards in Grafana are created using the web based interface. Here are the general steps:

  1. Log in to your Grafana instance.
  2. Click on “Create” and then “Dashboard.”
  3. Add a panel to your dashboard.
  4. Configure the panel’s data source, query, and visualization options.
  5. Customize the panel’s appearance and layout.
  6. Add more panels as needed to build a complete dashboard.
  7. Save the dashboard for future use and sharing.

Can Grafana be used for alerting and notifications?

Answer: Yes, Grafana includes alerting and notification features. You can set up alerts based on various thresholds or conditions in your data. When an alert condition is met Grafana can send notifications via various channel, such as email, Slack, PagerDuty, or custom webhooks, helping you to monitor and respond to issues.

Is Grafana suitable for large-scale enterprise environments?

Answer: Yes, Grafana is suitable for both small scale and large scale environments. It is highly scalable and can handle large volumes of data and users. Additionally Grafana supports features like user authentication, access control, and integration with various authentication providers. This makes it a great choice for use in enterprise level environments where security and access control are important considerations.

Questions?

If you have any questions or comments feel free to leave them below.

Related Resources

View our 5 Reasons to Switch from Windows 10 to Linux.

Learn How to Install Ubuntu Server 22.04 [Step by Step].

Check out our How to Easily Create a Bootable Linux USB Drive using Rufus article.

View our How to Setup an SFTP Server on Ubuntu 22.04 using OpenSSH tutorial.

Learn more cool things in Windows with our Linux Tutorials.

View all of our available online tools and converters at Formatswap.com.

How to Effortlessly Convert FLAC to MP3: A Step by Step Guide

flac to mp3 splash image

In the world of digital audio there exists many audio formats. Each have its own unique advantages and drawbacks. One such format is FLAC,short for Free Lossless Audio Codec. Renowned for its unparalleled audio quality and the ability to preserve the finest nuances of your music, FLAC has earned its place among audiophiles. However it’s not always the most convenient format, especially when it comes to compatibility with various devices. This is where FLAC to MP3 conversion comes into play. It offers a solution that strikes a balance between quality and compatibility. In this comprehensive guide we will explore the reasons for converting FLAC to MP3. As well as walk you through the simple step by step conversion process, and introduce you to a highly recommended FLAC to MP3 converter tool that makes the task a breeze.

Why Convert from FLAC to MP3?

Before we begin the conversion process it’s essential to understand why you might want to convert your FLAC files to MP3:

1. Wider Compatibility: FLAC offers unparalleled audio quality. However they are not supported by all devices and software. On the other hand MP3 is a universally recognized format. This makes them compatible with nearly every audio player, smartphone, and computer.

2. Reduced File Size: FLAC files are notorious for their large file sizes that quickly consume storage space on your device. Converting to MP3 significantly reduces file size without compromising audio quality excessively.

3. Streaming Convenience: Many streaming platforms and online music services primarily use MP3 for streaming. This makes it more convenient to enjoy your favorite tunes on these platforms while using less bandwidth.

Converting FLAC to MP3: A Simple Process

Converting FLAC to MP3 has never been easier. Thanks to our recommended FLAC to MP3 converter tool, you can complete the entire process in a few simple steps:

Step 1: Navigate to the Converter Tool

Start by clicking on the provided FLAC to MP3 converter tool link to access the online conversion platform.

Step 2: Upload Your FLAC File

On the converter tool’s webpage, you’ll find a “Browse Files” button. Click on it to select your FLAC file from your computer. The tool will automatically detect and upload the file for conversion.

Step 3: Wait for Conversion Completion

Once you’ve uploaded your FLAC file the tool will automatically begin processing your file and converting it to MP3. This might take a few moments depending on the file size and your internet connection speed.

Step 4: Download Your MP3 File

When the conversion process is complete the tool will automatically download your newly converted MP3 file. Click on the MP3 to play it on your computer or device.

Step 5: Enjoy Your Music

With your MP3 file downloaded you are all set to enjoy your music on a wider range of devices without sacrificing too much in terms of audio quality. Take a moment to listen to a few tracks to ensure the conversion has maintained the sound quality to your satisfaction.

Advanced Considerations for Audiophiles

For those with discerning ears, consider these additional tips:

1. Bitrate Control: Bitrate affects both audio quality and file size. Higher bit rates like 320 kbps offer superior quality but result in larger files. Lower bitrates such as 128 kbps reduce file size but may compromise quality. Experiment with different bitrates to find the right balance.

2. Preserve FLAC Files: Always retain your original FLAC files. This ensures you can revert to the FLAC format if you require the highest audio quality for specific purposes.

3. Opt for Lossless to Lossy Converters: Utilize high quality converters to minimize audio quality loss during the conversion. The FLAC to MP3 converter tool we recommend preserves audio fidelity by using a 320 kbps bitrate.

Conclusion

In conclusion converting FLAC to MP3 simplifies compatibility while maintaining reasonable audio quality. Thanks to the user friendly FLAC to MP3 converter tool, the process is quick and accessible. Explore the versatility of your music collection, whether for streaming, sharing, or conserving storage. Convert your FLAC files to MP3 effortlessly and enjoy your music on various devices. Embrace the era of accessibility without compromising audio quality. Enjoy your favorite tunes anytime and anywhere!

As technology advances the importance of versatility and accessibility in audio formats becomes increasingly evident. By learning about FLAC to MP3 conversion you can make your music collection more versatile and accessible than ever before. Whether you’re looking to stream your tunes, share them with friends, or simply save space on your device, the conversion process allows you to do so without compromising too much on audio quality. So go ahead and easily convert your FLAC files to MP3. Let your music be enjoyed wherever you go.

Questions?

If you have any questions or comments feel free to leave them below.

Related Resources

View our 5 Reasons to Switch from Windows 10 to Linux tutorial.

Learn How to Generate Images From Text Prompts with Python and TensorFlow.

Check out our How to Setup OpenSSH with Keys on Ubuntu 22.04 tutorial.

View our How to Install and Remotely Access Squid Proxy on Ubuntu 22.04 tutorial.

Learn How to Setup Nginx as a Reverse Proxy on Ubuntu 22.04 LTS.

Learn How to Create a Windows 10 Virtual Machine Using VirtualBox on Ubuntu 22.04.

View all of our available online tools and converters at Formatswap.com.

How to Create a Windows 10 Virtual Machine Using VirtualBox on Ubuntu 22.04

install virtualbox splash image

Welcome to our comprehensive tutorial on creating a Windows 10 virtual machine using VirtualBox on Ubuntu 22.04. In this article we will guide you through the step-by-step process of not only installing VirtualBox on your Ubuntu 22.04 system, but also constructing a new virtual machine within VirtualBox. Whether you’re a beginner or an experienced user this tutorial will equip you with the necessary knowledge to set up and configure Windows 10 within a virtualized environment. This will enable you to seamlessly run Windows applications on your Ubuntu system. So, let’s dive in and explore the exciting world of virtualization with VirtualBox!

Update and Upgrade Ubuntu 22.04

update and upgrade ubuntu

The first step is to update and upgrade Ubuntu 22.04. You can do so using the apt command.

sudo apt update && sudo apt upgrade

Install VirtualBox

install virtualbox

Next you will need to install the VirtualBox package as well as the VirtualBox DKMS package. You can install them both with the following command.

sudo apt install virtualbox virtualbox-dkms

Install VirtualBox Extension Pack (optional)

install virtualbox extensions

After installing the two packages you can install the VirtualBox extension pack. This gives you features such as shared clip board, and shared folders within your virtual machine. This step is optional but it is highly recommended.

sudo apt install virtualbox-ext-pack

Add Your User to the User Group

add user to virtualbox group

The final step of the installation process is to add your user account the the vboxusers group. Use the usermod command below to complete this operation.

sudo usermod -a -G vboxusers $USER

Download Windows 10 ISO

Download Windows 10

Now that VirtualBox is installed we can download our ISO that we will use for the virtual machine. In this example I will be using the Windows 10 (64 Bit) installation ISO file. However the Windows 11 process would be virtually the same.

Download Windows 10 (ISO File)

Create a New Virtual Machine with VirtualBox

create new vm with virtualbox

The next step is to open VirtualBox and create a new virtual machine. Simply open the application and click on the “New” button as shown in the screenshot.

Set the Virtual Machines Options

fill out virtualbox config

You will then be asked to choose a name for the virtual machine. Then you will need to select the amount of memory you want available to the virtual machine. Finally select “Create a virtual hard disk now” then press the “Create” button.

Create a Virtual Hard Disk

create the virtual hard drive

On the virtual hard disk creation wizard you will be asked to choose a location, as well as choose the disks size. After you have made your selections click on “Create” to finish.

Power on the Windows 10 Virtual Machine

start the virtual machine

After creating the new virtual machine you will be greeted with this screen showing the Windows 10 VM. Click on the machine and then click “Start” to launch the machine.

Select the Boot Disk

select the iso file

Once the virtual machine starts you will be asked to choose an installation ISO. Select the Windows 10 ISO file we downloaded earlier (or another of your choice). Then click on “Start”.

Start the Windows 10 Installation

start installation process for windows 10

After a few moments you will reach the Windows 10 installation screen. Select a language and click “Next” to continue.

Click Install Now

click install windows 10 now

On the next screen simply press “Install now”.

Windows Product Activation

enter up skip product key

The next screen will ask you if you want to provide a Windows activation key. Either enter your key and press next, or click “I don’t have a product key” to continue.

Select the Version of Windows 10 to Install

select windows version

You will now be asked which version of Windows 10 you would like to install. For this demo I will be selecting “Windows 10 Pro”. After you select it click “Next”.

Accept the License Agreement

accept the licence

Now you will be asked to accept Microsoft’s license terms for the Windows Operating System. Enable the checkbox then click “Next”.

Choose Custom Windows Install

choose custom install

Next you will be asked if you would like to upgrade an existing Windows installation or install a fresh version. Since this is a virtual machine we will want to select “Custom: Install Windows only (advanced)”.

Choose Where to Install Windows

select the disk

After selecting “Custom” you will be asked to choose the location Windows should be installed. Click on the virtual hard disk we created in the earlier, then click “Next”.

Wait for the Windows Installation to Complete

wait for windows 10 to finish installing

Once you reach this screen Windows is installing. Wait for the process to complete successfully.

Finalize the Windows 10 Configuration

follow windows setup prompts

After the base installation finishes you will see this screen. Go through each of the steps and provide your personalization preferences.

Wait for Windows to Configure

wait for final windows 10 setup

Wait for Windows 10 to finish configuring on the virtual machine.

Insert the VirtualBox Guest Additions CD

insert virtualbox guest cd

Once you are able to login to Windows we will want to install the VirtualBox Guest Additions package. To do so simply click on “Devices”, and then “Insert Guest Additions CD image…” shown in the screenshot above.

Open the VirtualBox Guest Additions CD

open guest additions cd

Now that you have inserted the CD it can’t be located in File Explorer under “This PC”. Double click on the CD to open it.

Launch the VirtualBox Guest Additions Installation Wizard

install guest cd

Launch the Oracle VM VirtualBox Guest Additions installer executable found in the CD folder. Follow the onscreen prompts to install the software.

Reboot the Windows 10 Virtual Machine

reboot virtualbox

The final step will be to reboot the virtual machine. Once the machine reboots you have successfully setup a Windows 10 virtual machine using VirtualBox in Ubuntu 22.04.

Questions?

If you have any questions or comments feel free to leave them below.

Related Resources

View our guide on How to Install WordPress on Ubuntu 22.04.

Learn How to Permanently Disable Windows Defender.

Check out our Installing Elementary OS: A Comprehensive Guide for Beginners article.

View our How to Install an Nginx RTMP Server in Ubuntu 22.04 tutorial.

Learn more cool things in Linux with our Linux Tutorials.

View all of our available online tools and converters at Formatswap.com.

How to Install and Remotely Access Squid Proxy on Ubuntu 22.04

squid splash image

This tutorial provides a comprehensive guide on setting up and remotely accessing the Squid proxy server on an Ubuntu 22.04 system. Squid proxy is a popular caching and forwarding HTTP proxy server that acts as an intermediary between clients and web servers. It enables efficient caching of web content, improves browsing performance, and provides various features for network administrators to manage and control internet access.

By installing and configuring Squid proxy on an Ubuntu 22.04 system, you gain the ability to cache frequently accessed web content, reducing bandwidth usage and improving response times for subsequent requests. Additionally, Squid proxy offers features such as access control, content filtering, and user authentication. This allows you to enforce policies and restrictions for internet access within your network.

The article not only walks you through the installation process of Squid proxy on Ubuntu 22.04 but also provides instructions for remote access. This means you can send your devices traffic to the proxy server from a remote location granting you accessibility and security from anywhere.

Overall, understanding how to install and remotely access Squid proxy on Ubuntu 22.04 empowers you to optimize your network’s performance, enhance security, and efficiently manage internet access for your organization or personal use.

Update and Upgrade Ubuntu 22.04

update and upgrade ubuntu 22.04

The first thing we will need to do to install Squid Proxy is update and upgrade your system. Run the apt update and apt upgrade command below.

sudo apt update && sudo apt upgrade -y

Install Squid Proxy

install squid and apache2-utils

The next thing we need to do is install Squid proxy and Apache utilities. The utilities package will allow us to create a password authentication file for authentication our proxy users. Use the apt command below to install the two packages.

sudo apt install squid apache2-utils

Create a Credential File

touch and create squid passwords file

Now we will create a passwords file and assign the correct permissions. Squid will read this file to authenticate our proxy users. Use the below command to touch and chmod the file.

sudo touch /etc/squid/passwords && sudo chmod 777 /etc/squid/passwords

Create Authentication User

create user and password

Next create the proxy authentication user with the htpasswd command. Replace “username” with the username you want to use for logging into the proxy. After you run the command you will be asked to type and retype the password you wish to use.

sudo htpasswd -c /etc/squid/passwords username

Test Authentication

test the authentication file

Now we can test our proxy authentication file with the basic_ncsa_auth command. Run the following command and confirm you get “OK” as shown in the above image. This means that the credential file is configured properly.

/usr/lib/squid/basic_ncsa_auth /etc/squid/passwords

Backup Squid Config

backup the original squid config

After we create our credentials file we need to make a backup of the squid config. Move it to a temporary location with the command below.

sudo mv /etc/squid/squid.conf /etc/squid/squid.conf.backup

Create Squid Config File

create new squid config file

Now create a new squid config file with the nano command.

sudo nano /etc/squid/squid.conf

Add Lines to Config (Local Network Only)

add to squid config for localnet only

Once the file opens it will be blank and we need to add a few lines. Copy and paste the below config into your squid.conf file. Make sure to change the “acl localnet src 192.168.2.0/24” line to reflect your own IP range. With this configuration you will only be able to access your proxy from within the local network. If you want to access the proxy remotely skip to the next optional step. Otherwise save and close the config file.

auth_param basic program /usr/lib/squid/basic_ncsa_auth /etc/squid/passwords
auth_param basic realm Squid proxy-caching web server
auth_param basic credentialsttl 24 hours
auth_param basic casesensitive off
acl authenticated proxy_auth REQUIRED
acl localnet src 192.168.2.0/24 # RFC1918 possible internal network
http_access allow localnet
http_access deny all
dns_v4_first on
forwarded_for delete
via off
http_port 8888

[optional] Add Lines to Config (Remote)

add to squid config for both wan and lan access

This step is optional, however it will allow you to access the proxy server remotely. To enable remote access replace your config with the lines shown below. Keep in mind you will also have to enable port forwarding in your router for remote access. Save and close the file.

When allowing remote access to your proxy it is recommended to configure a firewall. For guidance on this please see our How to Configure a Firewall in Linux using UFW tutorial.

auth_param basic program /usr/lib/squid/basic_ncsa_auth /etc/squid/passwords
auth_param basic realm Squid proxy-caching web server
auth_param basic credentialsttl 24 hours
auth_param basic casesensitive off
acl authenticated proxy_auth REQUIRED
acl all src 192.168.2.0/24 # RFC1918 possible internal network
http_access allow all
http_access deny all
dns_v4_first on
forwarded_for delete
via off
http_port 8888

Start and Enable Squid Process

start and enable squid

The last step in the installation process is to start and enable the squid proxy service. Use the systemctl command below to complete these steps.

sudo systemctl start squid && sudo systemctl enable squid

Install Curl

install curl on separate machine

Now that the installation is complete we can test our squid proxy server. For this step you will need to install Curl onto a separate machine.

sudo apt install curl

Test the Squid Proxy Server

test the proxy with curl

After you have installed Curl run the following command. Replace “myuser:password” with the username and password you choose when you created the credential file. Additionally replace IP-ADDRESS with the IP of the Ubuntu machine with the squid proxy server.

curl --proxy-user myuser:password --proxy IP-ADDRESS:8888 https://www.google.com

Verify Curl Results

confirm curl response with proxy

If the connection to the proxy server was successful you should see a bunch of text in the Curl response. You have now successfully installed Squid proxy on Ubuntu 22.04.

[optional] Verify the Proxy Requests in the Log

confirm the connection test in the squid access log

If you would like extra verification that Squid is functioning you can check the log file. Use the tail command below and verify you see a new request appear when you run the test Curl command from above.

sudo tail -f /var/log/squid/access.log

Questions?

If you have any questions or comments feel free to leave them below.

Related Resources

View our guide on How to Install WordPress on Ubuntu 22.04.

Learn How to Install Ubuntu Server 22.04 [Step by Step].

Check out our Installing Elementary OS: A Comprehensive Guide for Beginners article.

View our How to Setup an SFTP Server on Ubuntu 22.04 using OpenSSH tutorial.

Learn more cool things in Linux with our Linux Tutorials.

View all of our available online tools and converters at Formatswap.com.

How to Install WordPress on Ubuntu 22.04

install wordpress on ubuntu splash image

In today’s tech age having a powerful and user friendly website is essential for businesses, bloggers, and individuals. WordPress a renowned content management system (CMS), has emerged as the go-to solution for creating stunning websites with ease. If you’re looking to use WordPress on your Ubuntu 22.04 server this article is your comprehensive guide to getting started.

WordPress offers a vast array of themes, plugins, and customizable features that enable you to create a unique online presence. Whether you’re a beginner or a seasoned web developer, WordPress simplifies website creation and management. Best of all it eliminates the need for extensive coding knowledge. By leveraging its intuitive interface and extensive community support, you can effortlessly establish a professional online presence.

In this step by step tutorial, we will walk you through the process of installing WordPress on Ubuntu 22.04. By following these instructions, you’ll be well-equipped to embark on your WordPress journey and start using this dynamic platform. Let’s dive in and empower your web presence with WordPress on Ubuntu 22.04.

Update and Upgrade Ubuntu

Update and Upgrade Ubuntu

The first step to installing WordPress is to update and upgrade your Ubuntu installation. Run the following command.

sudo apt update && sudo apt upgrade -y

Install Required Packages

Install Required Packages

Next you will need to install all of the required packages. Install them using the apt command below.

sudo apt install apache2 mysql-server php libapache2-mod-php php-mysql -y

Login to the Root MySQL Account

Login to the Root MySQL Account

Once you have installed all of the required packages you will need to login to SQL. Use the below mysql command, then enter your user password to login.

sudo mysql -u root -p

Update the Database Records

Update the Database Records

After you get into mysql, run the following four mysql statements. Replace ‘wordpressuser’ and ‘password’ with the username and password you want to use for your mysql user.

CREATE DATABASE wordpress;

CREATE USER 'wordpressuser'@'localhost' IDENTIFIED BY 'password';

GRANT ALL PRIVILEGES ON wordpress.* TO 'wordpressuser'@'localhost';

FLUSH PRIVILEGES;

Once the mysql statements have been ran, exit the mysql command line with ‘EXIT;’.

EXIT;

Download WordPress

Download WordPress

After running your mysql commands you will need to download WordPress. First navigate to your web directory at /var/www/html.

cd /var/www/html

Then download the latest version of WordPress using the wget command.

sudo wget https://wordpress.org/latest.tar.gz

Extract the WordPress Archive

Extract the WordPress Archive

Next extract the WordPress files from the .tar.gz archive using the tar command.

sudo tar -xvzf latest.tar.gz

Move the Files to the Web Directory

Move the Files to the Web Directory

After the files have been extracted, move them to the root web directory using the mv command.

sudo mv wordpress/* .

Apply Permissions

Apply Permissions

Next apply read/write permission to the folder using the chown and chmod commands.

sudo chown -R www-data:www-data /var/www/html/
sudo chmod -R 755 /var/www/html/

Move the WordPress Config File

Move the WordPress Config File

After applying the permissions, create a WordPress config file based off of the sample file. Use the following command.

sudo mv wp-config-sample.php wp-config.php

Open the WordPress Config File

Open the WordPress Config File

After creating the wp-config.php file you need to open it using the nano text editor, or your editor of choice.

sudo nano wp-config.php

Update the Config Values

Update the Config Values

Now you need to update the three lines highlighted in red. Fill out the DB_NAME, DB_USER, and DB_PASSWORD lines with the values you choose during the mysql step. Once you finish editing these lines, save and close the file.

Edit the Apache Configuration File

Edit the Apache Configuration File

Afterwards open up your Apache configuration file with nano.

sudo nano /etc/apache2/sites-enabled/000-default.conf

Scroll down until you see the line “DocumentRoot /var/www/html”, add the following to the line underneath.

DirectoryIndex index.php index.html

Once you have made your changes save and close the file.

Enable Apache a2enmod

Enable Apache a2enmod

Now we have to enable the Apache extension “a2enmod”. Enable it using the below command. If it was successful you should see “Enabling module rewrite”.

Restart Apache

Restart Apache

Finally we will restart Apache to apply all of our changes. Use the systemctl restart command below.

sudo systemctl restart apache2

Navigate to the WordPress Setup Page

Navigate to the WordPress Setup Page

Now you can open a web browser and navigate to your servers IP address. You can find it by opening a terminal window on Ubuntu and running the “ip a” command. Once you arrive to the page you will be asked to select your language before continuing.

Configure the WordPress Site

Configure the WordPress Site

On the next page you will be asked for the title of your site, your username, password, and email. After you fill out these fields select “Install WordPress” to complete the installation.

WordPress Successfully Installed on Ubuntu 22.04

Wordpress Successfully Installed on Ubuntu 22.04

Once you see this page your WordPress installation is complete. Click “Log In” to begin using WordPress. You have now successfully installed WordPress on Ubuntu Server 22.04.

Questions?

If you have any questions or comments feel free to leave them below.

Related Resources

View our How to Setup Nginx as a Reverse Proxy on Ubuntu 22.04 LTS.

Learn How to Install Ubuntu Server 22.04 [Step by Step].

Check out our How to Easily Create a Bootable Linux USB Drive using Rufus article.

View our How to Setup an SFTP Server on Ubuntu 22.04 using OpenSSH tutorial.

Learn more cool things in Linux with our Linux Tutorials.

View all of our available online tools and converters at Formatswap.com.

Installing Elementary OS: A Comprehensive Guide for Beginners

splash image elemantary os

This guide will walk you through the process of downloading and installing Elementary OS. It is a popular Linux distribution originally released in March of 2011. It is designed to be lightweight and fast, making it suitable for older hardware. Based on Ubuntu, it offers a curated set of applications and a consistent design language. Elementary OS emphasizes simplicity and focuses on providing a seamless experience for users transitioning from other operating systems. After finishing this guide you will have all of the knowledge required to install Elementary OS on your own PC.

Download Elementary OS

The first thing you will need to do is download Elementary OS. Download it with the link below.

Download Elementary OS

After you download the ISO file you will need to write it to a USB drive. If you need instructions for that please read our How to Create a Bootable Linux USB tutorial. Once you have booted into the installer you can continue reading below.

1. Choose the Installers Language

choose installer language

The first screen will ask you to choose the language for the installer. Choose your preferred language then press the select button.

2. Choose Keyboard Layout

choose installer keyboard layout

Next you will choose the keyboard layout to use during the installation. Choose your preferred layout then press select.

3. Select Custom Install

custom install Elementary OS

Now you will be asked if you would like to try Elementary OS, or install it to the disk. We will be using the Custom Install option. Select it then click on the “Custom Install” button.

4. Create a Partition Table

create a partition table

After clicking install the GParted partition manager will open. Click on “Device” at the top of the screen, then click “Create Partition Table”. (make sure your disk is selected below)

5. Modify the Partitions

modify the partitions

Next you will have to click the “Modify Partitions” button highlighted in red.

6. Apply the Partition Table Changes

apply partition table changes

Now click “Apply” to save your partition table to the disk.

7. Create a New Partition

create a new partition

After creating our partition table we can create the partition. We will be using a single partition for the easiest setup. Click on the green plus button highlighted above.

8. Configure the Partition

configure the new partition

We will use all of the default options which will use 100% of the available space. Click the “Add” button to continue.

9. Confirm the Partition Changes

confirm partition changes

Next click on the green check mark to save the partition changes.

10. Confirm the Operation

apply partition to device

Now click the “Apply” button to apply all of the pending operations in GParted.

11. Close the Dialog Window

close confirmation window

After the pending operations complete you can close the window.

12. Close the GParted Application

close gparted

Finally close the GParted window to finish the partitioning process.

13. Erase and Install

choose Elementary OS partition

Now you need to select the new partition we just created. Click on the green bar, then slide the slider on “Use Partition” as shown in the red box. Next click on “Erase and Install” to begin the installation.

14. Wait for Elementary OS to Finish Installing

wait for Elementary OS to install

Wait for the install process to complete. Once it finishes it will ask you to remove your installation media. Remove your USB drive, then press “Enter”. After your PC reboots you will be brought to the final setup screen.

15. Initial Setup

choose system language

Now you need to select the language for your user account. After you do that press “Select”.

16. Select the Keyboard Language

choose keyboard language

Repeat the same process for selecting your accounts keyboard layout.

17. User Profile Setup

set up user profile Elementary OS

Finally you will be able to setup your user profile. Fill out all of the fields including the device name. After you are finished click “Finish Setup”.

18. Login to Elementary OS

login to Elementary OS

You will now be able to login to your new Elementary OS account. Type your password and press the “Enter” key to continue,

19. Installation Complete

Elementary OS install complete

You have now successfully installed Elementary OS. If you are interested in additional operating system install tutorials you may like our OS Installs, and Linux Tutorials blog categories.

Additional Questions?

If you have any additional questions or thoughts feel free to comment them below.

Related Resources

View our How to Install an Nginx RTMP Server in Ubuntu 22.04 guide.

Learn How to Create a Mapped Network Drive in Windows 10.

Click here to learn How to Easily Create a Bootable Linux USB Drive using Rufus.

View our How to install Kali Linux 2022.3 tutorial.

Learn more the Windows operating system with our Windows Tutorials.

View all of our available online tools and converters at Formatswap.com.

How to Setup Nginx as a Reverse Proxy on Ubuntu 22.04 LTS

nginx splash

What is a reverse proxy server?

With the rise of cloud computing and distributed systems, it is common to have multiple web servers handling different aspects of a web application. However, managing and directing traffic to multiple servers can be a complex task. This is where setting up a Nginx reverse proxy can come in handy.

A reverse proxy acts as an intermediary between the clients device and one or more web servers. It receives requests from clients and sends them to the appropriate server based on a configuration file. This allows for load balancing and distribution of traffic across multiple servers. This ensures that none of your servers are overwhelmed with requests.

One of the primary benefits of using a reverse proxy is that it enables you to have multiple web servers handling different sections of your website or web application while still appearing as a single website to your users. For example, you could have the main section of your website handled by one Nginx server, while the additional subsections of your website are handled by a separate Nginx server.

This will not only help with managing traffic but also provides an added layer of security by hiding the origin servers from external users. If one of the servers fails, the reverse proxy has the ability to automatically redirect traffic to other healthy servers. This ensures that the website will always remain available and responsive.

Overall a reverse proxy is a powerful tool that can help manage traffic to multiple web servers, provide load balancing, improve security, and ensure high availability of web applications.

Initial Setup

This tutorial assumes that you already have a primary Nginx server set up (reverse proxy server). As well as a second Nginx server with the web app you want to appear on the first. If you need help installing a basic Nginx server, please read our How to install and configure Nginx tutorial.

Overview of Goal

primary nginx reverse proxy web server

For this example the above web server 192.168.2.154 (shown above) will be our primary web server where we will configure the Nginx reverse proxy.

secondary nginx reverse proxy web server

The second web server 192.168.2.155 (shown above) hosts the web application we want to reverse proxy to the first server.

404 not found example reverse proxy

The goal is to be able to access the second web servers content from a subfolder app2/ on the primary server. We want to be able to access the above URL on the primary server and have the blue website content load from the second server. Once we have finished configuring the reverse proxy, we will be able to access the second web servers content using a subfolder on the primary web server 192.168.2.154/app2/.

Connect to the Primary Web Server

To get started connect to the primary web server. In my case this will be the 192.168.2.154 server. Once connected open a new terminal window. Next create a new directory in the /var/www/html/ folder. This is where you will access your secondary web server from. In my case I will use the command shown below.

sudo mkdir /var/www/html/app2

Edit the Nginx Config File

nginx config file

Afterwards we need to edit the /etc/nginx/sites-available/default config file. Open the file in your favorite text editor and navigate to the location / section inside the server { } parentheses as shown above. The command below will open the file with the nano text editor.

sudo nano /etc/nginx/sites-available/default

Add a New Location

add lines to nginx config for proxy_pass

Now we need to add a new location under the first location / block. Use the command block below as an example. Replace FOLDER_NAME with the name of the directory you want the secondary web server accessible from. This is the folder we created in the first step. We also need to replace IP_ADDRESS with the IP of the secondary web server.

location /FOLDER_NAME {
                proxy_pass http://IP_ADDRESS/;
                proxy_set_header Host $host;
                proxy_set_header X-Real-IP $remote_addr;
                proxy_set_header X-Forwarded-For $proxy_add_x_forwarded_for;
}

After adding the location block, close and save the file with Crtl+X.

Restart Nginx

Next we need to restart the Nginx web server to apply our configuration changes. To do this we use the systemctl command below.

sudo systemctl restart nginx.service

Test the Nginx Reverse Proxy

successful nginx reverse proxy test

Now we will need to test that the reverse proxy is working. We will navigate to our subfolder we created earlier using the primary web server 192.168.2.154/app2/. Assuming the Nginx config was set up correctly your second web servers content should appear. You have now successfully configured a reverse proxy using the Nginx web server.

Questions?

If you have any questions or comments feel free to leave them below.

Related Resources

View our 5 Reasons to Switch from Windows 10 to Linux tutorial.

Learn How to Generate Images From Text Prompts with Python and TensorFlow.

Check out our How to Setup OpenSSH with Keys on Ubuntu 22.04 tutorial.

View our Deep Learning Image Style Transfer Tutorial Using Neural Style Pt tutorial.

Learn How to Setup Nginx as a Reverse Proxy on Ubuntu 22.04 LTS.

Learn How to Install an Nginx RTMP Server in Ubuntu 22.04.

View all of our available online tools and converters at Formatswap.com.