Using this tutorial you will learn how to install the popular bash shell alternative Oh My Zsh. Most Linux systems come preinstalled with the bash shell. Oh My Zsh adds many features compared to what you would find in this shell. Integrating Oh My Zsh into your workflow can provide numerous benefits. It’s easy to install, customize, and use, making it a must have tool for anyone looking to optimize their terminal experience. This will optimize and improve the speed and efficiency of your terminal based workflow.
Benefits of Oh My Zsh
One of the main benefits is spelling correction. While the standard bash shell offers this feature, Oh My Zsh does more efficiently and accurately. Another reason to use Oh my Zsh is the ability to easily install custom themes. There are hundreds of pre-built themes available for download on the projects GitHub page. Theming is also possible in the standard bash shell, however you are limited in the amount of customization you can easily achieve. The primary reason I recommend people switch to Oh My Zsh is its advanced command history ability. You can customize the shells history to your specific liking. This makes re-running past commands indefinitely easier. Don’t miss out on the chance to enhance your terminal with Oh My Zsh.
Update and Upgrade
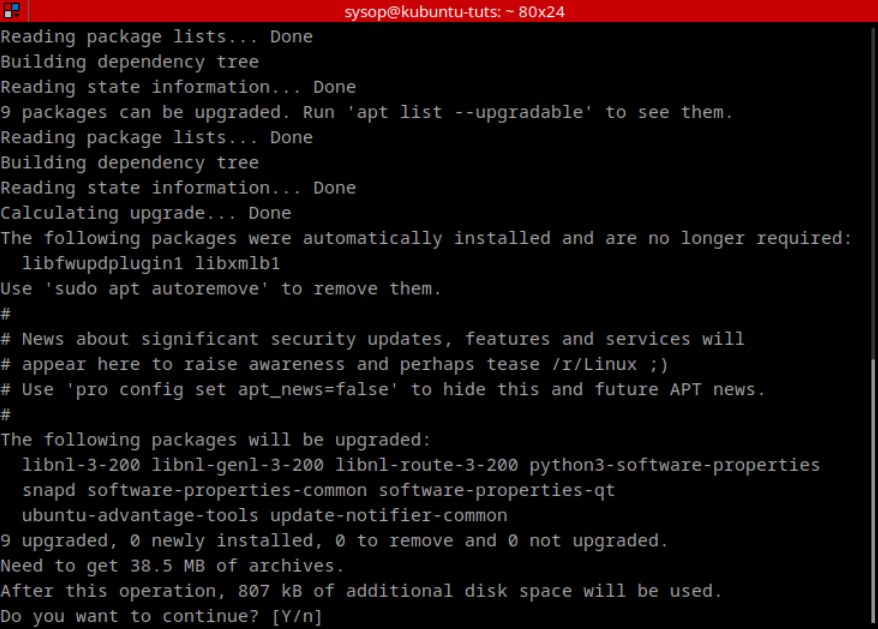
In this tutorial I will be using Ubuntu 22.04 to install the shell. However any Linux distribution that supports bash will support installing Oh My Zsh.
sudo apt update && sudo apt upgradeDownload and Install Curl
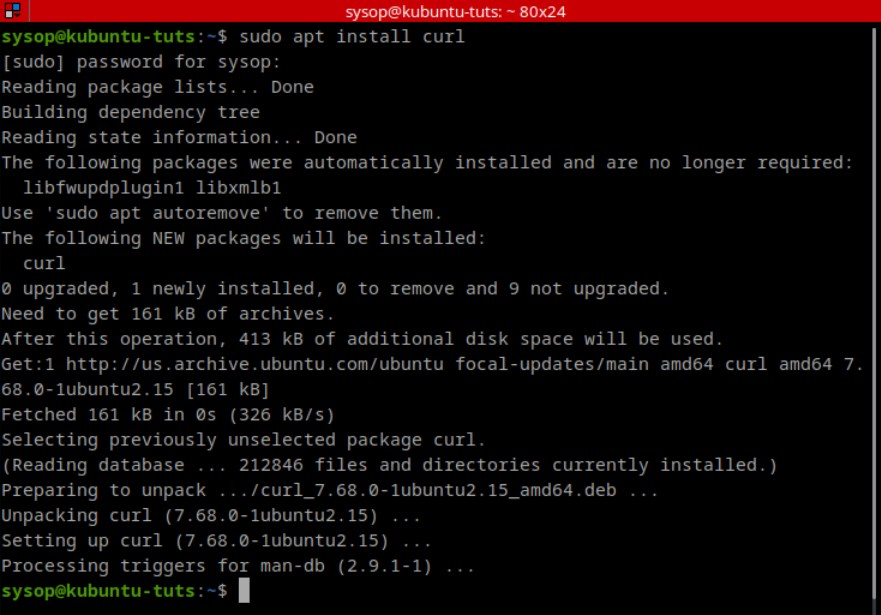
Next you will need to install the application curl. This will allow us to download and install Oh My Zsh using a curl command.
sudo apt install curlDownload and Install Zsh
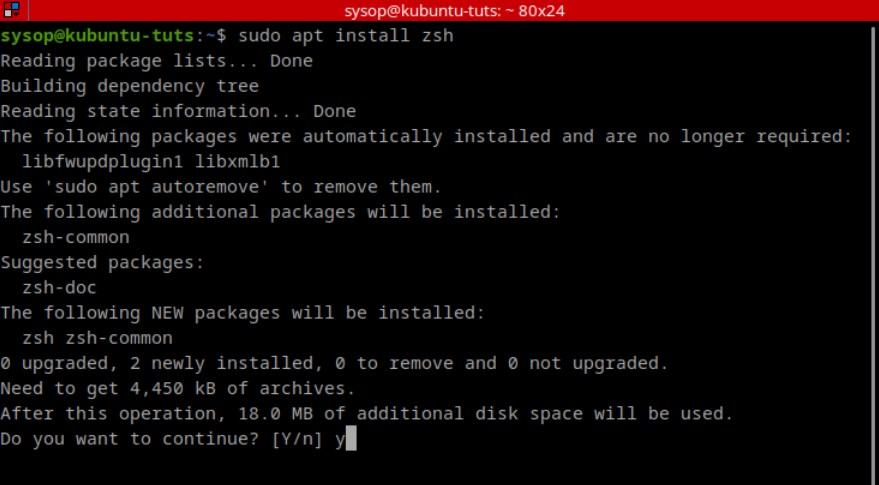
After installing curl you need to download the base zsh shell program. Install it by running the following apt command.
sudo apt install zshInstallation Options
You are able to install Oh My Zsh using either the wget, fetch, or curl command. In this example I will be using wget. Use whichever method you prefer and run the command.
wget:
sh -c "$(wget -O- https://raw.githubusercontent.com/ohmyzsh/ohmyzsh/master/tools/install.sh)"fetch:
sh -c "$(fetch -o - https://raw.githubusercontent.com/ohmyzsh/ohmyzsh/master/tools/install.sh)"curl:
sh -c "$(curl -fsSL https://raw.githubusercontent.com/ohmyzsh/ohmyzsh/master/tools/install.sh)"Download Oh My Zsh
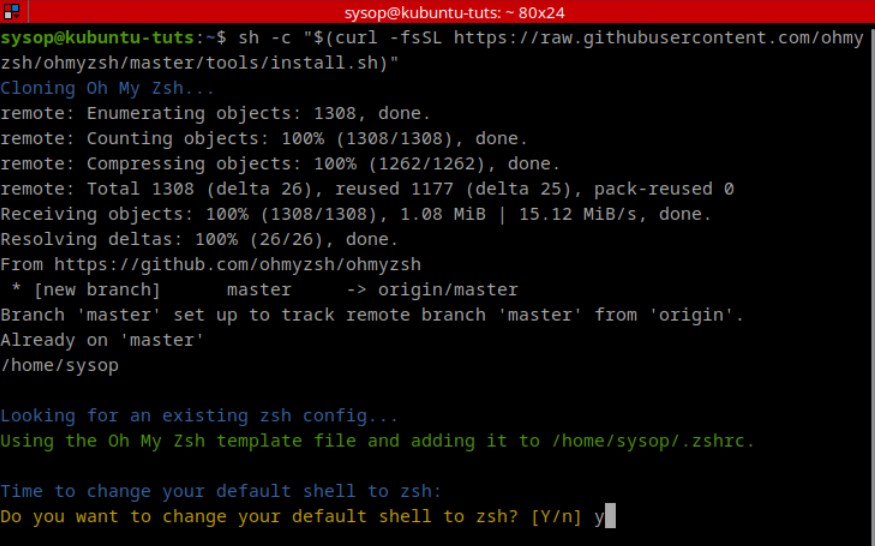
After running the command to download Oh My Zsh you will need to change it to your default shell. Type “y”, then press “Enter” to confirm the change.
sh -c "$(wget -O- https://raw.githubusercontent.com/ohmyzsh/ohmyzsh/master/tools/install.sh)"Installation Successful
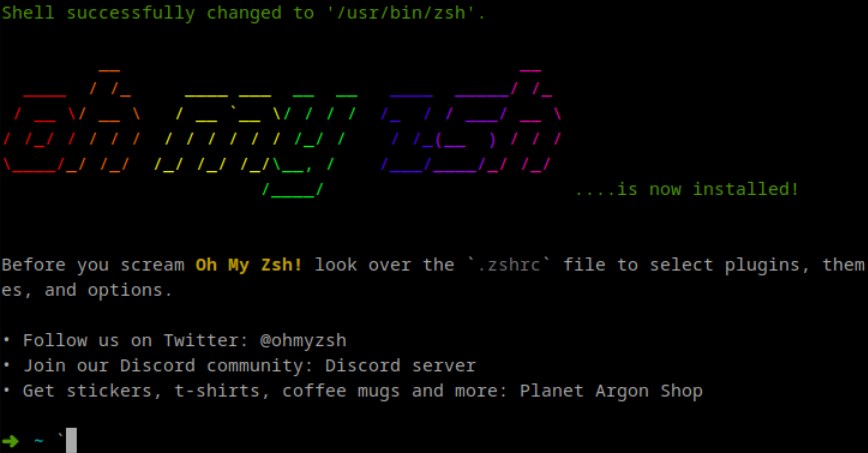
You will see the following screen after Oh My Zsh finishes the installation process. The shell is almost ready for use. We just need to verify the installation and make a few edits to the zshrc configuration file. Press “Ctrl+C” twice to exit the Oh My Zsh installer.
Verify the Zsh Installation

Run the “zsh –version” command and verify that you have zsh 5.8 or newer.
zsh --versionSet Default Shell to Zsh

Set zsh as the default shell using the “chsh” command.
chsh -s $(which zsh)Logout to Apply Changes
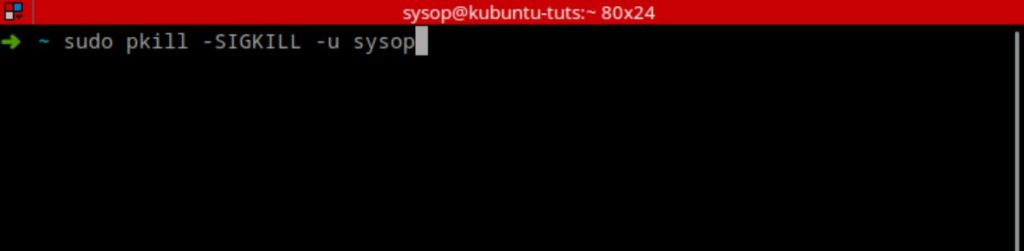
Now you will need to logout of your user account to apply the new changes. Run the “pkill” command below. Once you have logged out, log back in and reopen your terminal.
sudo pkill -SIGKILL -u [your username]Verify Current Shell

Next verify that your shell is set to zsh using the command below. You should see “/usr/bin/zsh” as the commands output.
echo $SHELLVerify Shell Version

Now verify that the correct version of zsh is set as your default shell. You should see version 5.8 or newer.
$SHELL --versionOpen the Oh My Zsh Config File
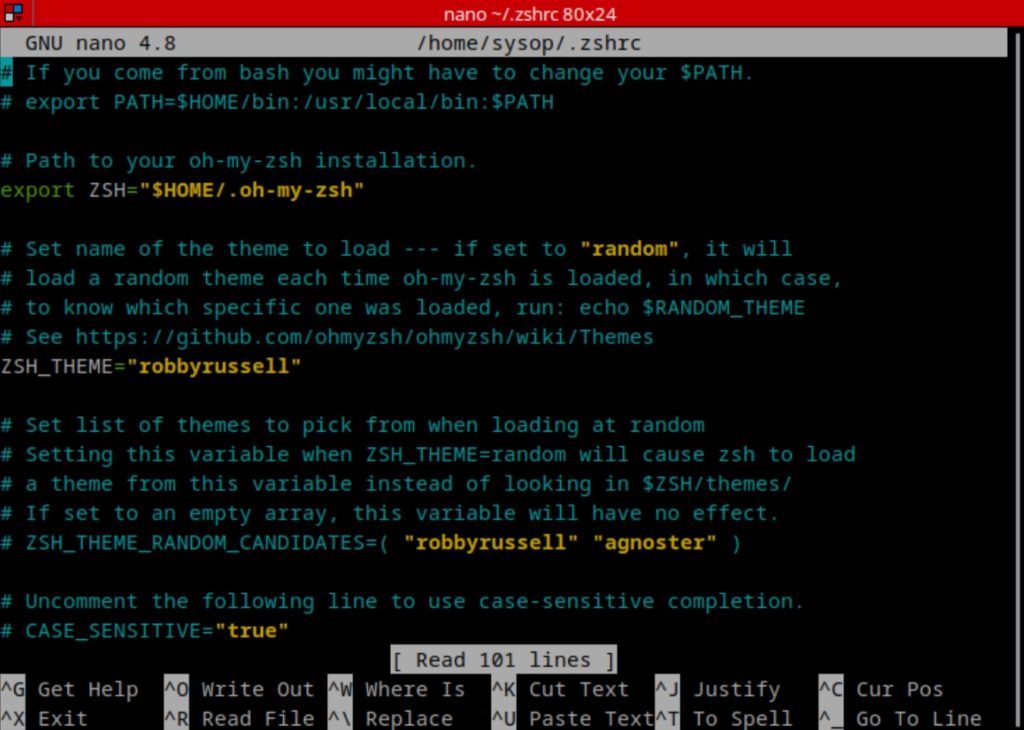
Next we will customize the shell using the “.zshrc” file located in the home directory. Open the Oh My Zsh configuration file using the command below.
nano ~/.zshrcSet a Oh My Zsh Theme
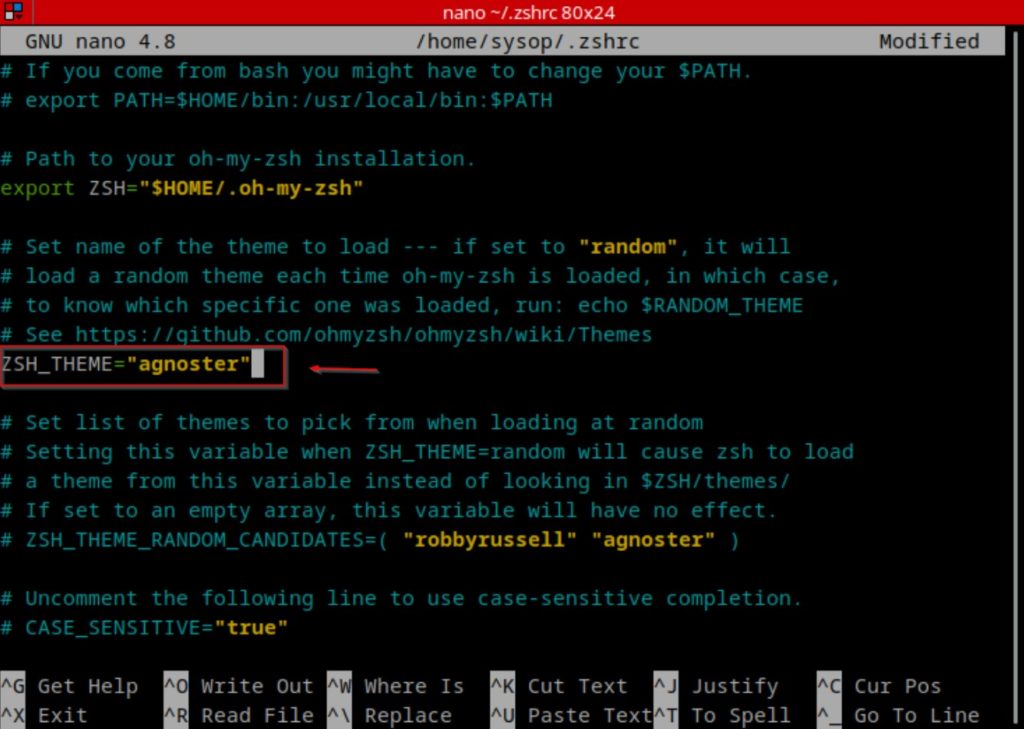
Now you will want to set a theme. Locate the “ZSH_THEME” and modify it to the theme name of your choice. Above I have set my theme to “agnoster” as it is one of my personal favorites. You can view the full list of available themes to choose from on the Oh My Zsh Github page. Save the file when you are finished with your changes.
Apply the Configuration

Once you are finished editing the zshrc config file you will need to apply the changes. Run the command below, then reopen your terminal.
source ~/.zshrcVerify Oh My Zsh Theme
If everything worked correctly you will see your new theme. You have now successfully installed Oh My Zsh, and configured a theme. If you are interested in adding plugins to echance your shells experience even further, visit the plugins page on the Oh My Zsh Wiki.
Conclusion
In conclusion, with the help of this article you now have the tools to effortlessly set up and customize Oh My Zsh in your Linux environment. Say goodbye to mundane terminal sessions and hello to a more productive, customizable, and user-friendly shell experience.
Questions?
If you have any questions or comments feel free to leave them below.
Recommended By Our Editors
View our 5 Reasons to Switch from Windows 10 to Linux.
Learn How to Configure a Firewall in Linux using UFW.
Check out How to Setup OpenSSH with Keys on Ubuntu 22.04.
View our Deep Learning Image Style Transfer Tutorial Using Neural Style Pt tutorial.
Learn How to Create a Mapped Network Drive in Windows 10.
View all of our available online tools and converters at Formatswap.com.