
If you have ever tried to disable Windows Defender within Windows 10 you may have noticed it can sometimes be difficult. In this tutorial you will learn two different methods for disabling it. You can disable Defender using Control Panel, and Registry Editor if you are a more advanced user. This can be useful for many reasons, such as development of applications, cyber security, false positives and more.
Disable Windows Defender (Basic)
Open PC Settings
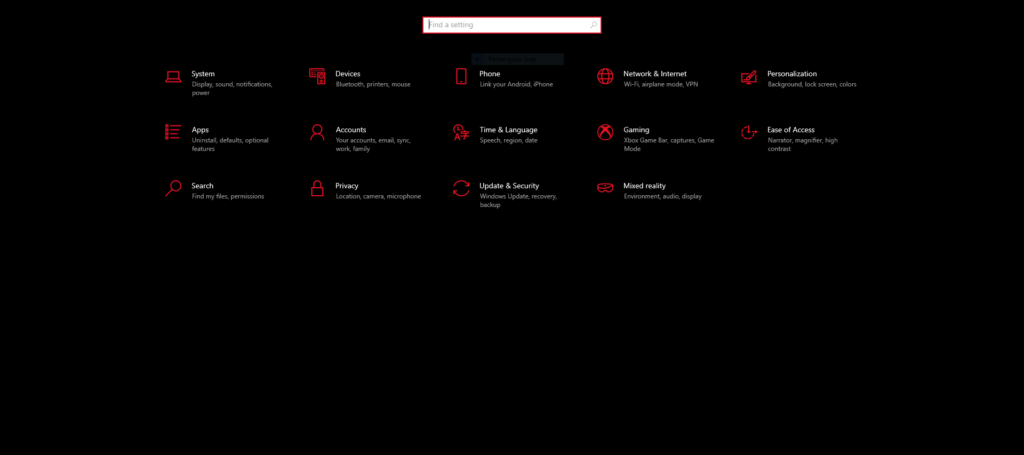
At your computer, open the Control Panel using the Windows button in the corner of your screen, then clicking on the gear icon in the bottom left corner.
Click Update & Security
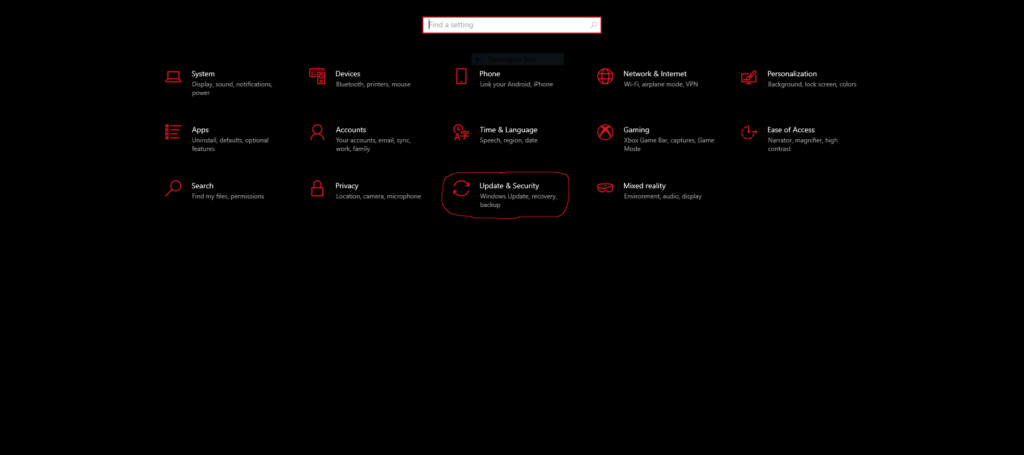
Once you are at the control panel, click the ‘Update & Security’ category.
Click Windows Security
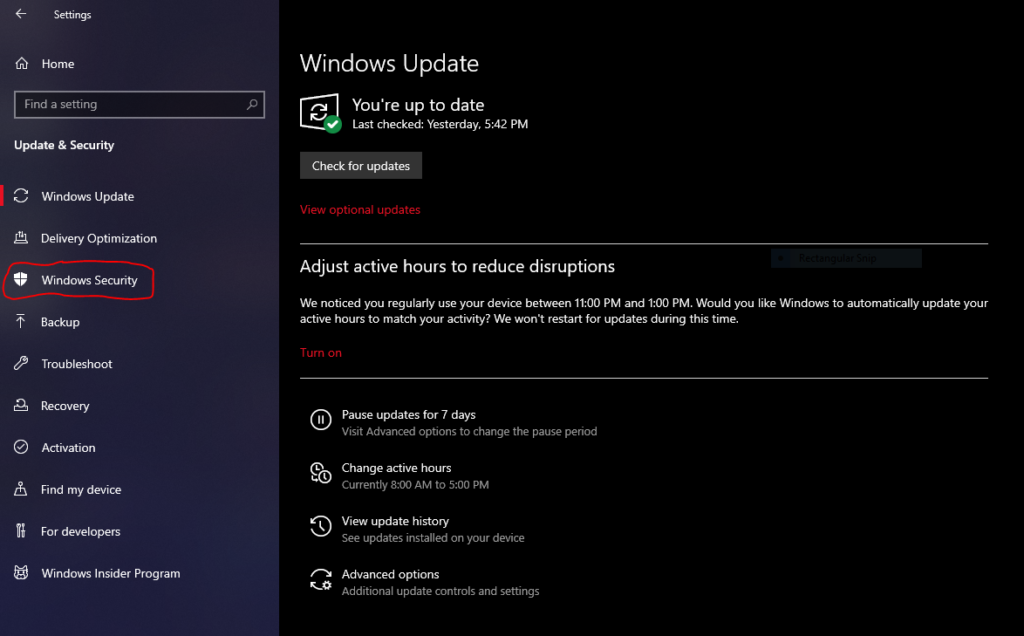
Select the ‘Windows Security’ option from the left hand side of Update & Security.
Click Manage Settings (Virus & Threat Protection)
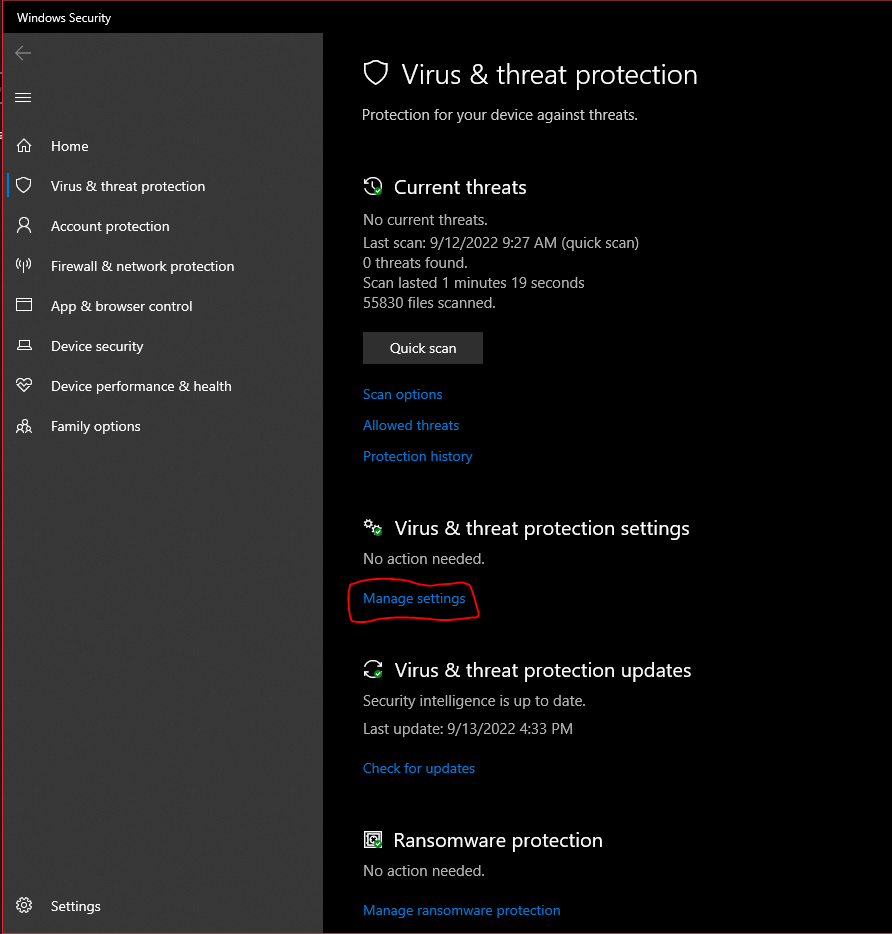
Then, find the ‘Manage settings’ text as shown above and click on it.
Disable Defender Protection Settings
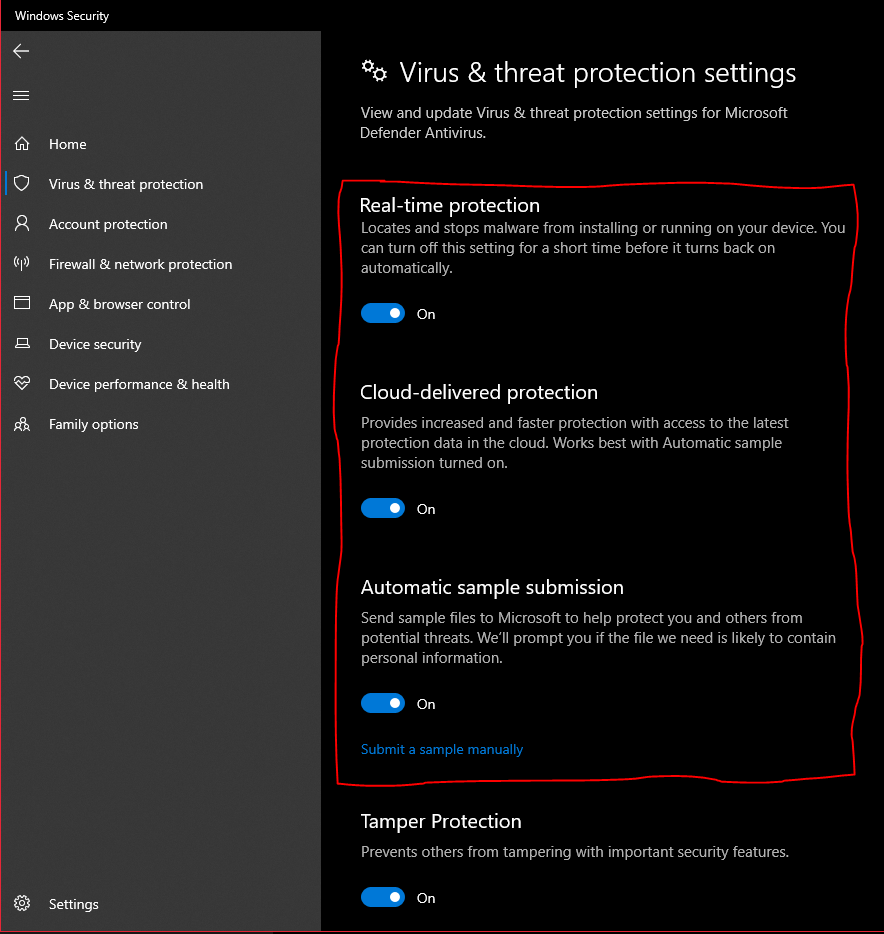
You will want to disable the highlighted options above. The other slider selections are optional. You are done!
How to Disable Windows Defender Using Registry Editor (Advanced)
Sometimes, Defender can re-enable itself during updates and restarts. If you would like to make sure it doesn’t come back and don’t mind tinkering with your operating system a bit, you can disable it with your Registry Editor.
Open Run

First, you will open your ‘Run’ box either by searching for it or using Windows + R on your keyboard.
Open Registry Editor

You will type ‘regedit’ in the box and either click OK or press Enter.
Navigate to Folder
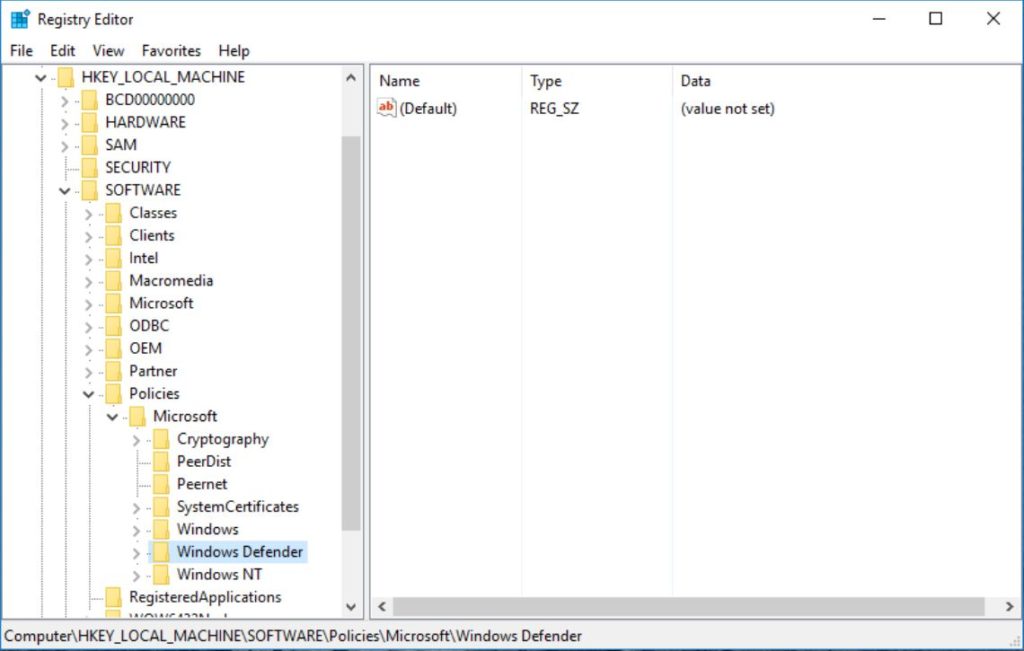
Open the folders inside Registry Editor by using the arrows next to the folder icon. You will want to navigate to:
HKEY_LOCAL_MACHINE\SOFTWARE\Policies\Microsoft\Windows DefenderAdd New Registry Value
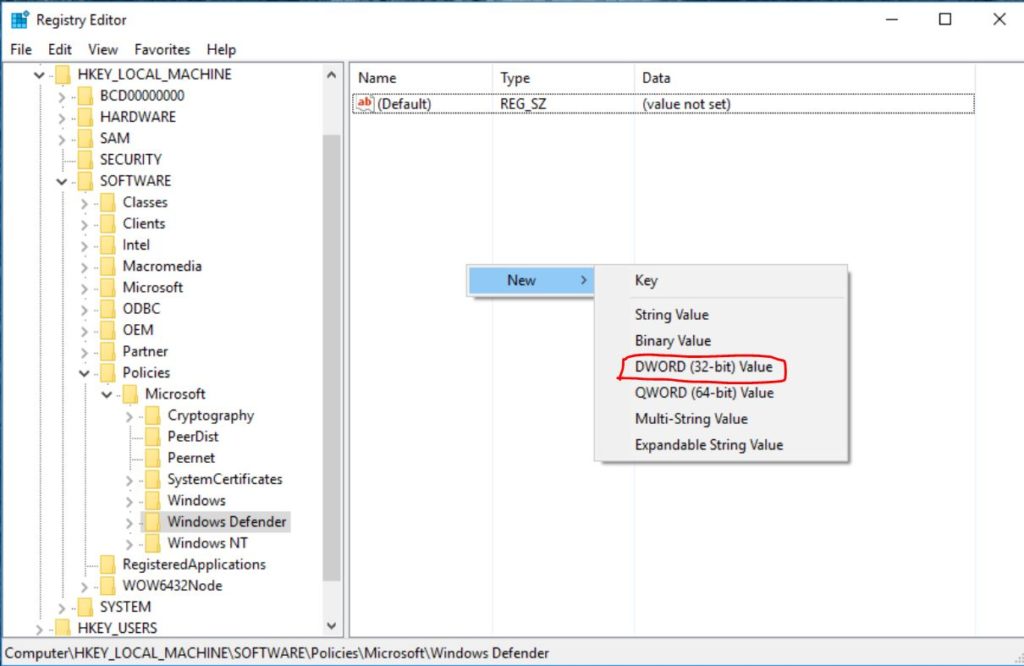
Once you select the Windows Defender folder, you will right click inside the blank space inside the right panel of the window and hover over New, then click the option that says ‘DWORD (32-bit Value)’.
Rename Registry Entry
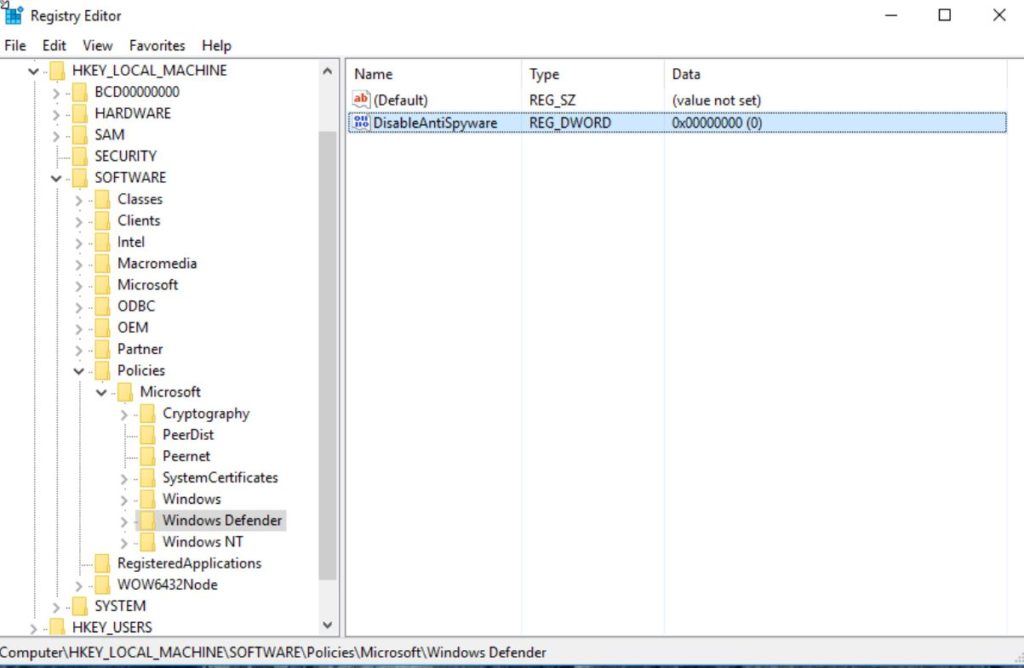
You will want to set the name of the value to ‘DisableAntiSpyware’.
Edit the Registry Value
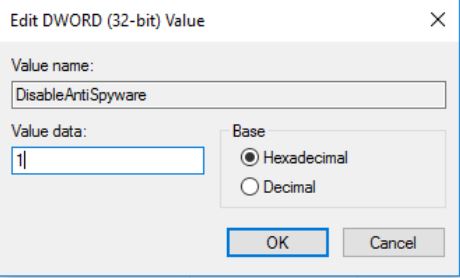
Then, double click on the 0x000… (value) portion of the pair you just created and change the Value data to 1. Double check to make sure that the Value name is the same as the one that you created and that the Base option is set to Hexadecimal.
Restart Windows
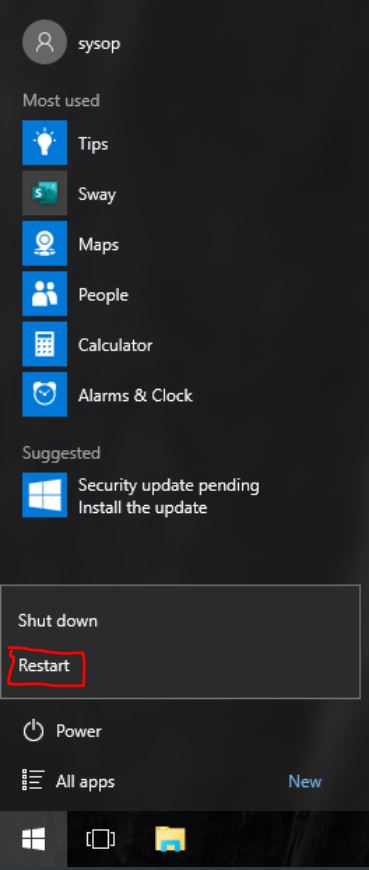
Finally, restart your computer and you have completed all the steps to disabling Windows Defender on Windows 10.
Questions?
If you have any questions or comments feel free to leave them below.
Related Resources
View our 5 Reasons to Switch from Windows 10 to Linux.
Learn How to Create a Mapped Network Drive in Windows 10.
Click here to learn How to Easily Create a Bootable Linux USB Drive using Rufus.
View our OS Installs Category.
Learn more cool things in Windows with our Windows Tutorials.
View all of our available online tools and converters at Formatswap.com.