
Are you worried about your device being stolen? Do you have sensitive files to protect? If you answered yes to either of those questions then you would benefit from encrypting your drive with VeraCrypt. In this tutorial you will learn how to download, install, and setup encryption with VeraCrypt in Linux. One of the primary reasons to use VeraCrypt is that it is an opensource replacement for the now defunct TrueCrypt. Another benefit to VeraCrypt is the ability to encrypt both flash drives and hard disks. You also have the ability to create encrypted file containers. It supports the most popular encryption algorithms such as AES 256 and AES 512. All said you will get a much more robust and secure encryption solution compared to any paid encryption software you could purchase.
Add the required repository
The first step is to add the repository to your packages list.
sudo add-apt-repository ppa:unit193/encryptionUpdate Ubuntu
The next thing you will want do do is update and upgrade Ubuntu 22.04. To do that simply open a terminal and run the following command.
sudo apt update && sudo apt upgradeDownload and install VeraCrypt
The last step is to install VeraCrypt. You can do so with this command.
sudo apt install veracryptEncrypting a volume
In this section of the tutorial you will learn how to create the encrypted flash drive partition using VeraCrypt.
Launching VeraCrypt
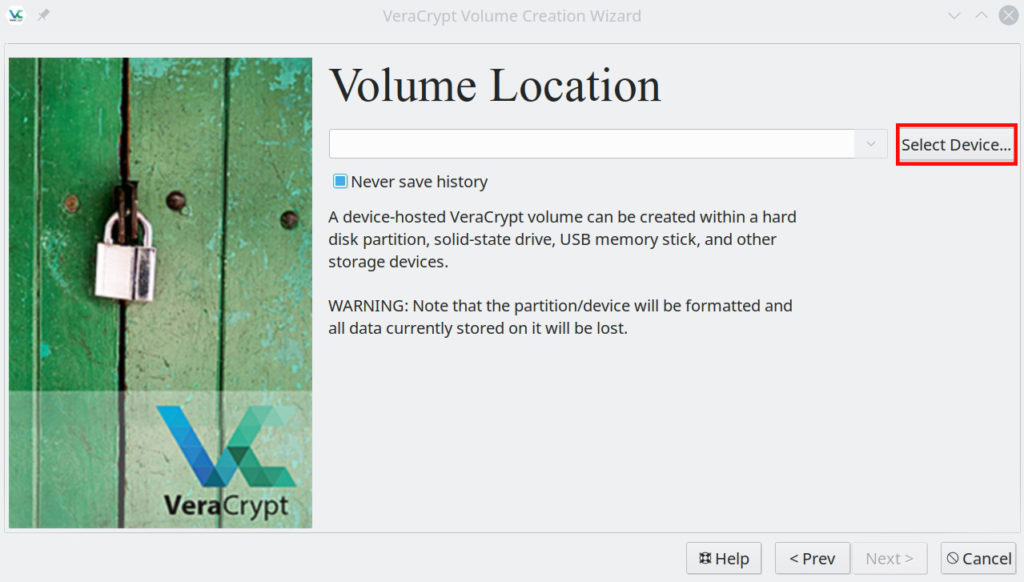
You can launch VeraCrypt by searching for it in your systems start menu or app folder. After you launch the program click on “Select Device…”.
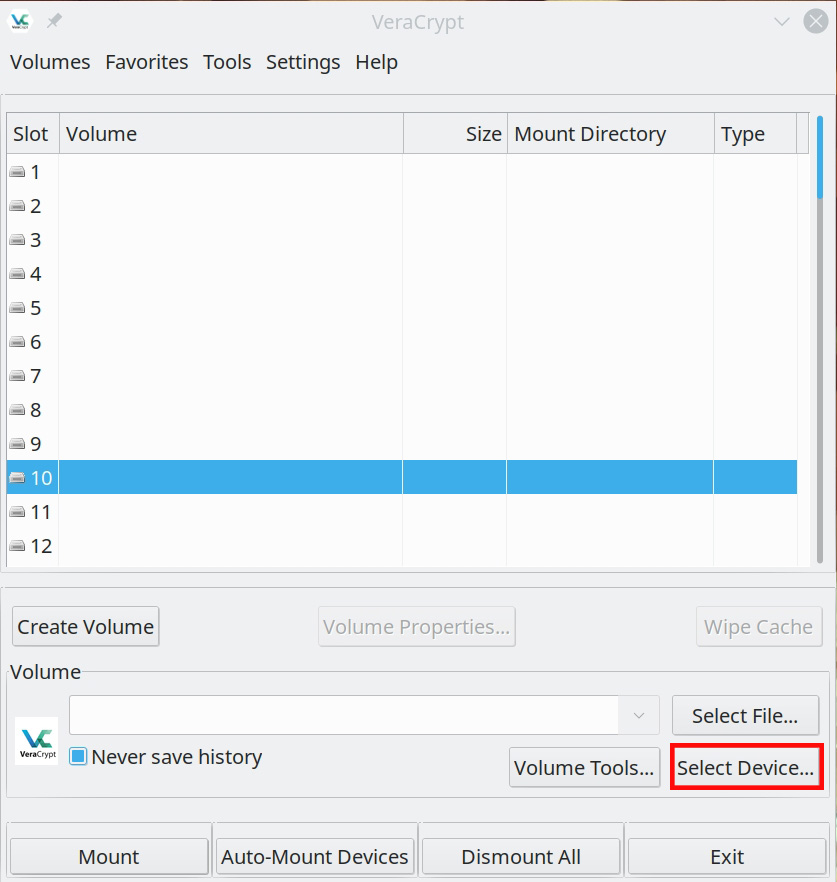
Selecting a device to encrypt
A window will pop up showing all of the storage devices on your computer. Very carefully select the partition on the flash drive you want to encrypt. (warning, all data is wiped during the encryption process)

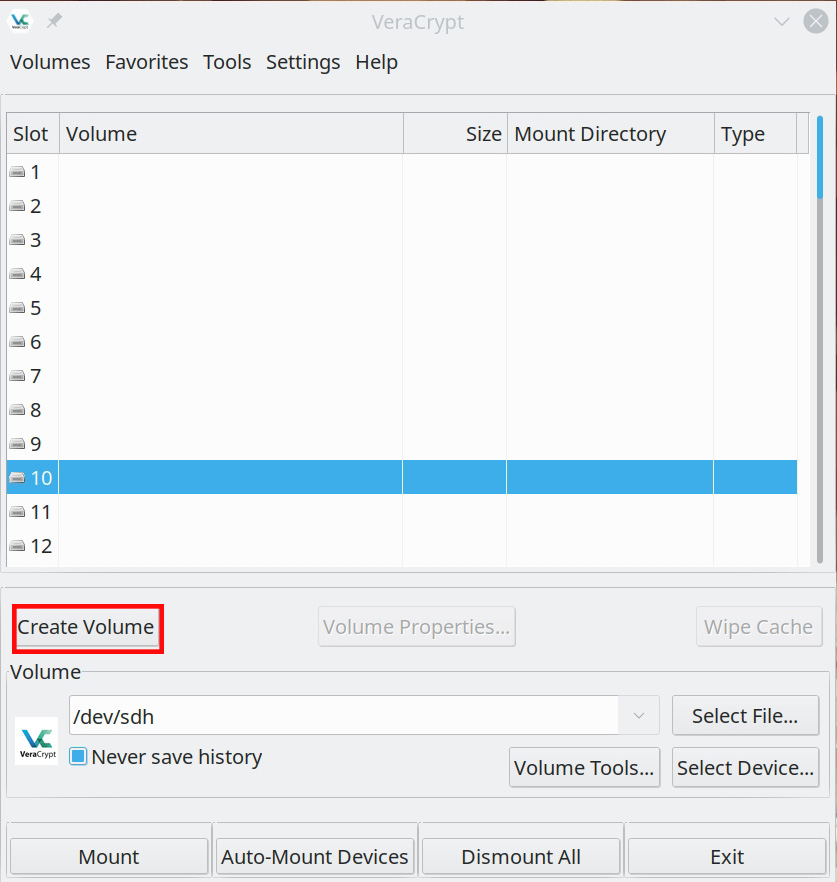
Creating the volume
Next you will want to click create volume to begin the encryption process.
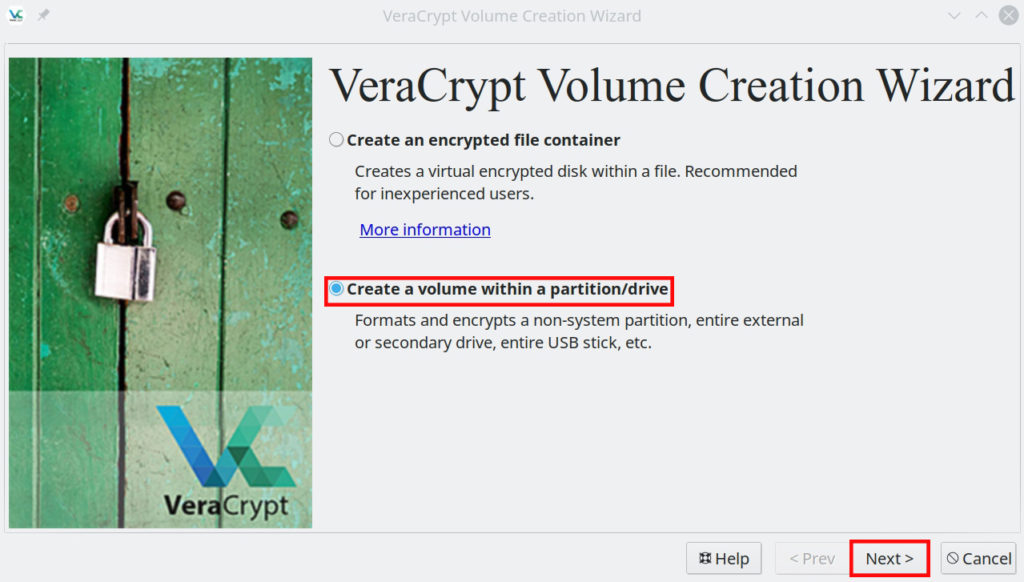
Select VeraCrypt device type
After the “VeraCrypt Volume Creation Wizard” opens you want to select the second option highlighted in red. Then click the “Next” button.
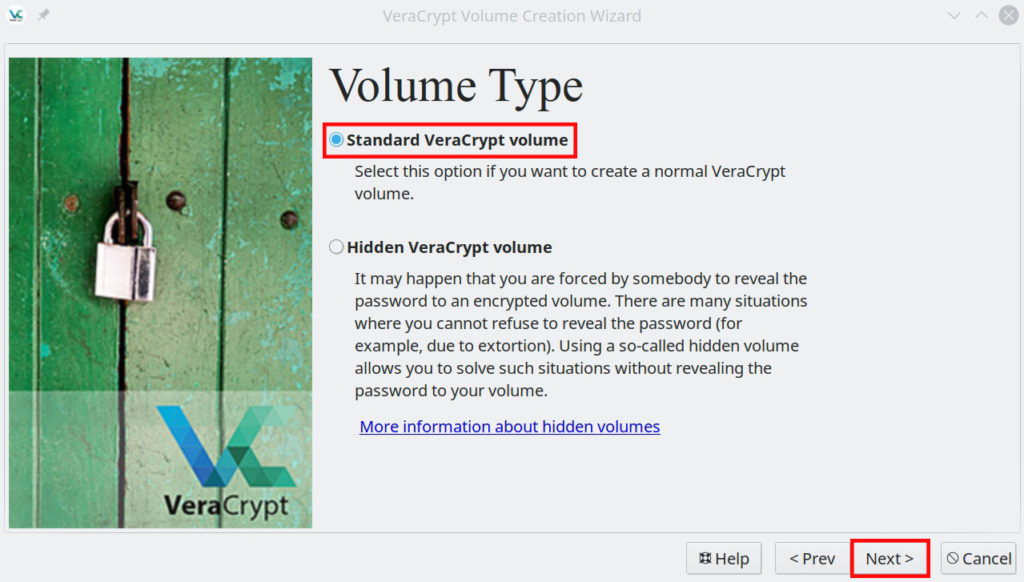
Select VeraCrypt volume type
The next step is to select the VeraCrypt volume type. Choose the first option on the list. “Standard VeraCrypt volume”.
View devices
Afterwards you will have to click “Select Device…” to view the partitions.
Select USB devices partition
Re-select the partition of the flash drive you want to encrypt. Then press “OK”.

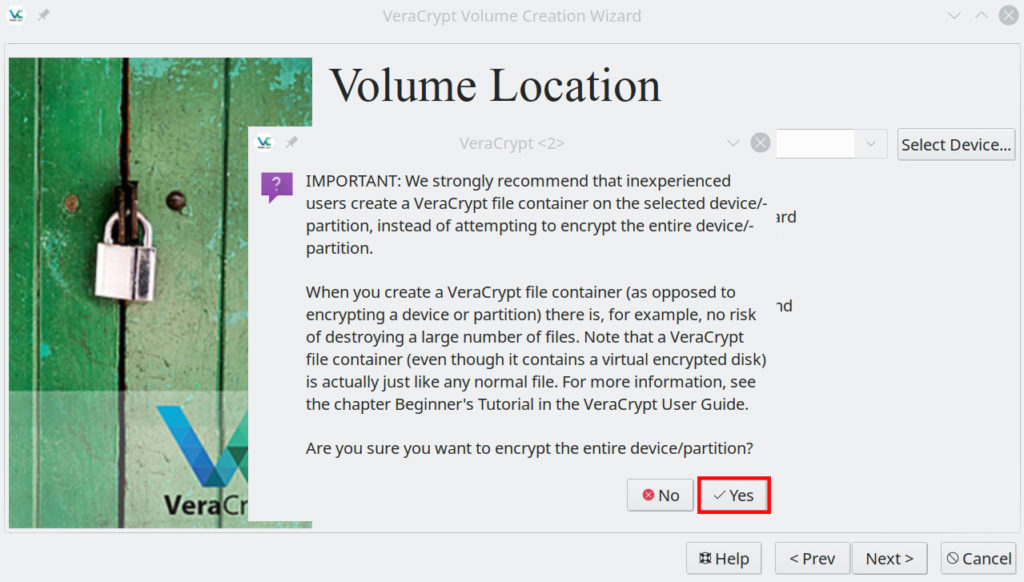
Volume confirmation dialog
A dialog will pop up confirming you would like to proceed. Click on the “Yes” button.
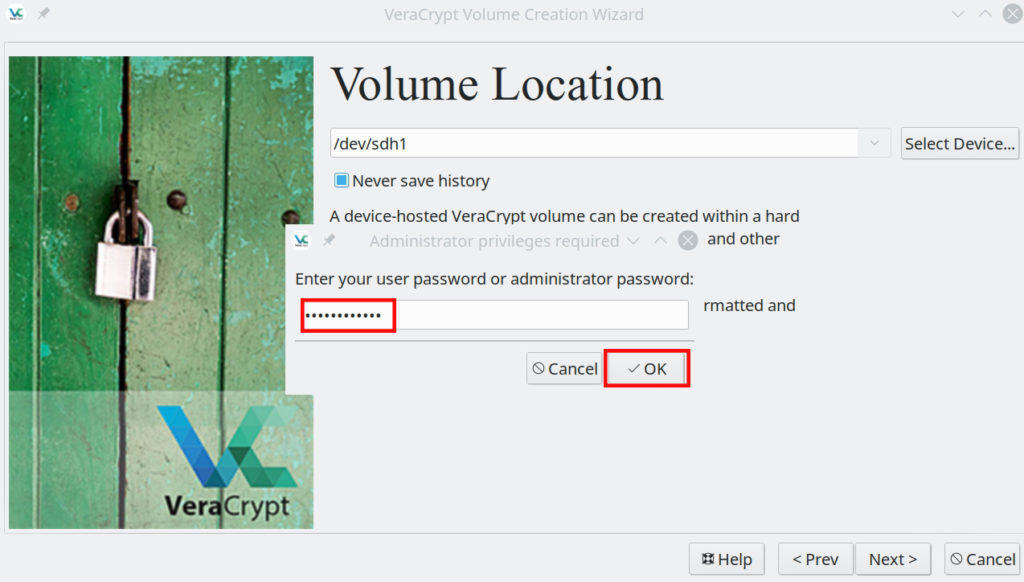
Enter the administrator password
You will receive a popup asking you to type in the administrator password. Afterwards click on the “OK” button.
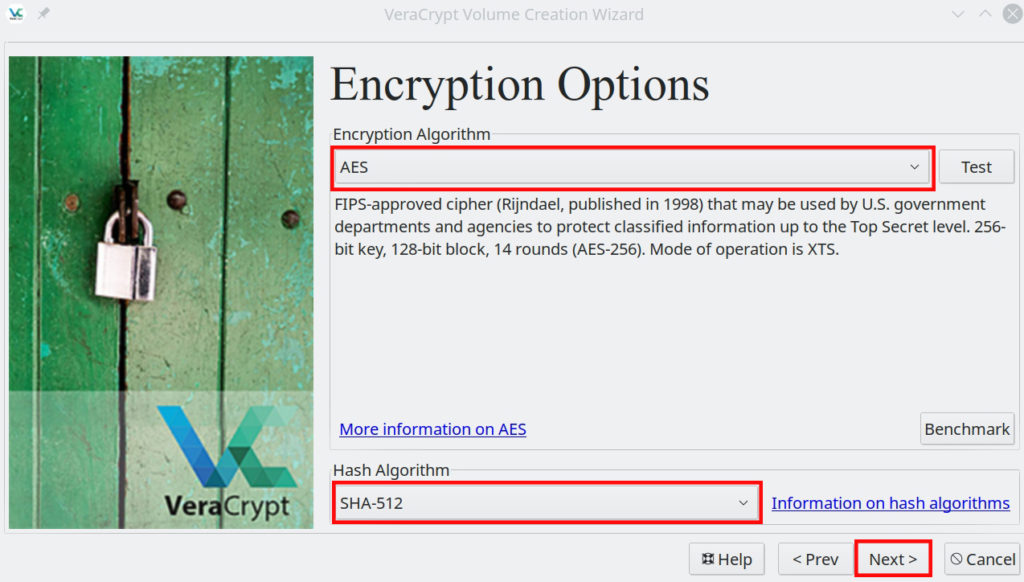
Choose VeraCrypt encryption algorithm
On the next page you will be asked to choose a Encryption Algorithm and a Hash Algorithm. I recommend selecting “AES” for the first box, and “SHA-512” for the second box. After selecting your options click on the “Next” button.
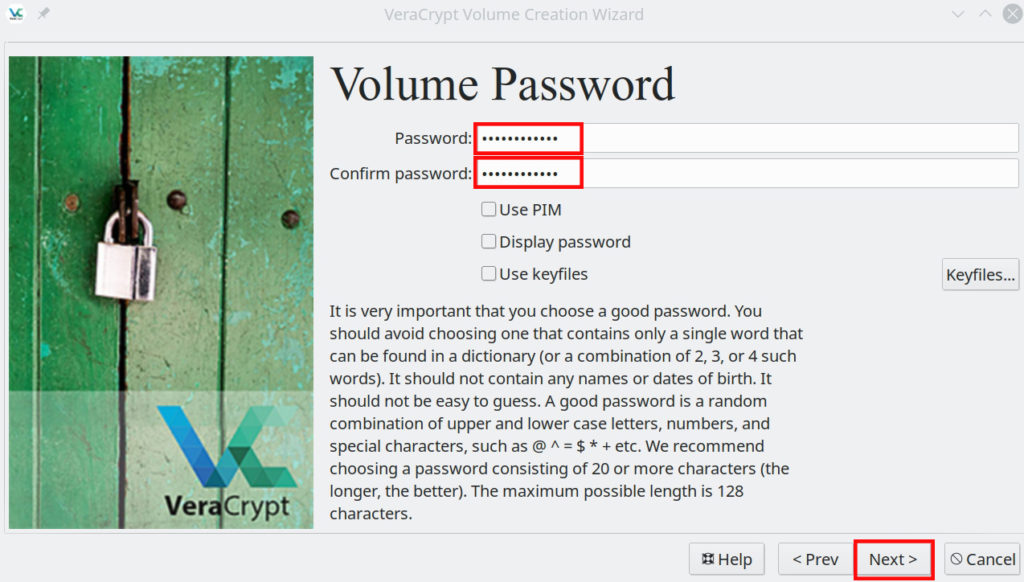
Type and repeat the encryption password
The next part of the wizard will have you enter and re-enter the encryption password you would like to use for the encrypted volume. Enter the passwords and click on the “Next” button.
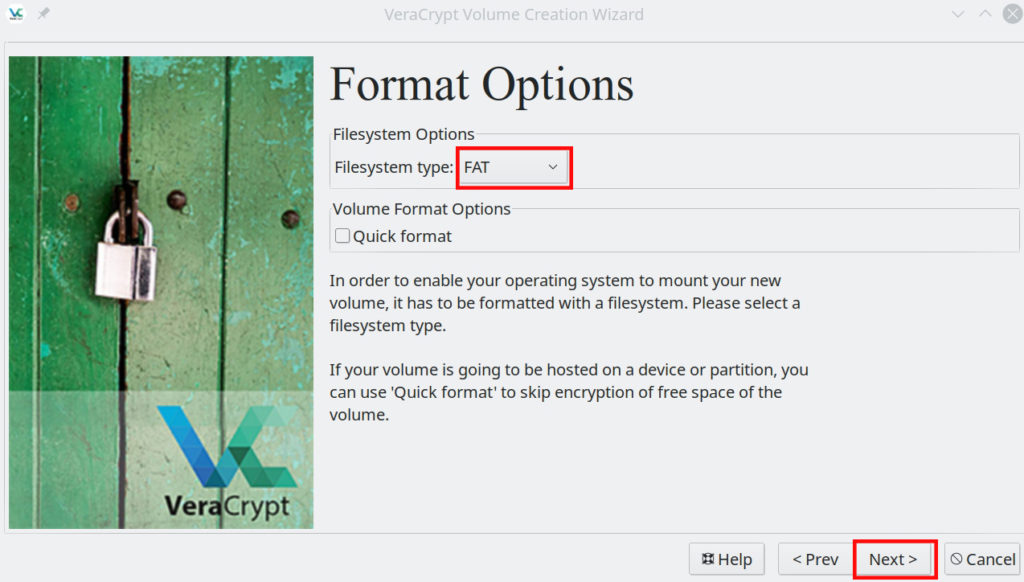
Select encrypted USB format options
On this page it will ask you to choose your flash drives format options. I recommend selecting “FAT”. Afterwards click on the “Next” button.
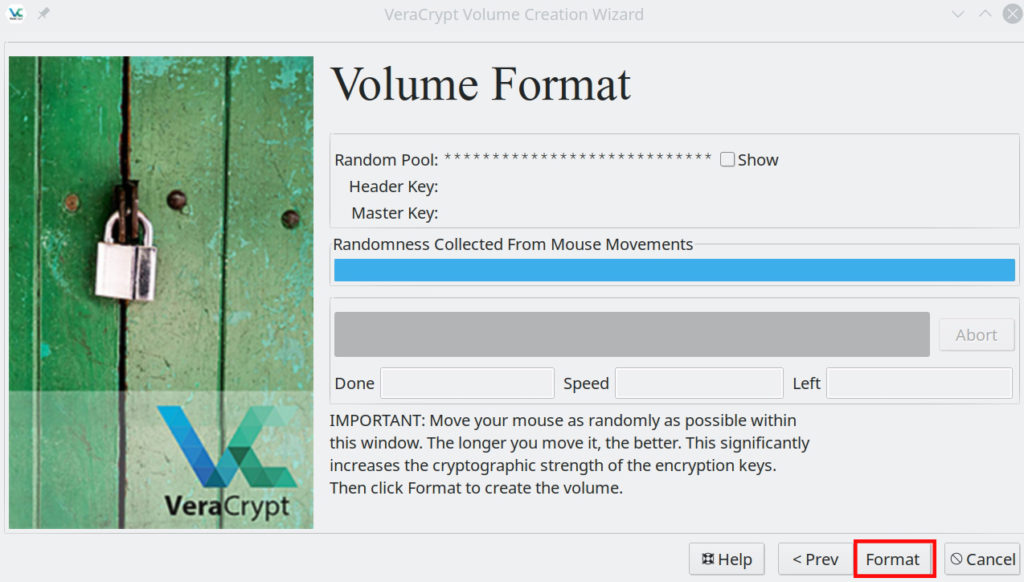
Encrypt the USB partition
For this step you will have to randomly move your mouse for 20-30 seconds to generated the Random Pool key. The longer you do it for the better the cryptographic strength will be. After the blue bar is full click on “Format” to start the encryption process.
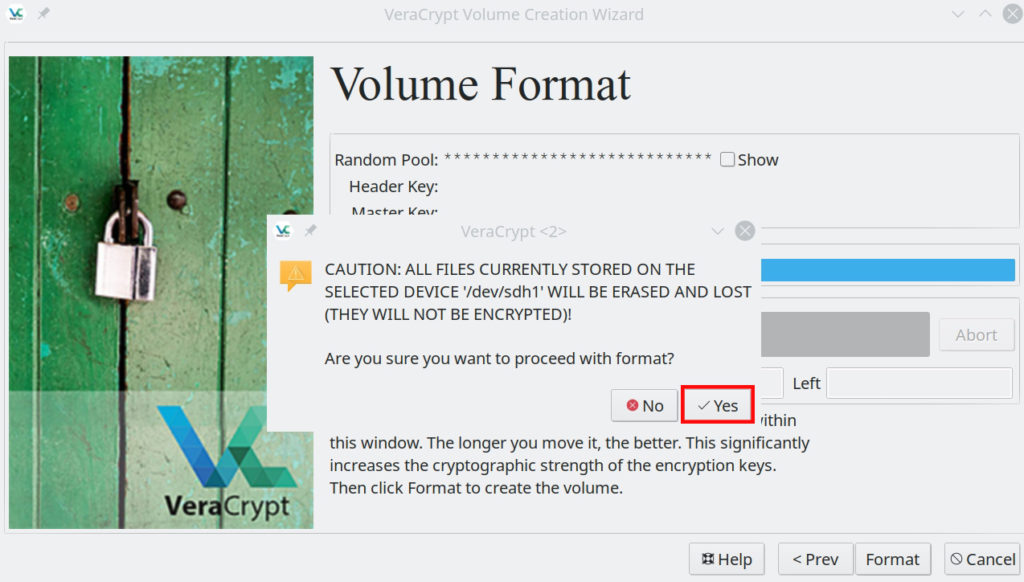
Volume format dialog
You will be asked to confirm that you want to continue encrypting. Press the “Yes” button.
Wait for device to encrypt
The encryption process could take anywhere from 5-30 minutes. Be patient and wait for the process to complete.

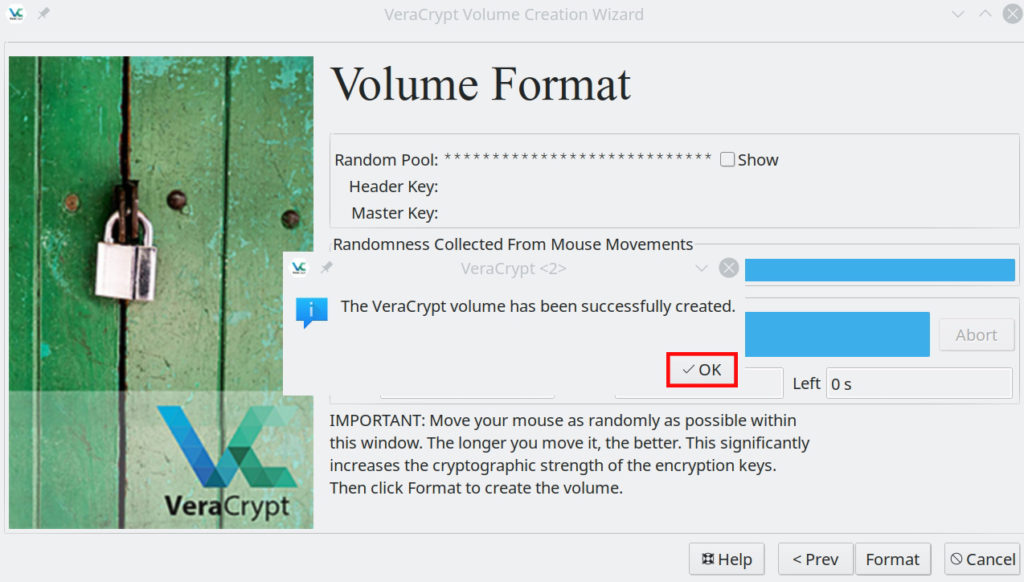
Encryption successful dialog
When the device has finished the encryption process you will get this dialog telling you it is complete. Click on the “OK” button.
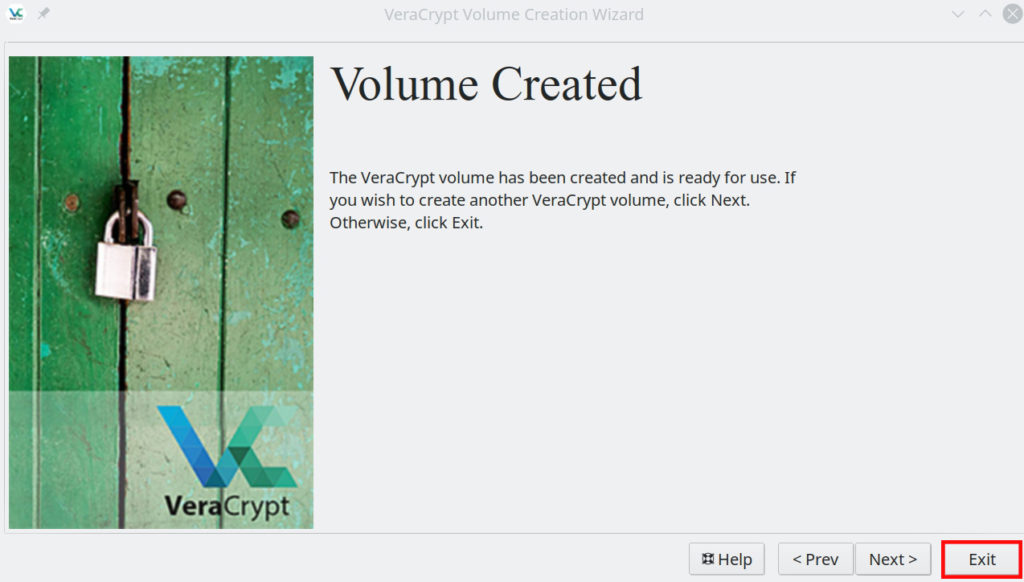
Exit VeraCrypt
Now that your flash drives partition is encrypted you can exit the application by clicking the “Exit” button.
Mounting encrypted volume
In this part of the tutorial you will learn how to mount the encrypted partition that you just created.
View the devices
The first step to mounting your partition is to select the device. Click on “Select Device…”.
Select an encrypted partition to mount
Next you will want to select the partition of the flash drive that you encrypted in the above steps.

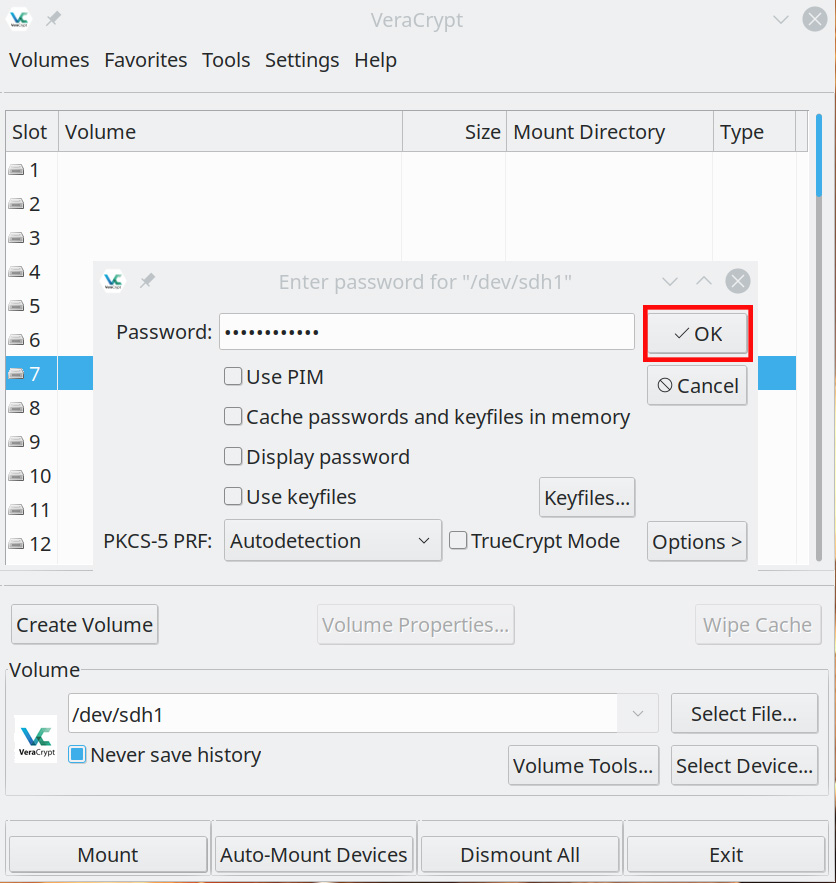
Type in encrypted USB’s password
Finally type in the encrypted flash drives password.
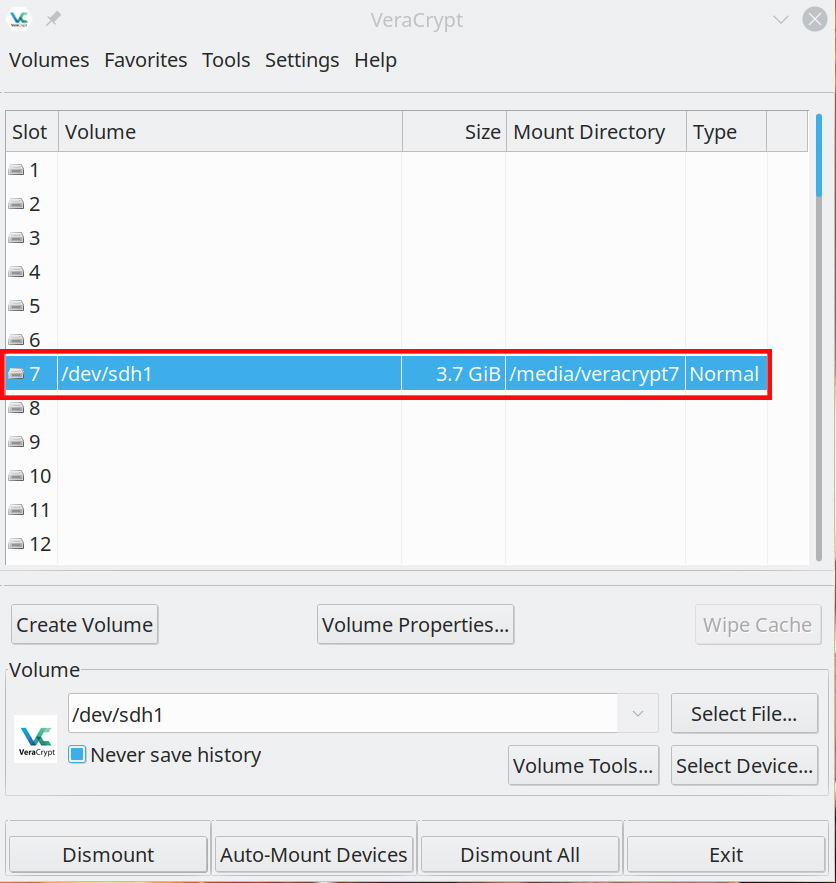
Opening encrypted USB drive
The encrypted flash drives partition will now show up in the VeraCrypt window. To open it and browse the files double click on the highlighted light blue bar. If you want to dismount the encrypted partition just select it and click “Dismount”. You now know how to download, install, and encrypt flash drive partitions using VeraCrypt on Ubuntu 22.04.
Related Resources
View our list of The Top 5 Programming Languages to Learn in 2022.
Learn How to Generate Images using Neural Networks with VQGAN.
Click here to learn How to Install MySQL on Ubuntu Server 22.04 LTS.
View our Programming Articles and Tutorials.
Learn more cool things in Linux with our Linux Tutorials.
View all of our available online tools and converters at Formatswap.com.
Affiliate Disclaimer:
This website may contain affiliate links. This means we may receive a small commission if you purchase through our links. However, this does not impact our reviews and comparisons, as we only promote products we personally believe in. We are independently owned and the opinions expressed here are our own.