
In this tutorial you will learn how to create bootable USB drives using Rufus. One of the main benefits of using Rufus is that it is free, open source, and easy to use. Rufus is a good lightweight alternative to Unetbootin. Additionally with this universal USB installer you can easily create installation drives for Linux, Mac OS, and Windows. It is compatible with most .ISO files and bootable image formats, as well as raw disk image file support. Rufus also supports the creation of bootable FreeDOS installations.
Download Rufus
The first step will be to download Rufus. You will want to navigate to the Rufus Download Page. Then scroll down to the Download section and click on “Rufus 3.20” to download the application.

After you download Rufus, double click on “rufus-3.2.0.exe” to launch the application. At this point you will also want to plug in your USB flash drive.
Select Installation ISO File
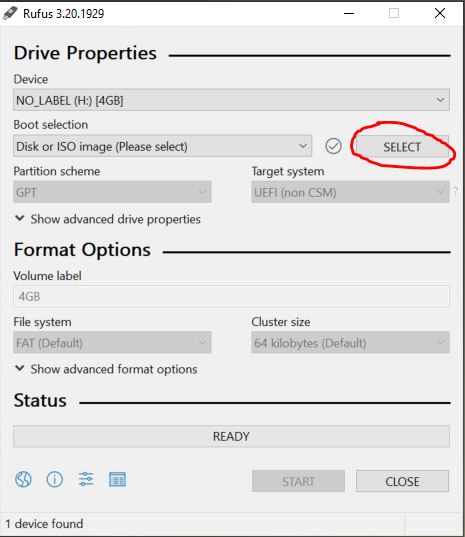
Next you will select the iso file that you want to flash to the USB drive. Click on the “SELECT” button. You will then get a file selection dialog, navigate to where your iso is and select it. In this example I will be using “ubuntu-22.04-live-server-amd64”. If you wish to download the ISO you can do so on the Ubuntu website.
Select Storage Device
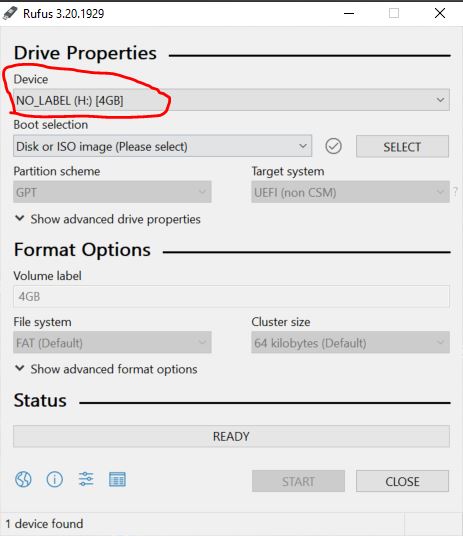
Afterwards you will need to select the storage device you want to use. This will be the flash drive that you plugged in a few moments ago. Select it from the drop down list then continue. *WARNING* be careful to select the right drive as all of the data will be deleted.
Set Boot Selection
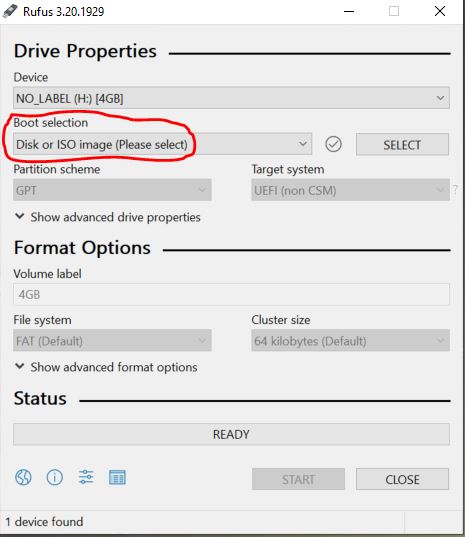
Now you will select the “Boot selection” I recommend keeping this option at the default “Disk or ISO image”.
Choose Partition Scheme
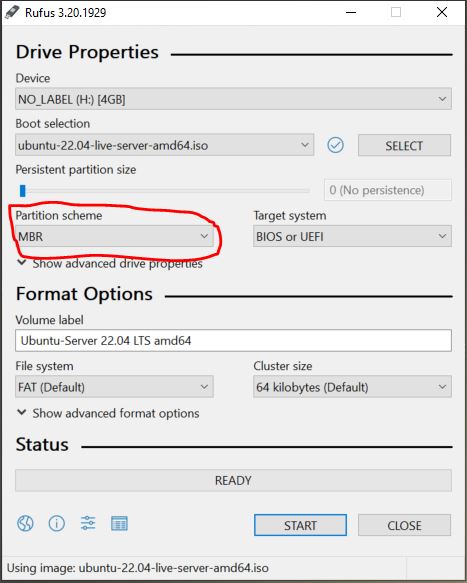
Next choose the partition scheme. Usually you can keep this at the default unless you have a very old PC. If you end up having issues change this option and re-flash. We will be keeping it at “MBR”.
Choose Target System
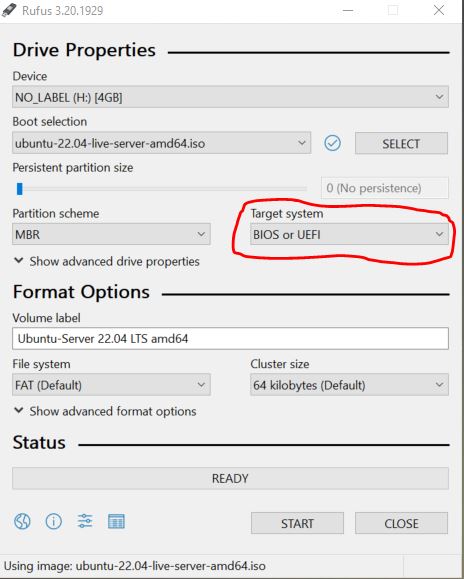
The next option is the “Target system” I would leave it at “BIOS or UEFI” unless you have a specific reason to change it. This option will work for almost every PC.
Create a Volume Label (optional)
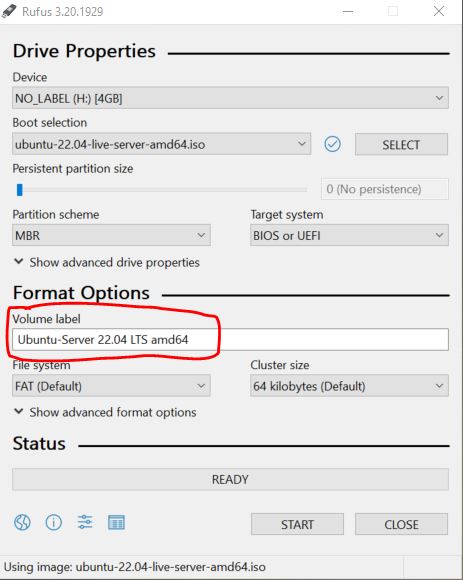
This step is optional but if you want to give your flash drive a name just type it in this box. This name will show up in the file explorer after you complete the process.
Set Cluster Size
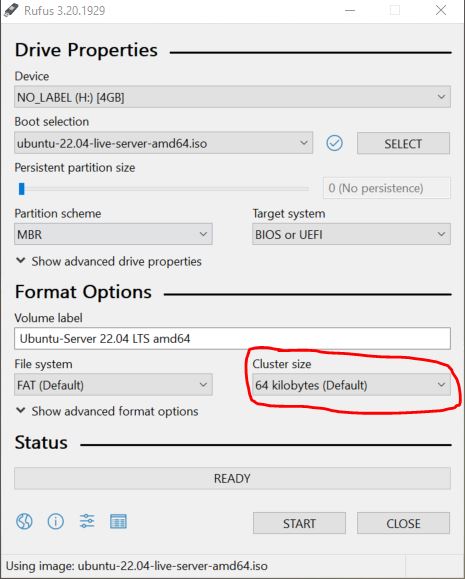
For the cluster size you can keep it and the default of “64 kilobytes”. This will work for most flash drives.
Set File System
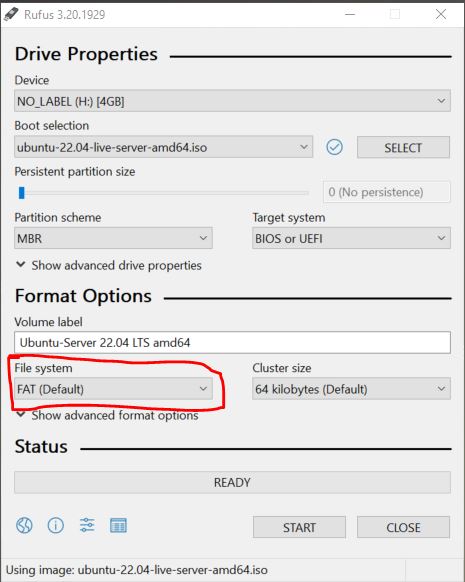
Finally select the file system. Most people use either NTFS or FAT file formatting. I will be using FAT for this tutorial.
Start Flashing Process
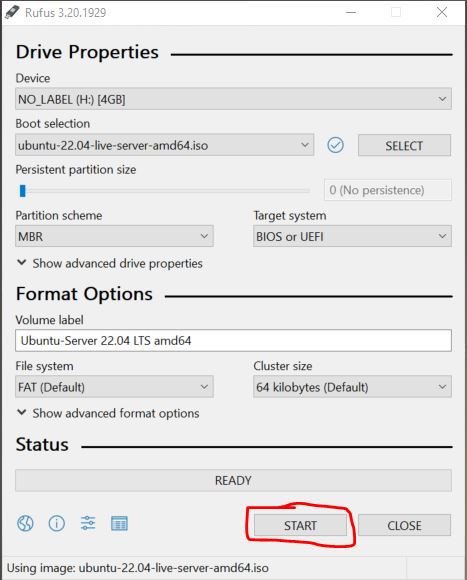
Finally we can start the ISO flashing process. Click on the start button to begin flashing your USB drive.
Confirm Rufus Drive Flashing Process
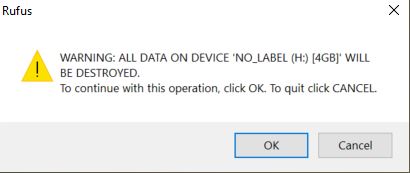
This window will ask you to confirm that you really want to flash the USB drive.
Wait for Flashing to Complete
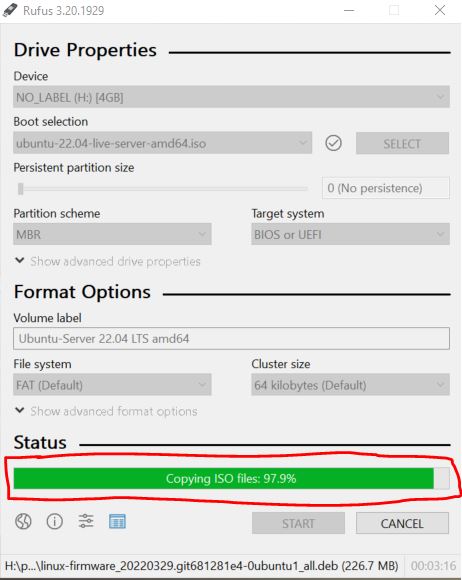
Now you will have to wait for the flashing process to begin. This can take a while so go make yourself a cup of coffee while you wait.
Rufus Flashing Complete
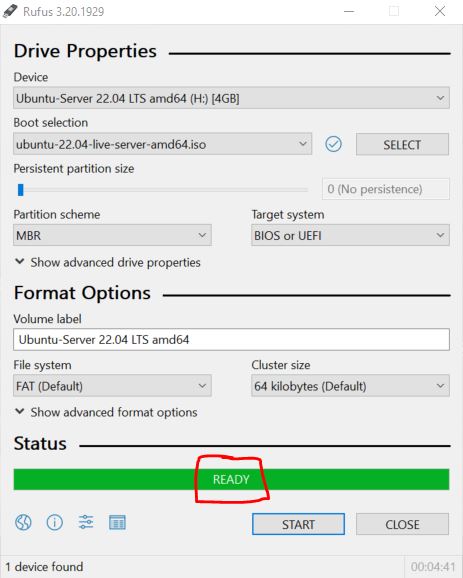
When the flashing process completes you will see a green bar at the bottom, as well as the word “READY”. Your installation media is now ready to be used. You can now eject your flash drive and close Rufus.
Additional Questions?
If you have any additional questions or thoughts feel free to comment them below.
Related Resources
View our list of The Top 5 Programming Languages to Learn in 2022.
Check our our The Best Mechanical Gaming Keyboards to Purchase in 2023 article.
Learn How to Install Ubuntu Server 22.04 [Step by Step].
Click here to learn How to Install MySQL on Ubuntu Server 22.04 LTS.
View our How to Setup OpenSSH with Keys on Ubuntu 22.04 tutorial.
Learn How to install Kali Linux 2022.3 [step by step].
View all of our available online tools and converters at Formatswap.com.
Affiliate Disclaimer:
This website may contain affiliate links. This means we may receive a small commission if you purchase through our links. However, this does not impact our reviews and comparisons, as we only promote products we personally believe in. We are independently owned and the opinions expressed here are our own.