This tutorial will teach you how to create a network share in Windows 10. You can use any hard drive or folder on your computer to share. This will easily allow you to access any files you want on your local network. This allows you to avoid using USB flash drives or portable hard drives to transfer files. We will be using the file sharing feature built into the operating system. You will be able to successfully share your files by reading below.
Open File Explorer
First, you will want to open your file explorer by clicking on the folder icon on your taskbar, or pressing Windows+E simultaneously on your keyboard.
Choose Drive or Folder to Map
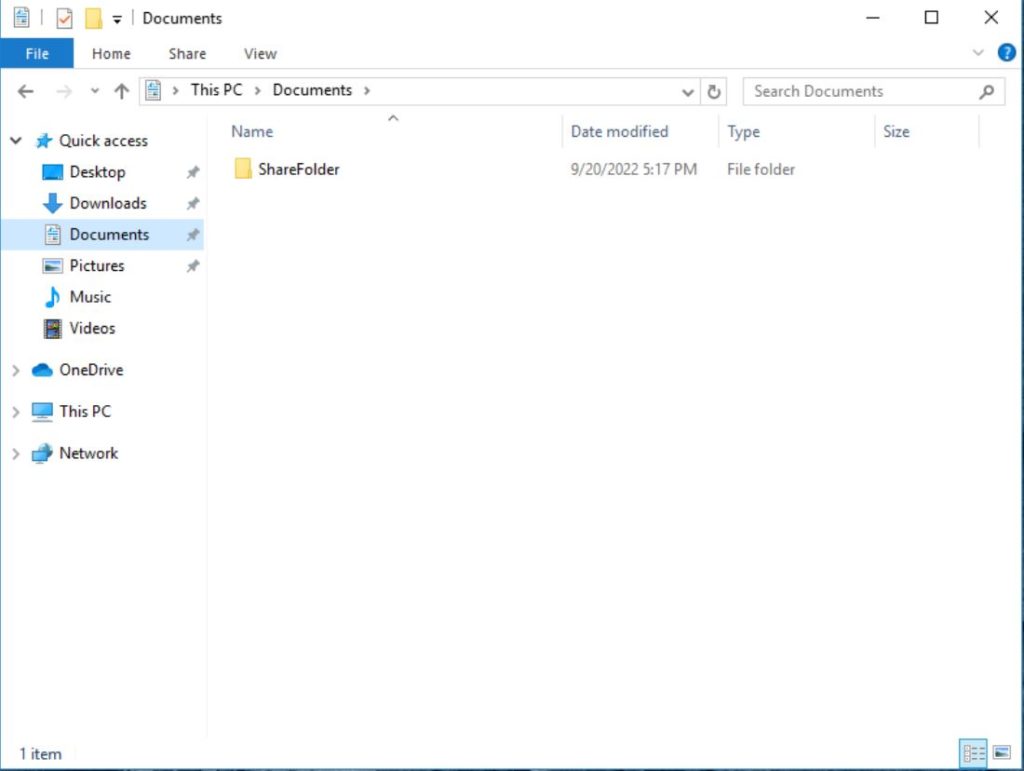
Next, you will navigate to the folder you are trying to share. If you are sharing a full hard drive, click on “This PC” in the left column.
Open Properties
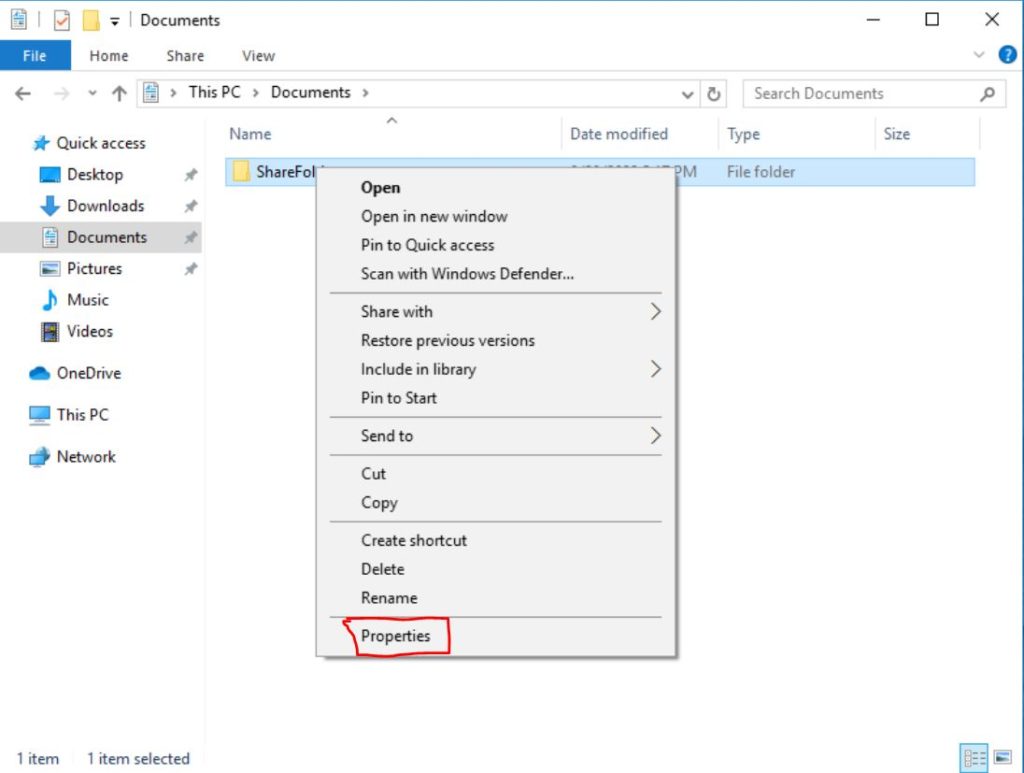
Right click on the folder or hard drive, and click on the ‘Properties’ option.
Navigate to Sharing Tab
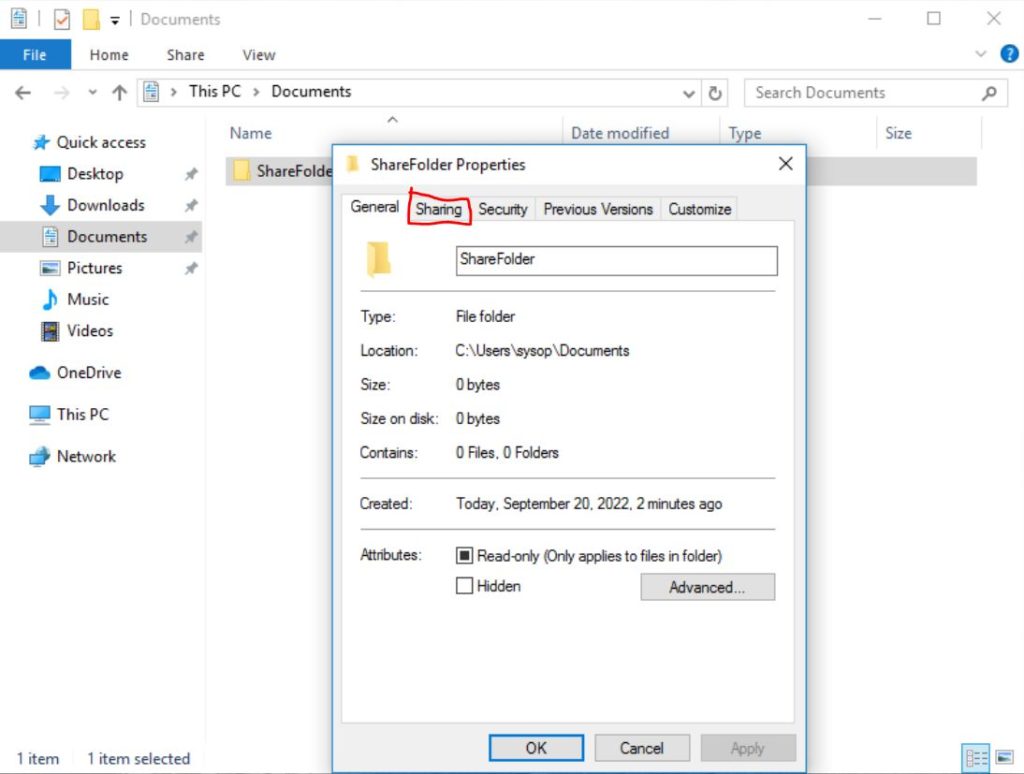
Once the folder or hard drives property tab opens, click on the ‘Sharing’ tab.
Advanced Sharing
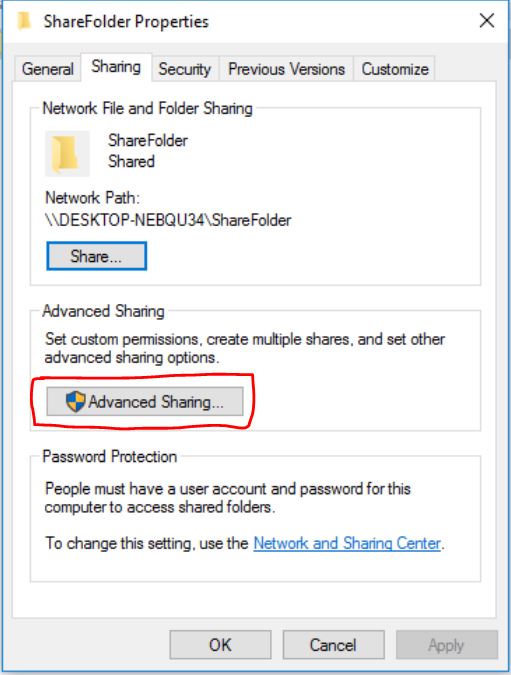
Click on the advanced sharing button.
Open Permissions Dialog
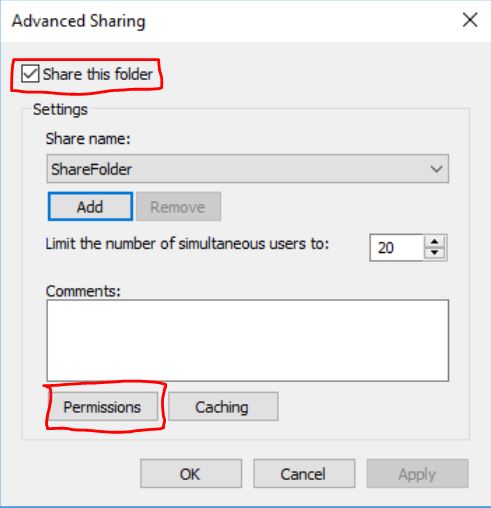
Click on the ‘Share this folder’ checkbox, then click the ‘Permissions’ button.
Set the Permissions
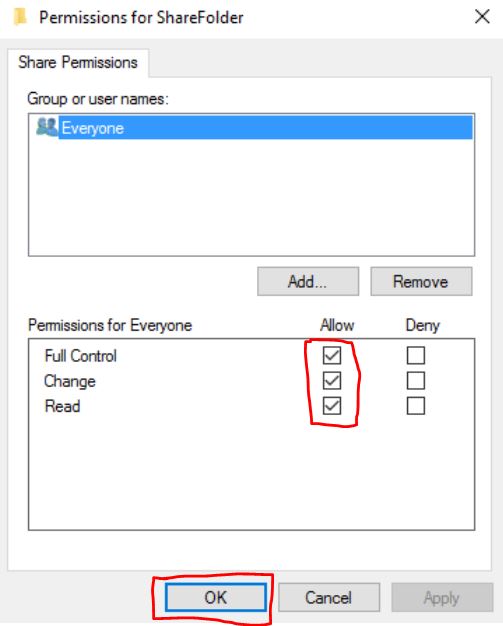
Select what file permissions either everyone accessing the folder has available, or certain users by clicking ‘Add’ and adding in new users. If you want full access to read and write files, select all of the check boxes on the left. Then click the “OK” button to continue.
Close Advanced Sharing

Click on the OK button to close the advanced sharing dialog window.
Open Share Dialog
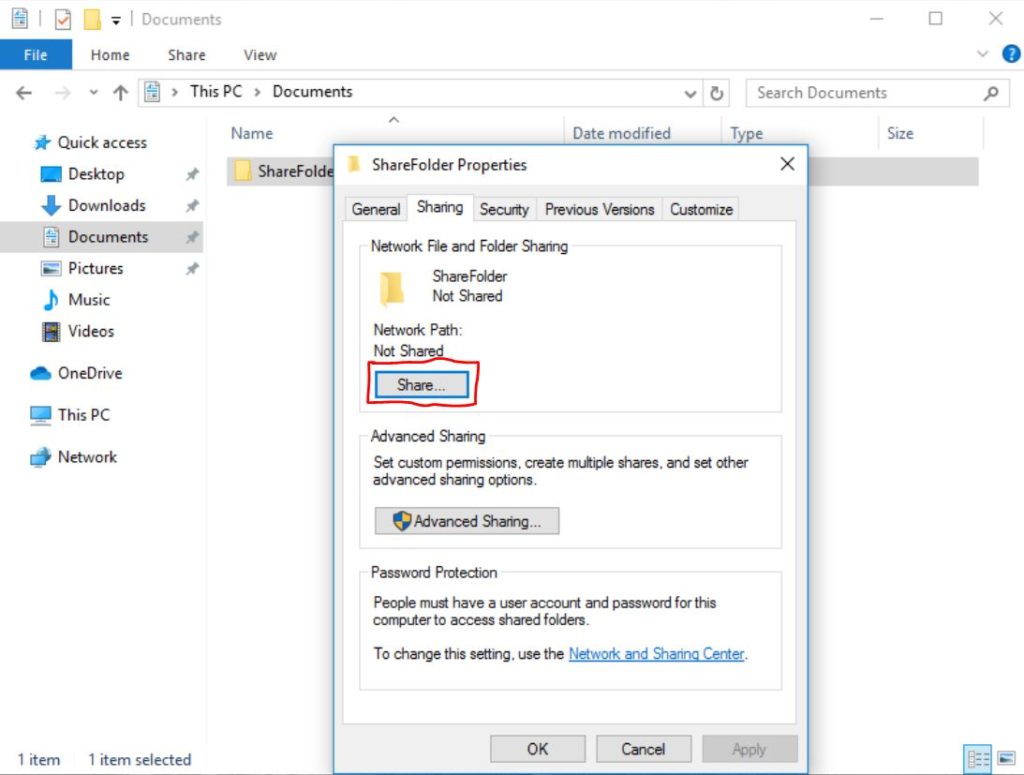
Now that you have set up the sharing permissions you need to setup the share. To begin click on the “Share…” button.
Choose User(s) to Share With
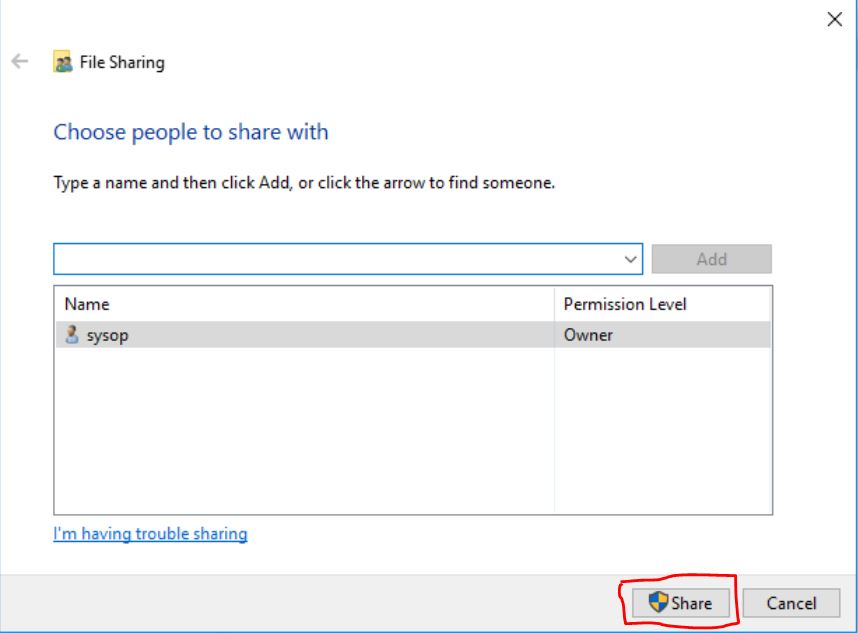
Type in the user you want to use when accessing the folder from the network. You can also add other users if you have different users you would like to have access to the folder.
Confirm Network Discovery Dialog
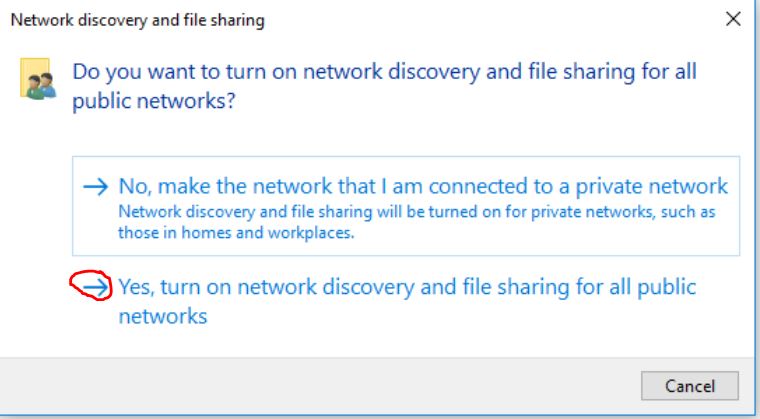
After you click “Share” you will get the above dialog. This is asking you to turn on network discovery for file sharing. You need to enable this for the network share to function. Click on “Yes” to continue.
Network Sharing Completed
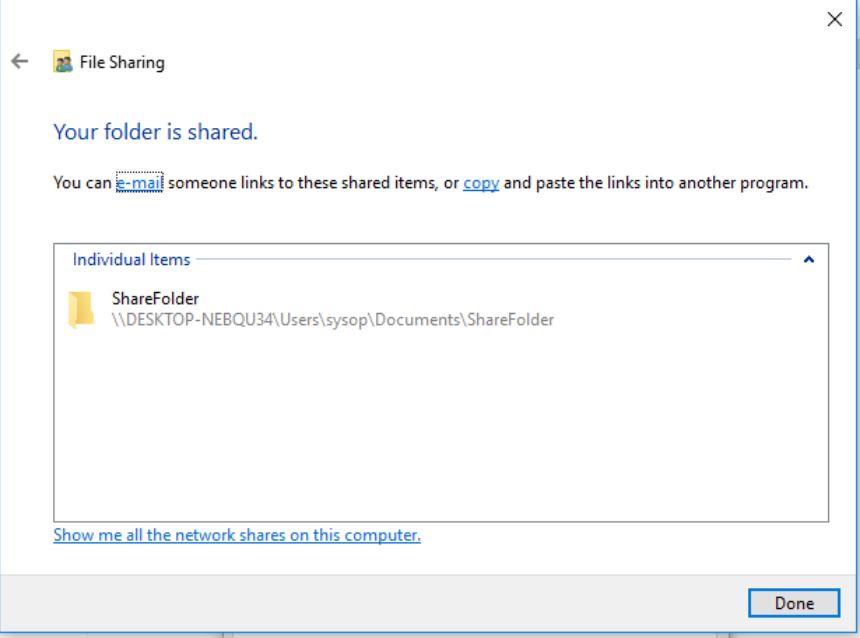
Congratulations! You have now completed all the steps towards sharing a folder within your network. You can now access it from other computers by mounting a network share or accessing it directly by typing the above link to the folder. In this case, the folder URL would be:
\\DESKTOP-NEBQU34\Users\sysop\Documents\ShareFolder
You can mount a network share on another computer by following the steps below.
Mounting a Network Share (Full Guide)
If you want an in depth tutorial on mounting network shares in Windows 10 click the link below.
How to Add a Network Location in Windows 10
Questions?
If you have any questions or comments feel free to leave them below.
Related Resources
View our How to Create a Deepfake Video Using DeepFaceLab article.
Learn How to Install Ubuntu Server 22.04 [Step by Step].
Click here to learn How to Install MySQL on Ubuntu Server 22.04 LTS.
View our How to Setup a FTP Server with FileZilla in Windows guide.
Learn How to Setup OpenSSH with Keys on Ubuntu 22.04.
View all of our available online tools and converters at Formatswap.com.
https://t.me/s/portable_1WIN