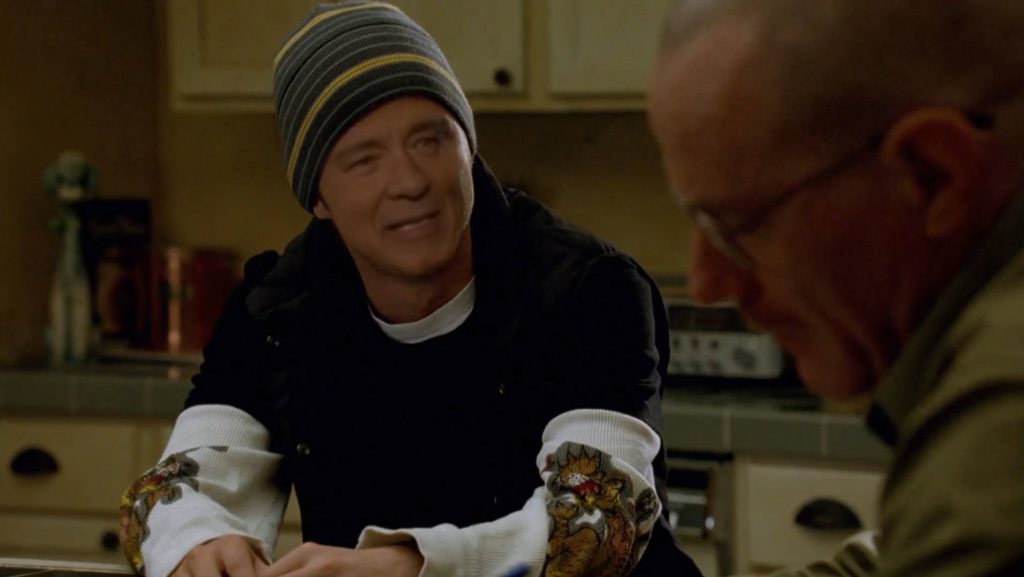
How to Create a Deepfake Video Using DeepFaceLab

deep fake cover

In this tutorial you will learn how to create a deepfake video using DeepFaceLab. This application uses machine learning to swap almost any face from a video for one that you choose. DeepFaceLab is currently the best software by far for making deepfakes. In this tutorial we will be using the Windows 10 operating system. However the steps are pretty much the same if you are using Linux. So you should be able to utilize this tutorial with either operating system. It is advised that you have a powerful GPU such as a Nvidia GTX 1060 or better for creating deepfakes. If you want the best experience possible I would recommend you use a RTX 3080 or RTX 3090 graphics card. The software will still work with a low end GPU, but it could take multiple weeks to train your model. Having a high end GPU will also allow you to render the face swaps in a higher resolution. To learn how to create a deepfake continue reading below.

Download DeepFaceLab

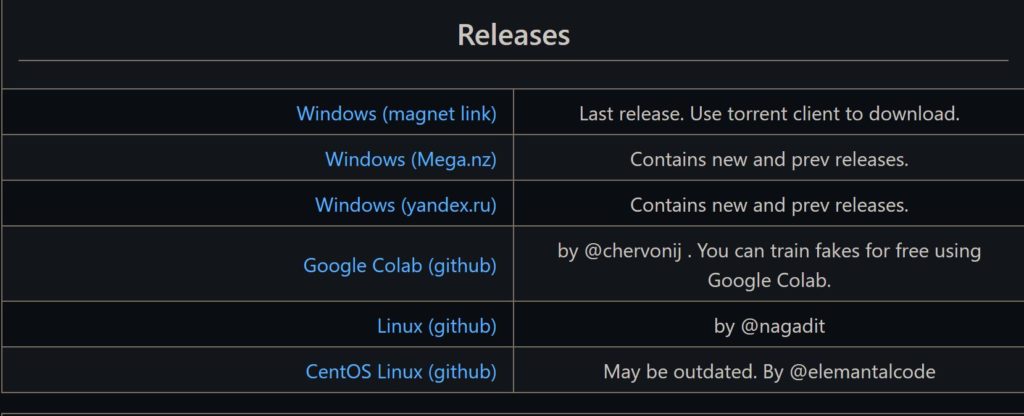
The first step is to download the latest version of DeepFaceLab. You can do so by going to the DeepFaceLab Github page and scrolling down to releases. Click on the Windows (Mega.nz) link to download the correct release for your graphics card. If you are installing in Linux you will have to follow the instructions provided on the Linux (github) page.
deepfacelab releases

Choose Version

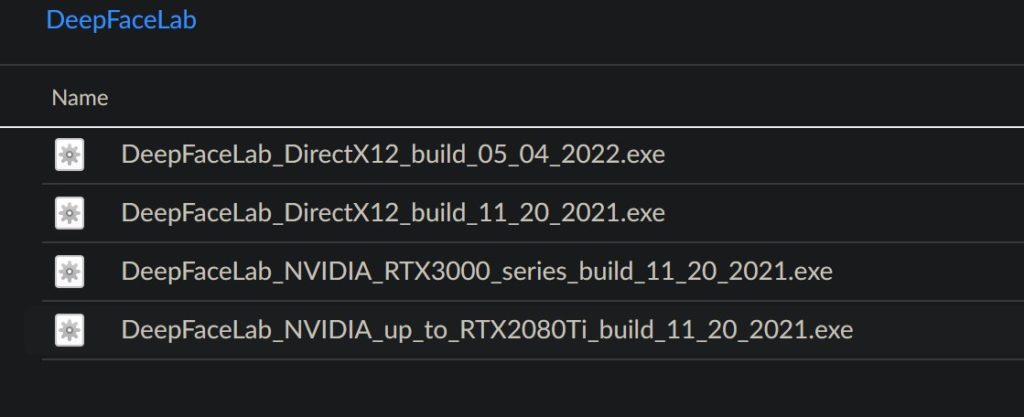
After navigating to the Mega.nz download link you will need to select a version of DeepFaceLab. This is based on which graphics card you have installed. In this tutorial I am using a GTX 1080 so I will download “DeepFaceLab_NVIDIA_up_to_RTX2080Ti_build_11_20_2021.exe”. Choose the version that is correct for your system.
deepfacelab choose version to download

Open the Workspace

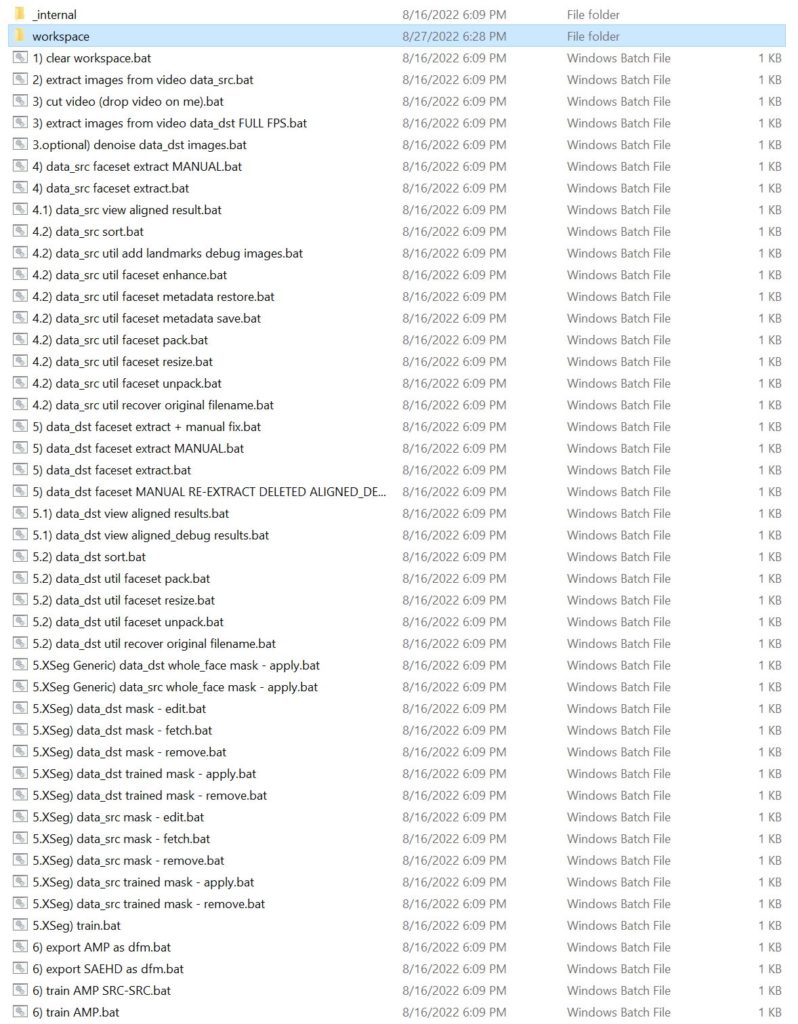
After downloading the application, extract the zip file and open the folder. Your folder should look similar to this.
open the workspace

Collect source videos

This is by far the most important step of getting a good result from the process. You need to select a video of your source (persons face you want to copy). As well as a destination video (where you want your source face copied to). You want to find a clip for each that is 5-10 minutes long with multiple angles of the faces. A good source for these videos are interviews on YouTube. Below are the two videos I am going to use. After you download the videos rename the source video to “data_src.mp4” and the destination video to “data_dst.mp4”. Then move both MP4 files into the “workspace” folder.

Source face:

Destination Face:

Extract images from source video
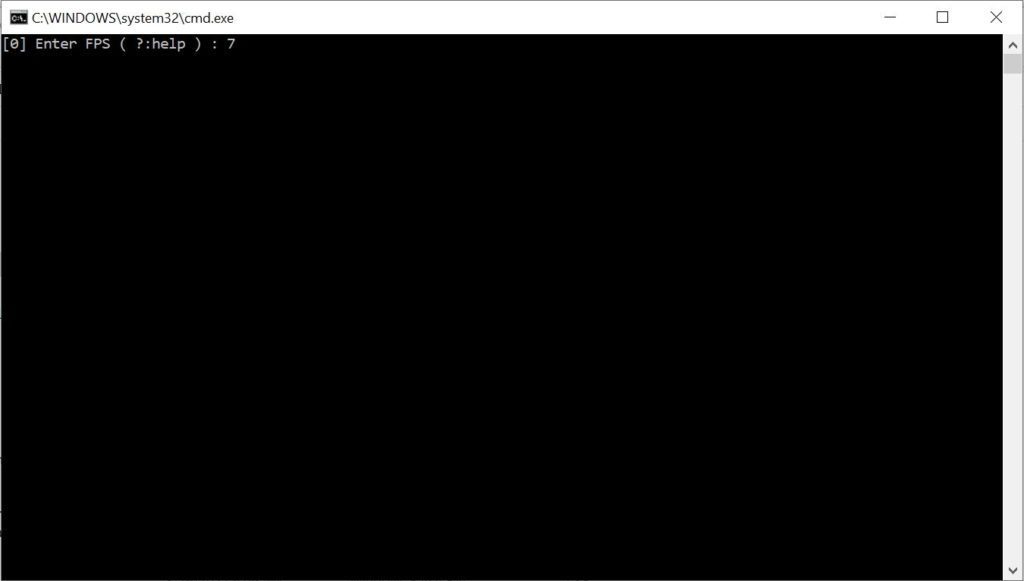
step 1 enter src fps

To start we will need to extract the image frames from the source video. Double click on “2) extract images from video data_src.bat”, you will then see the above window open. Type in 7 or 8 and press “Enter”.
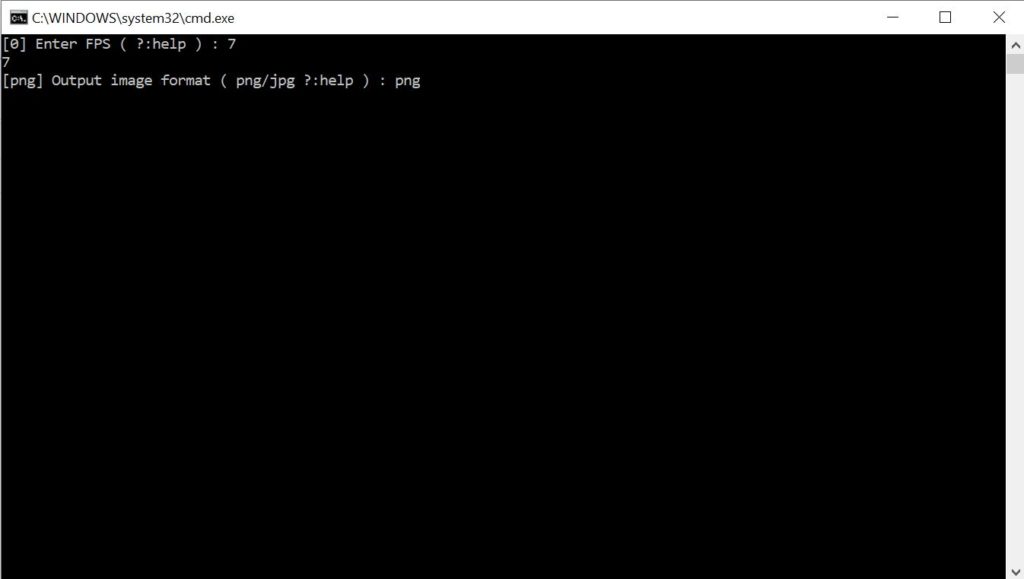
enter source output format

Next type in “png” and press “Enter”.
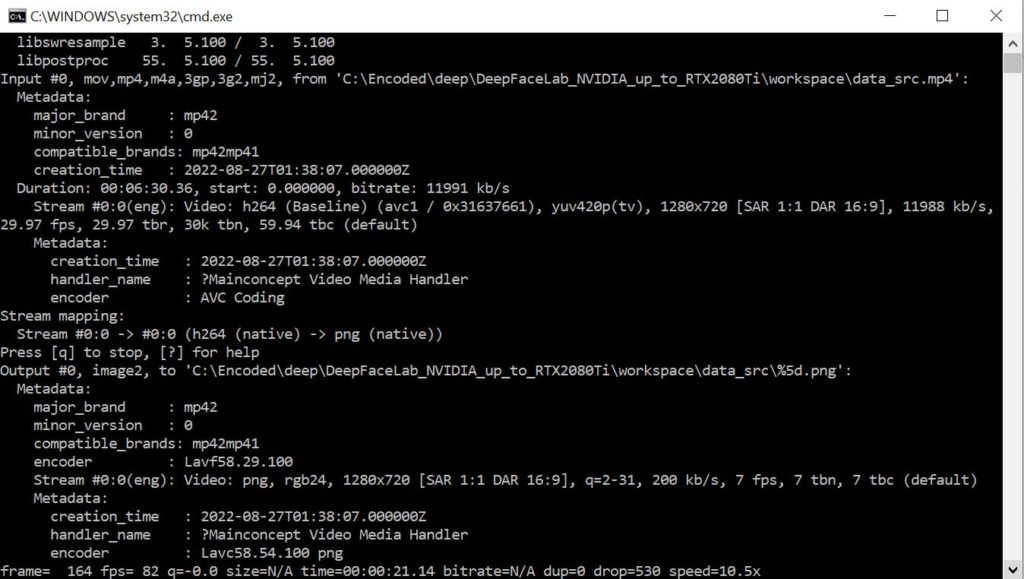
wait for source images to extract

Wait for the extraction process to complete.
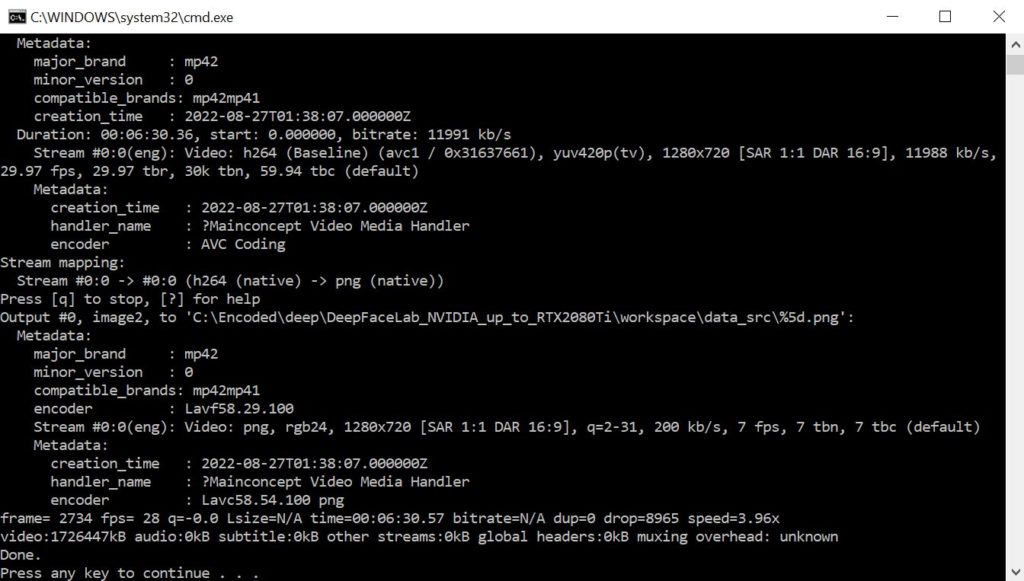
source extraction complete

Once you see this screen the process is complete and you can close the window.

Extract images from destination video
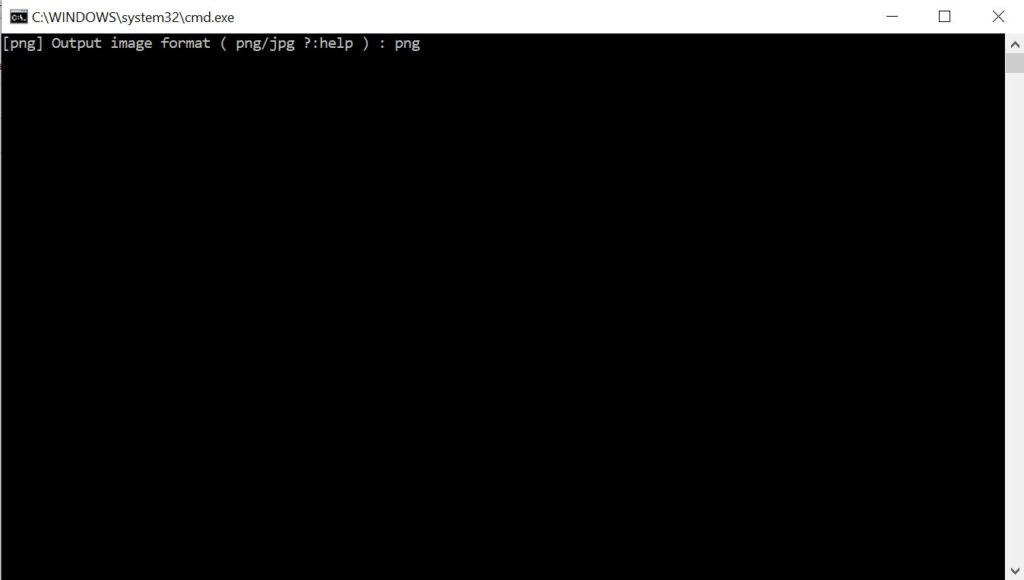
select destination output image format

Next you need to extract every frame from the destination video as an image. Double click on “3) extract images from video data_dst FULL FPS.bat”. You will see the above window open. Type in “png” and press “Enter”.
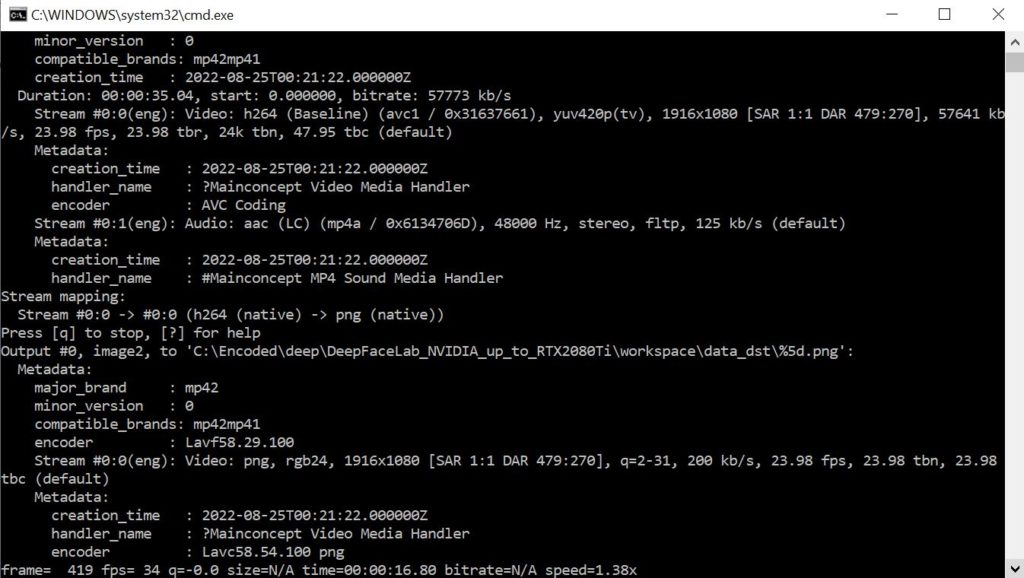
wait for images to extract destination

Wait for all of the destination images to be extracted.
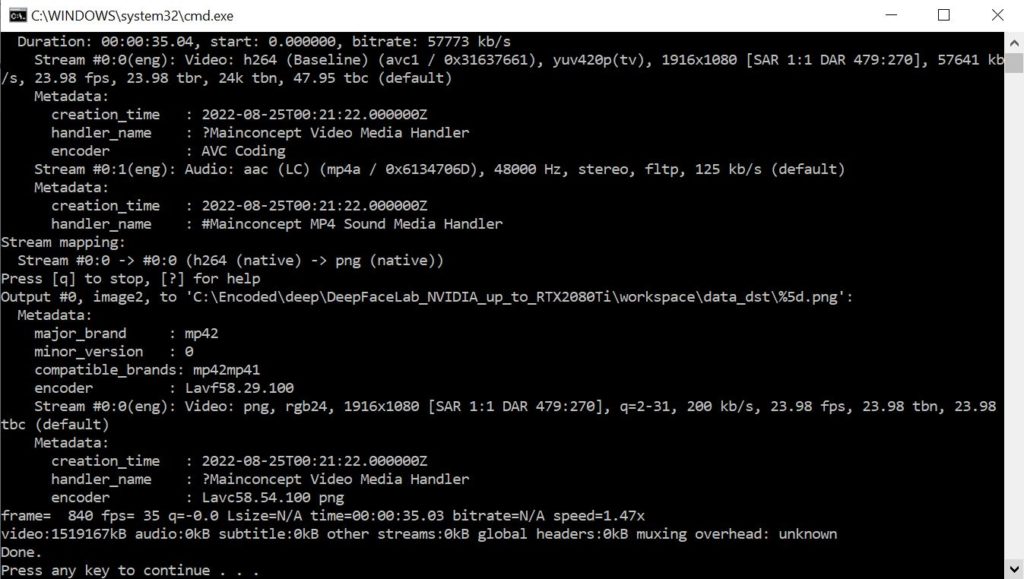
destination image extract complete

Once you see this screen the process is complete and you can close the window.

Extract the source video’s faceset
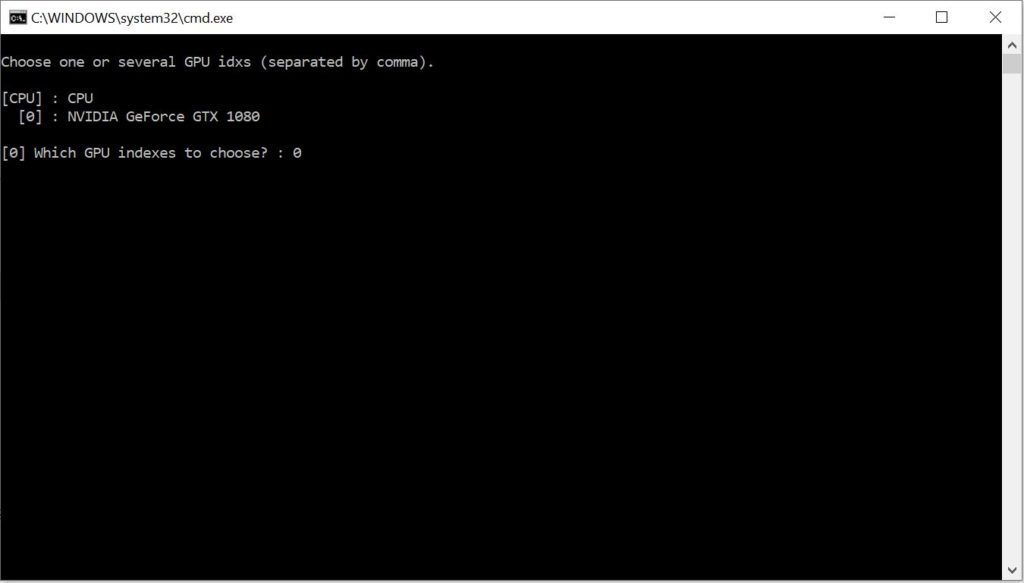
select gpu source video face extract

Next you will need to extract the source video’s faceset images. To begin double click on “4) data_src faceset extract.bat”. It will open the window you see above. Select your GPU device and press “Enter”.
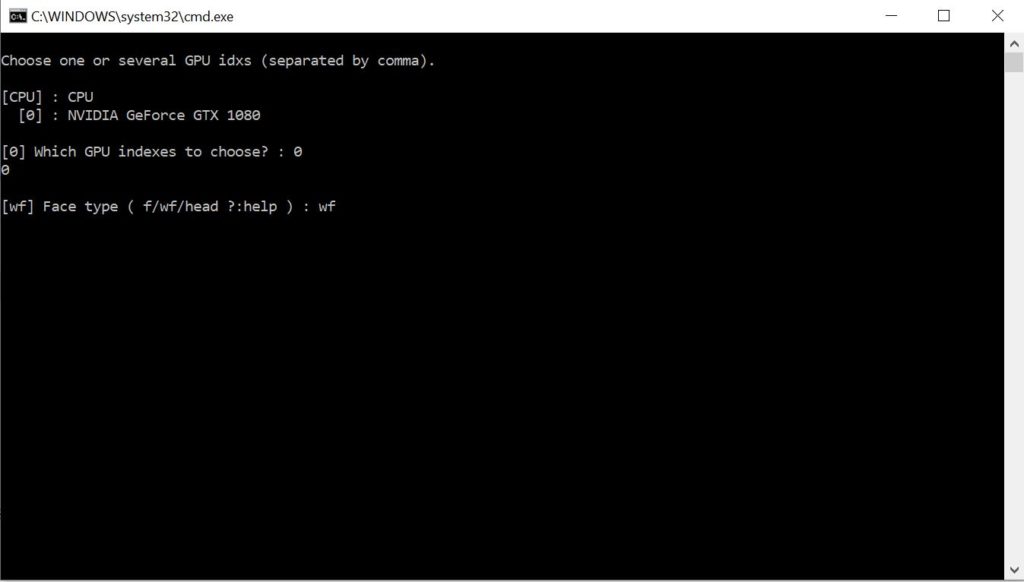
select face extract type source

Afterwards you will be asked which face type to use. Type in the default option “wf” (whole face) and press “Enter”.
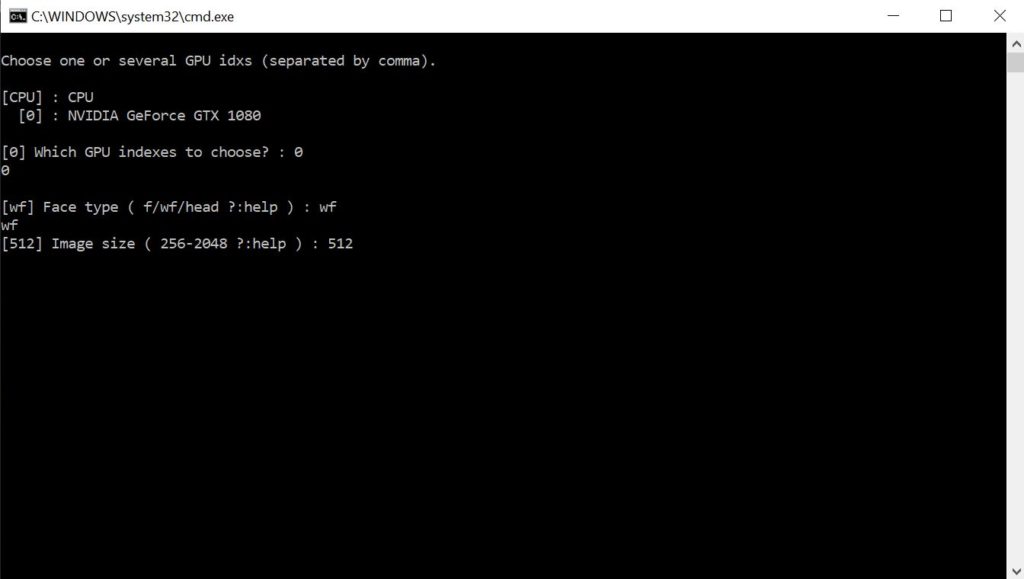
extracted source face image size

Then you will select the faces image size. Type in “512” and press “Enter”.
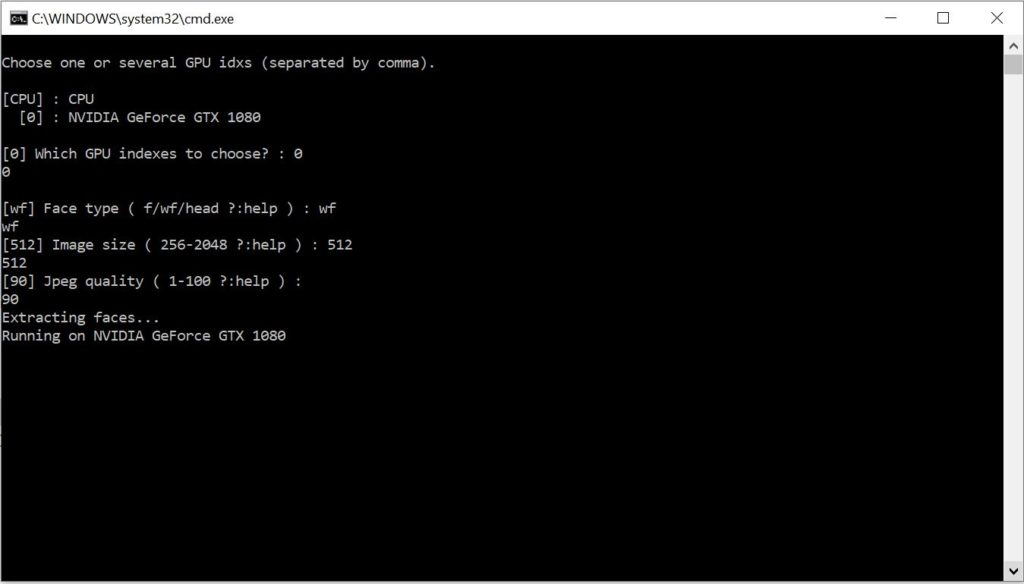
extracted source face jpeg quality

Next set the jpeg quality to “90”. Once you press “Enter” the face extraction process will start.
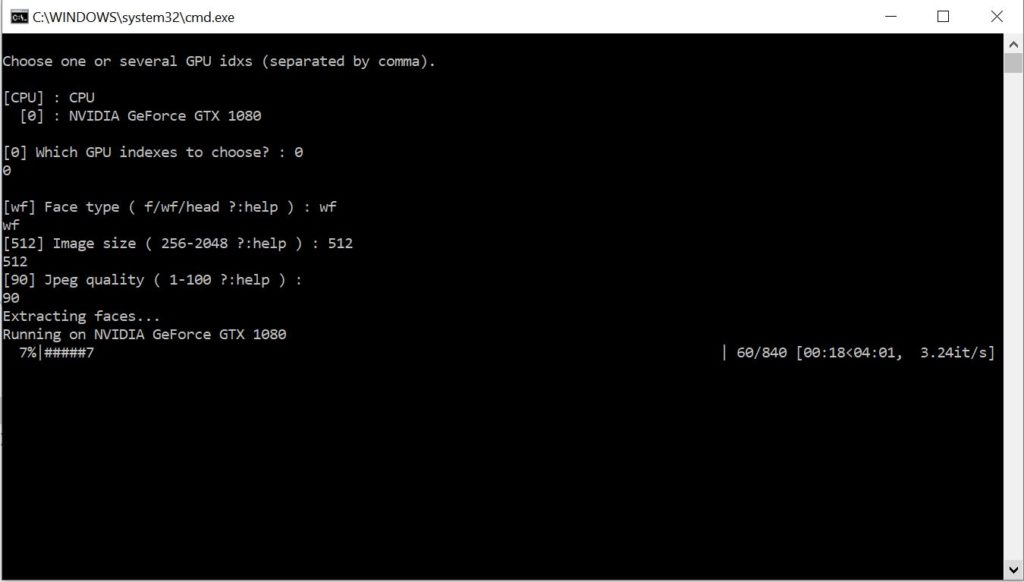
wait for source faces to extract

Wait for the extraction process to complete.
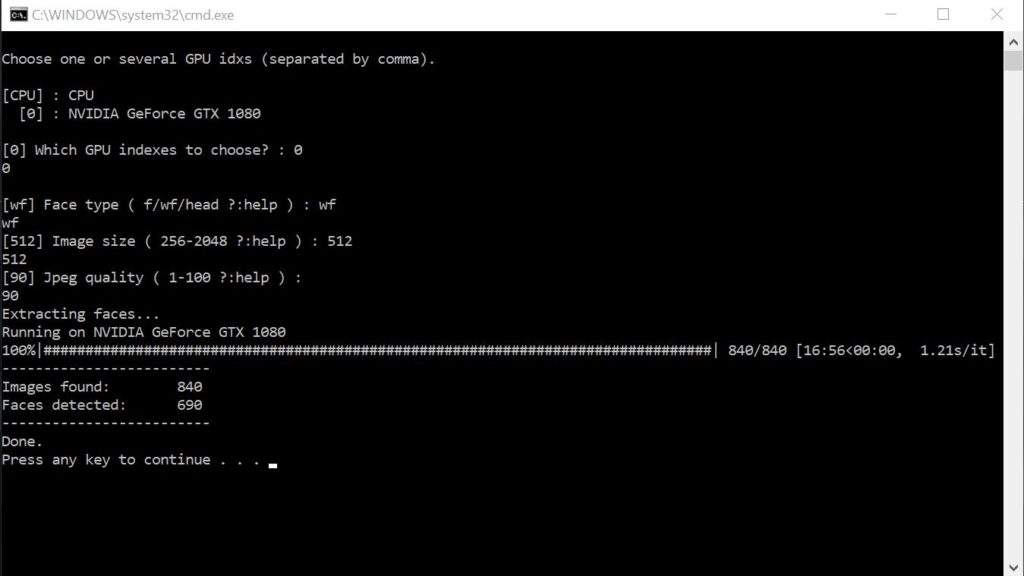
source video face extraction complete

You will see this screen once the source face extraction is complete. Press “any key” to exit and close the window.

Extract the destination video’s faceset

select gpu source video face extract

The destination video face extraction process will be similar to the source extraction. To begin double click on “5) data_dst faceset extract.bat”. Once the window opens, select the GPU device and press “Enter”.

select face extract type source

Type in “wf” and press “Enter” to use the whole face.

extracted source face image size

Set the face image size to “512” then press “Enter” to continue.

extracted source face jpeg quality

Finally set the jpeg quality to “90” and press “Enter”.

wait for source faces to extract

Wait for the destination face extraction process to complete.

source video face extraction complete

At completion you will see this screen. You can press “any key” to save and exit. At this point you have both of your videos faces extracted and ready for use in the deepfake video.

Sort the source and destination faceset’s
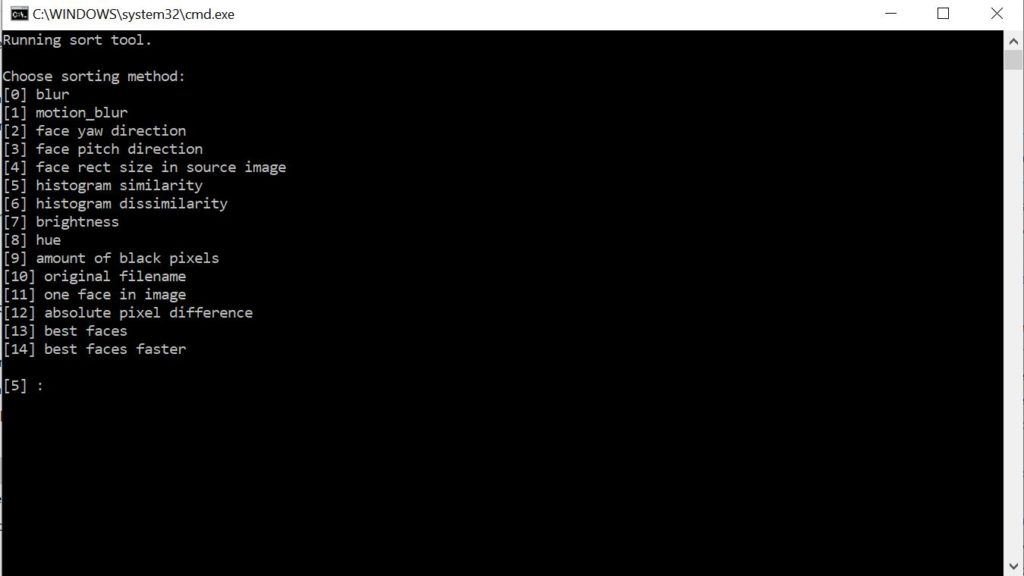
run the sorting tool

In this step we will be sorting the faces by similarity to make it easier to remove blurry and unwanted faces. To sort the source faces double click on “4.2) data_src sort.bat”. You will see the above screen. Type in “5” and press “Enter”.
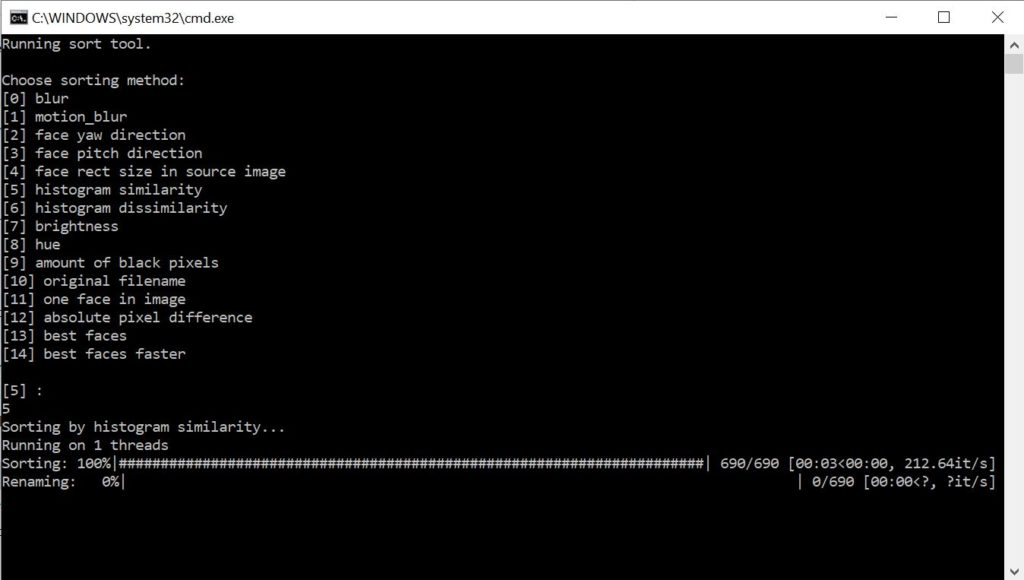
wait for sort tool

Wait for the sorting process to complete.
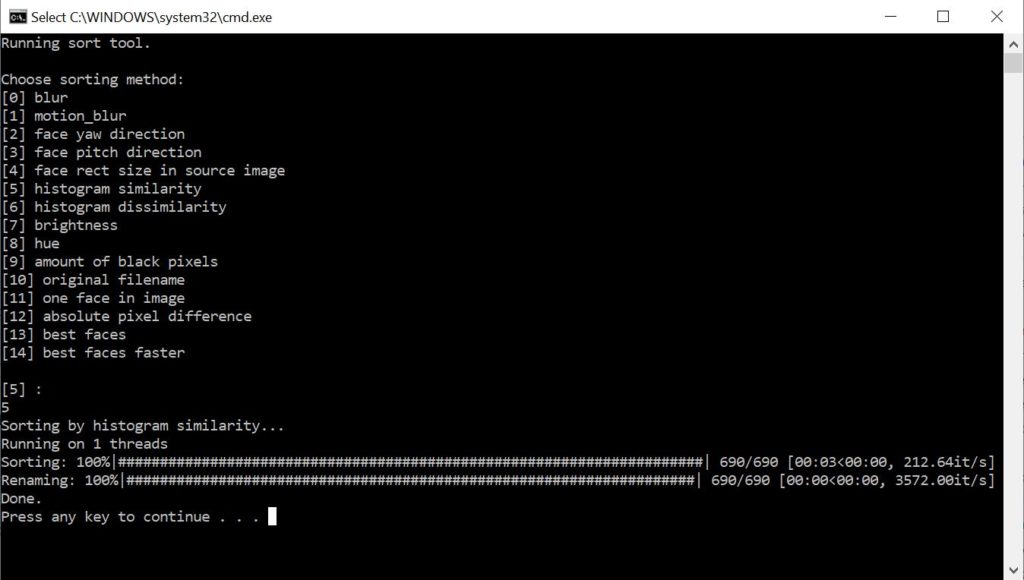
sort tool complete

The source faces are now sorting by similarity. You now need to sort the destination faces. Double click on “5.2) data_dst sort.bat”. After the terminal window opens repeat the same steps above that you used to sort the source face.

Remove unwanted face images
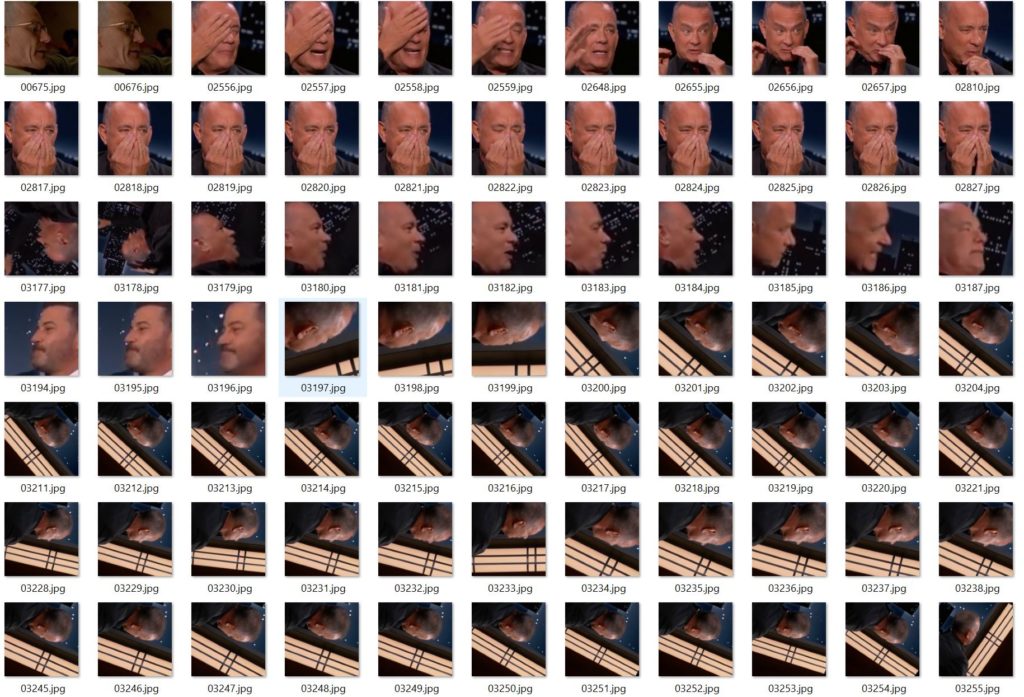
bad faces examples

This is the last step before beginning to train the model. It is very important to complete this step to obtain a good result. Open the “workspace” folder and navigate to the “data_src” folder. Finally open the “aligned” folder and delete all images that do not contain a face, are blurry, or have hands in front of the face. After you complete this step, repeat the same by navigating to the “data_dst” then the “aligned” folder. Above are some examples of bad photos that I would remove. Use your best judgement when deciding which photos to remove.

Train the deepfake model
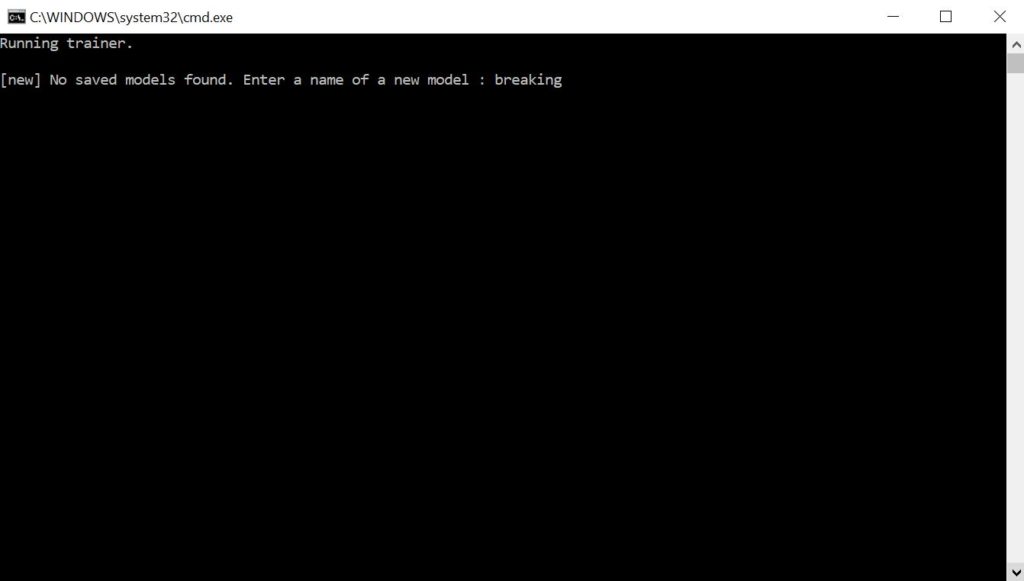
set model name

Now you will need to train the model. There are a few training batch files to choose from. If you are new to making deepfakes I would recommend the Quick96 model. To get started double click on “6) train Quick96.bat”.
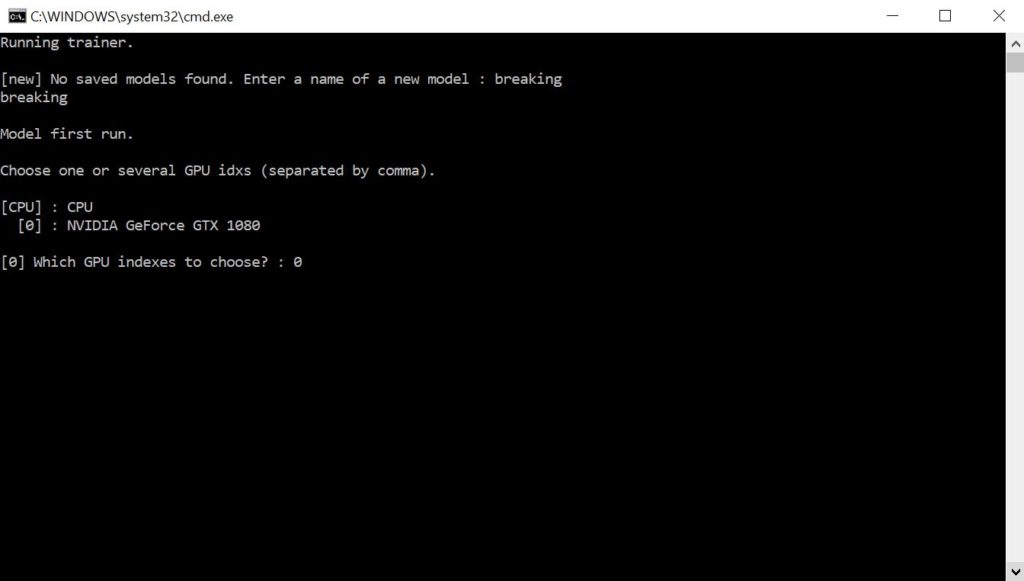
select gpu for training

Select the GPU device to use for training. If you have multiple GPU’s you will see them here. Unfortunately you are currently only able to use one GPU at a time. Once you press “Enter” the model training will begin. Now you will need to wait for the model to train. Within 24 hours you should start to see the faces in the preview window. I recommend you train the model for at least 7 days to get high quality results. If you need to use your computer for something else you can press “CTRL+C” to save and exit. The next time you open the Quick86 trainer it will resume from the last saved iteration.
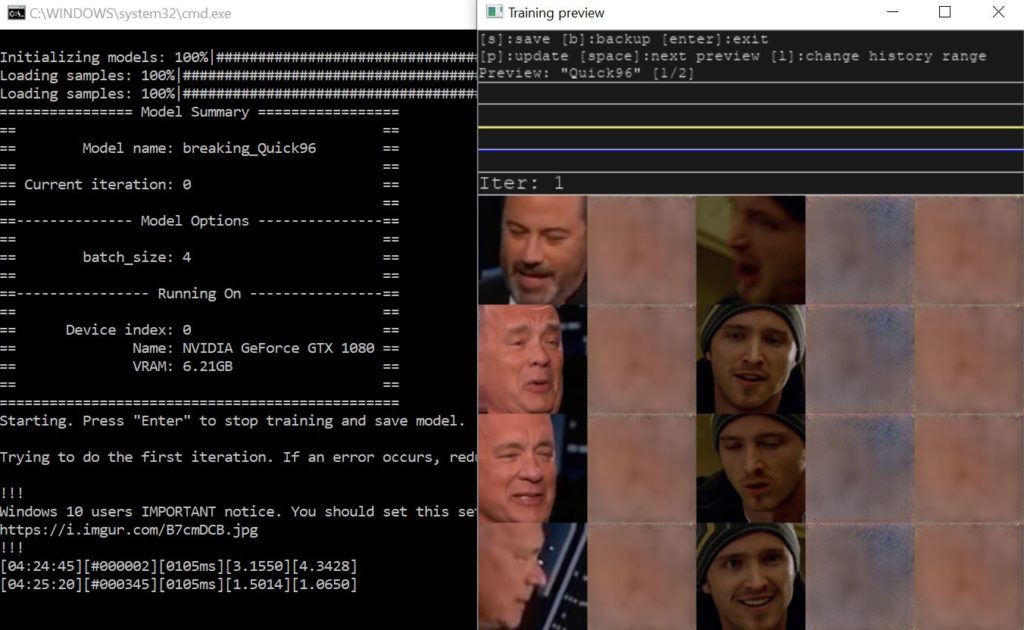
train it 1

Preview at 1 iteration.

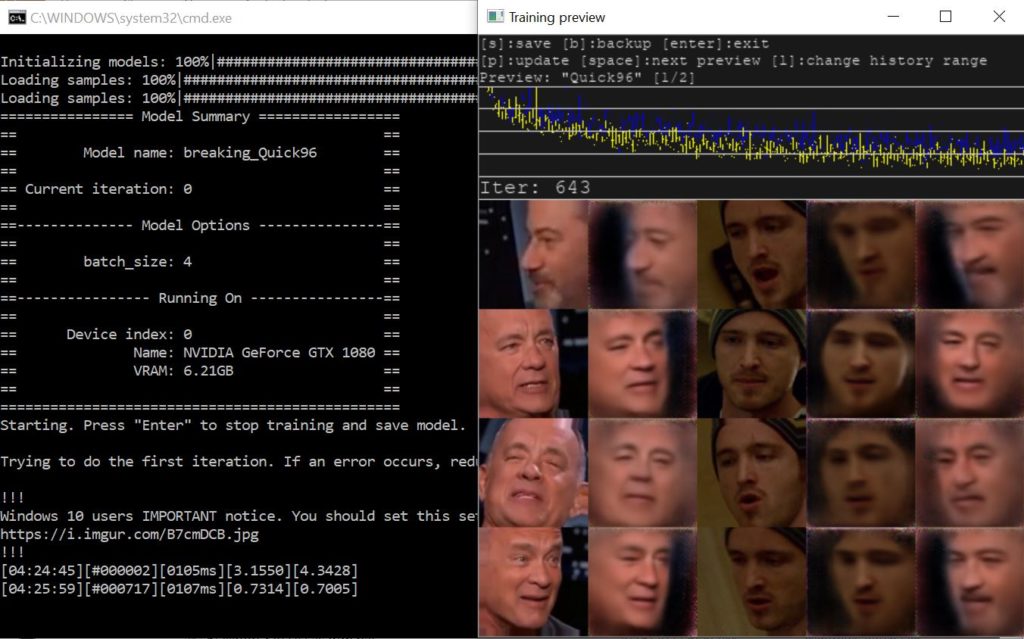
train it 650

Preview at 643 iterations.

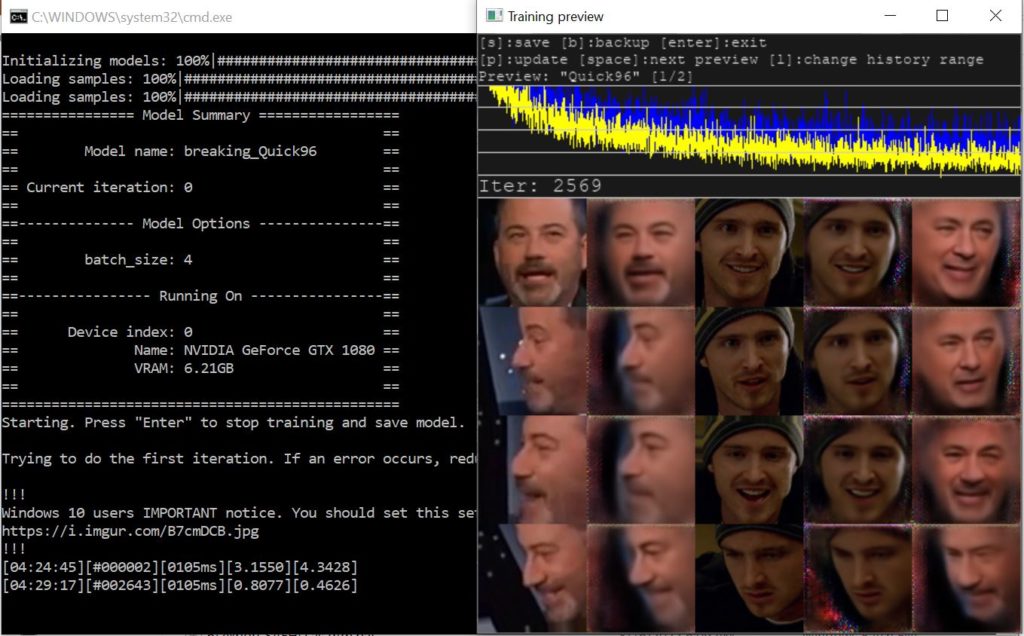
train it 2500

Preview at 2,569 iterations.

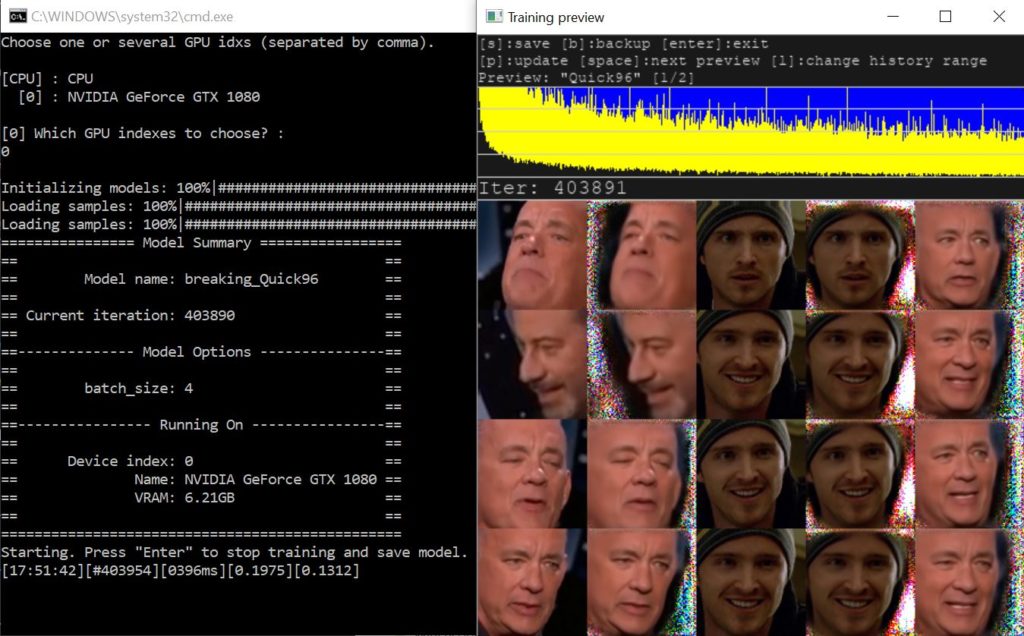
train it 400000

Preview at 403,891 iterations.

Merge the deepfake video
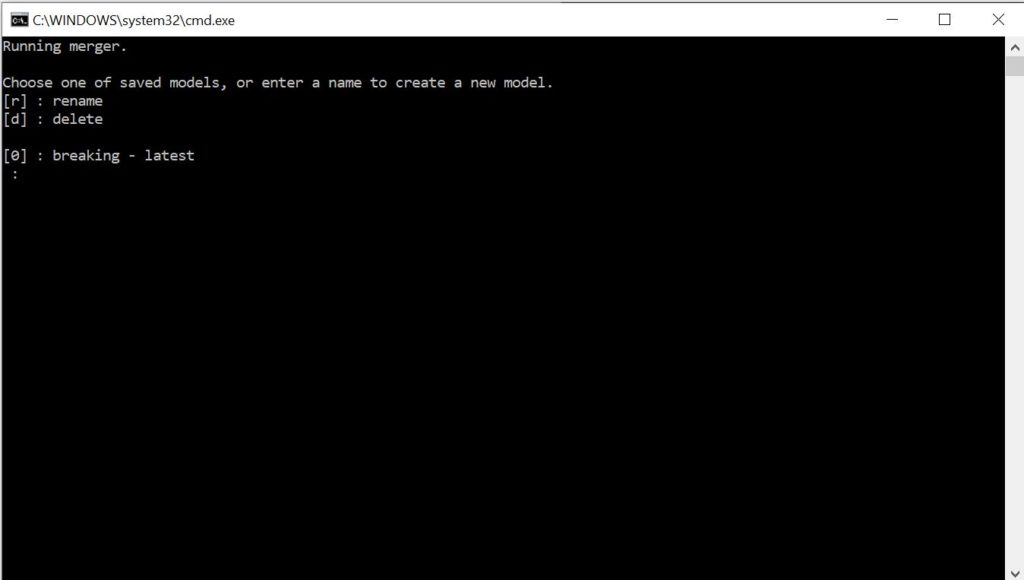
select model

Next you will need to merge the faces into each frame of the video. This replaces the destination face with the source face for each frame. The merging process will also allow you to adjust the blur, erode mask, and color matching profile. This will allow you to get a more realistic final result. “Double click on “7) merge Quick96.bat”. Then type “0” and press “Enter” to load the model.
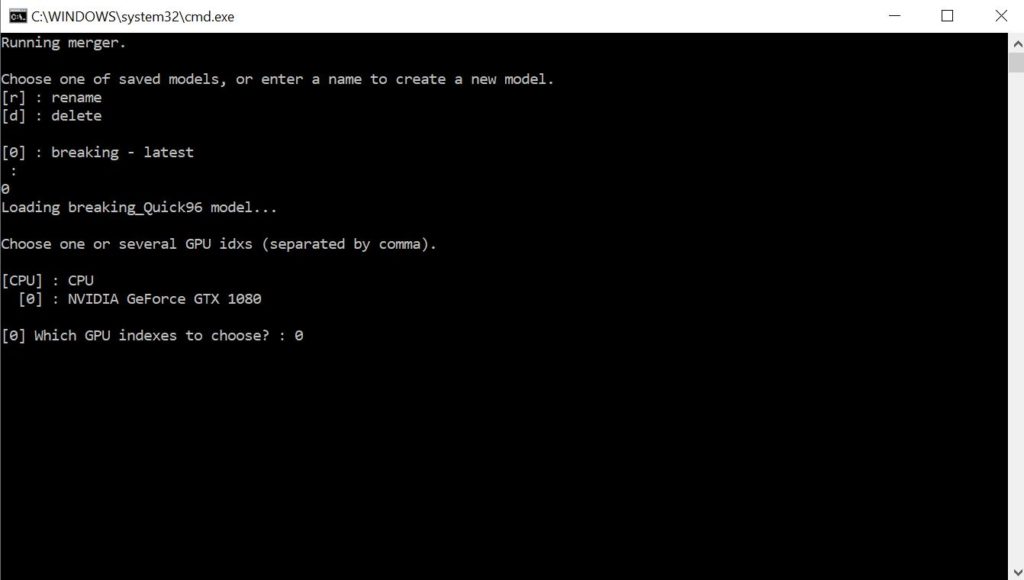
select gpu

Select the GPU device to use for the merging process.
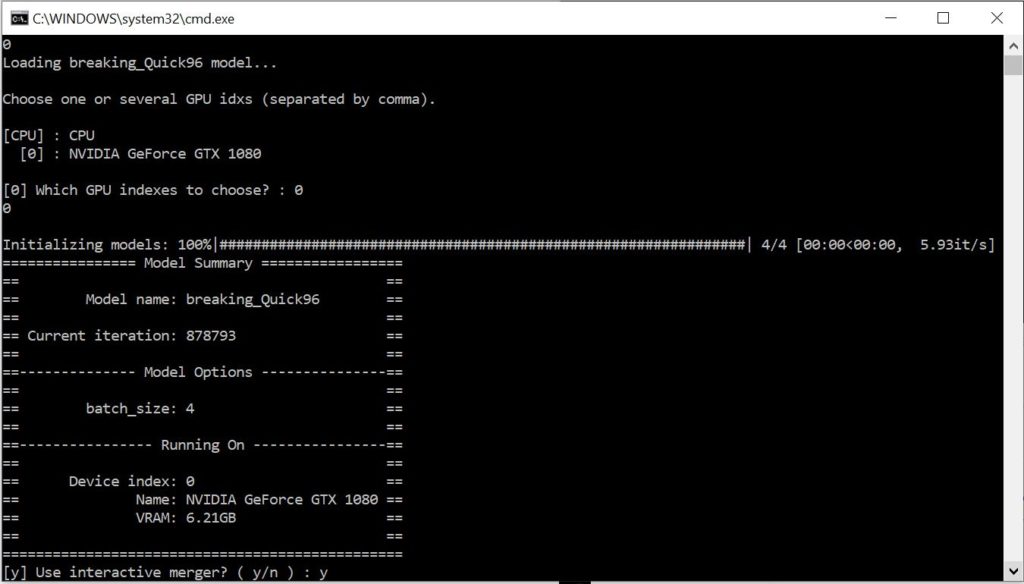
use interactive merger

Type “y” and press “Enter” to use the interactive merger tool. The interactive merger allows you to visualize the changes you are making.
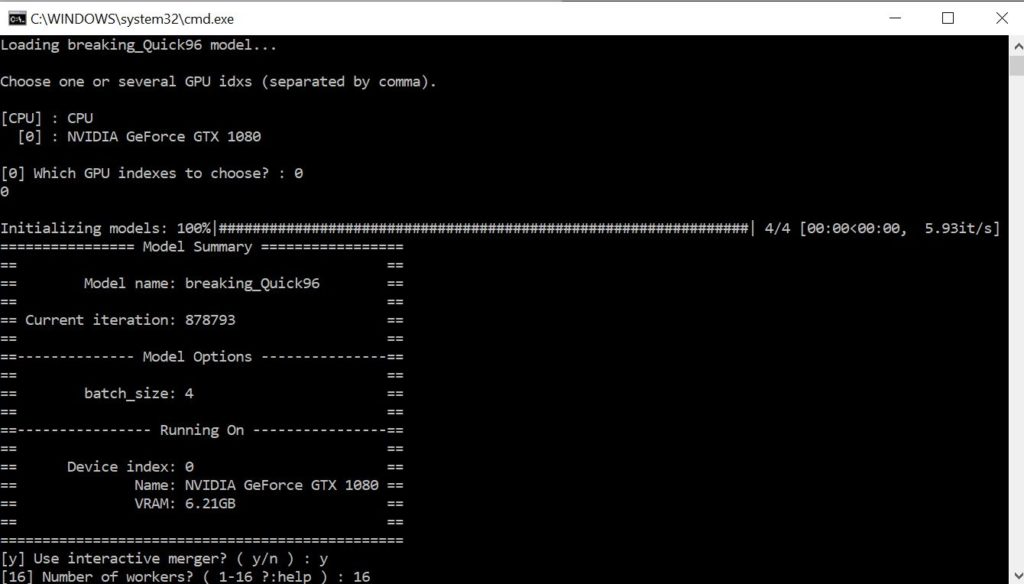
select amount of workers

Set the number of workers to “16” and press “Enter”. If you have any issues with the interactive merger opening you should reduce the number of workers.
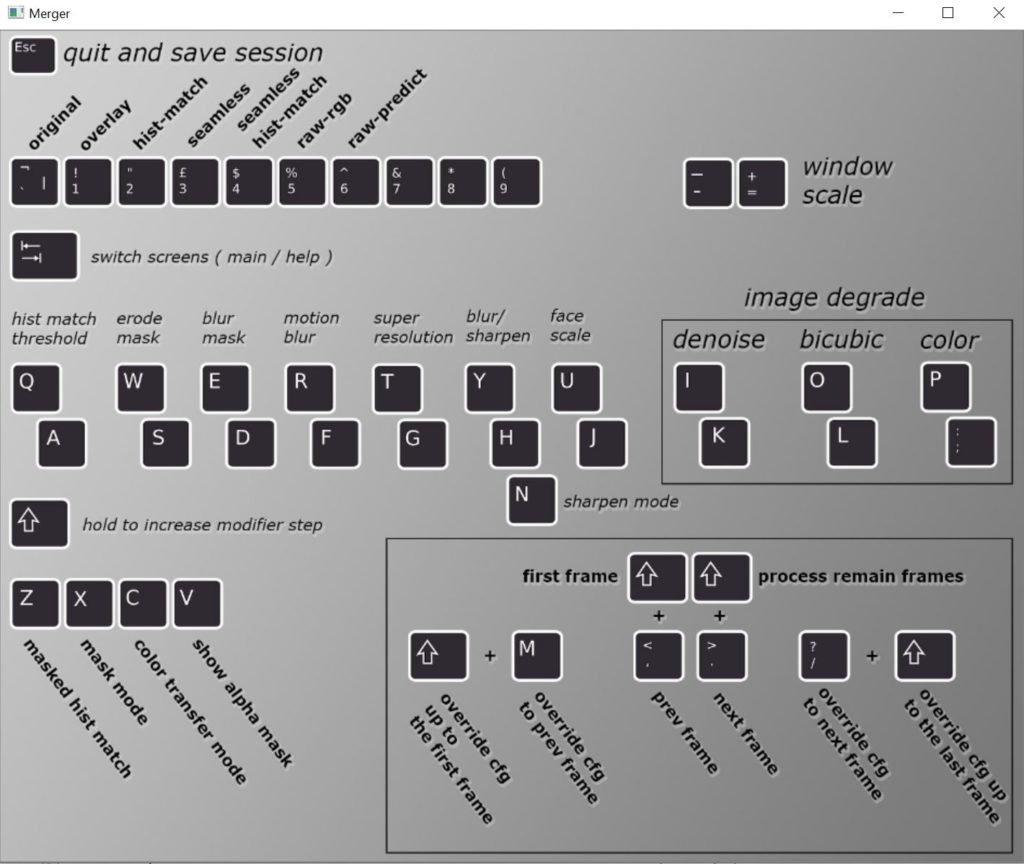
controls

The above screen will open. These are the different shortcut keys for the merge tool. You are able to adjust many parameters, but we will be changing just a few of them. To begin click anywhere in the gray box and press “Tab”.
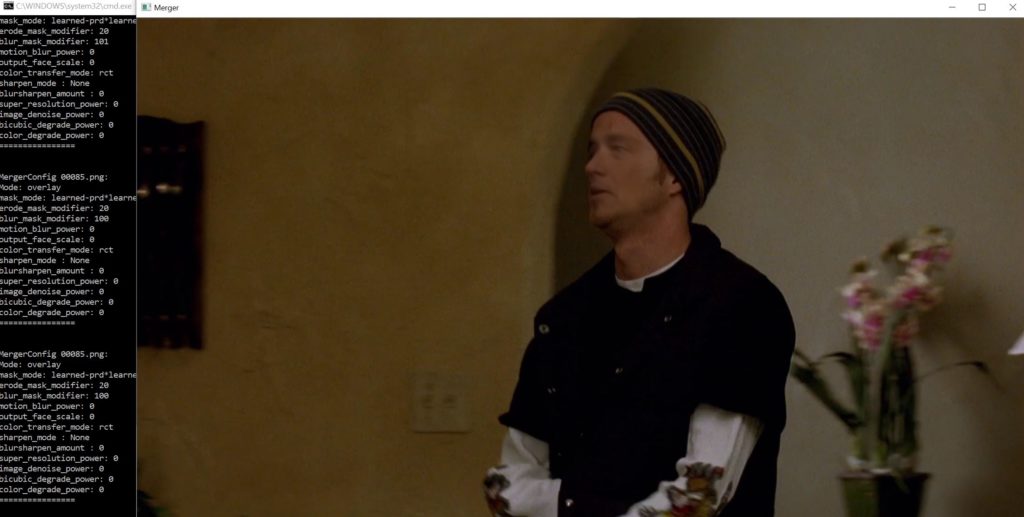
set erode and blur

You will then see the videos first frame as well as different values in the terminal. If you just see a black screen use the less than symbol “>” until you get to the first frame to show the face. Now you will have to change the erode_mask_modifier as well as the blur_mask modifier. This will help the face seem more realistic during scenes with heavy movement. To do this press the “W” key 20 times. Then press the “E” key 100 times. After doing this your values will be set. To start the merge press shift plus forward slash “SHIFT+/”, then press shift plus the less than key “SHIFT+>”.
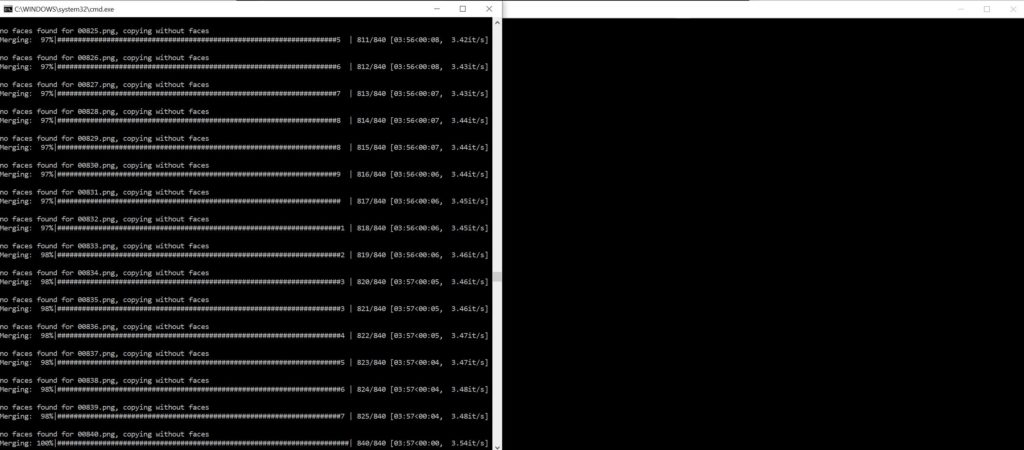
wait until merge is 100%

You will see the “merging” progress bar fill up. Once it gets to 100% the merge is complete.
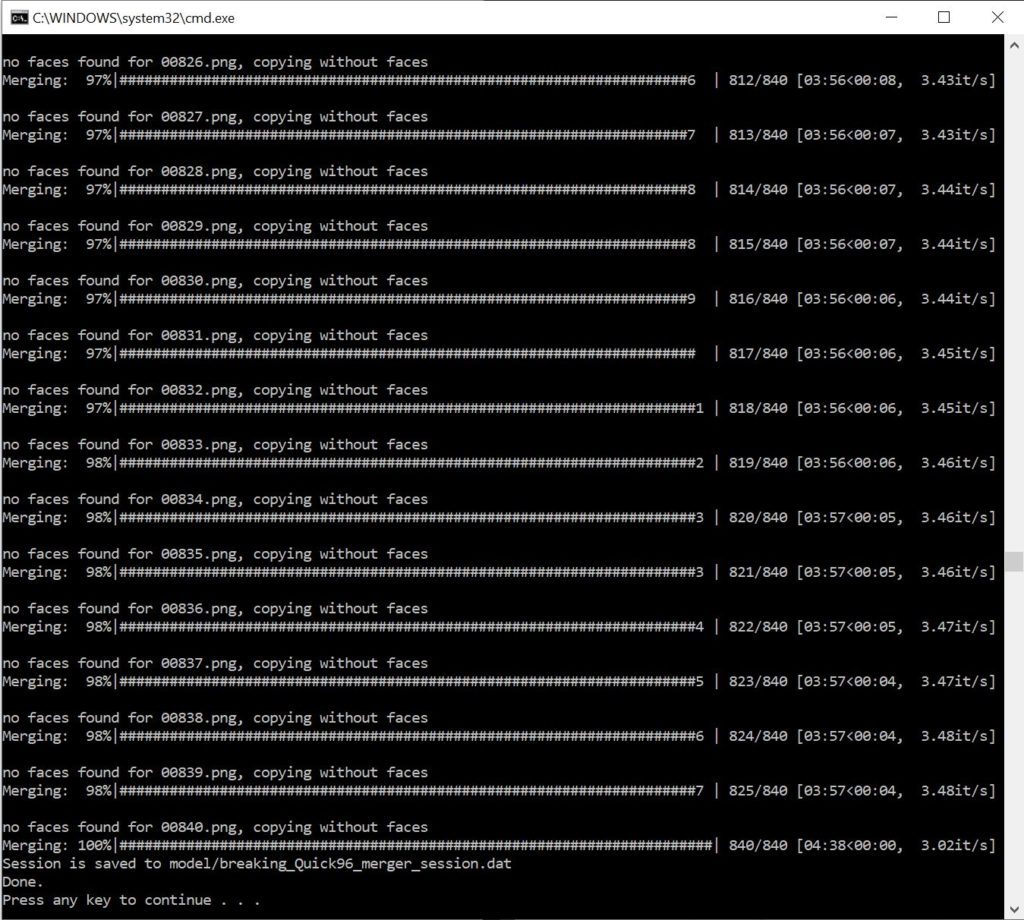
press esc to save

After the video has finished merging click on the video output window and press “Escape” to save and close the merge.

Export the video file
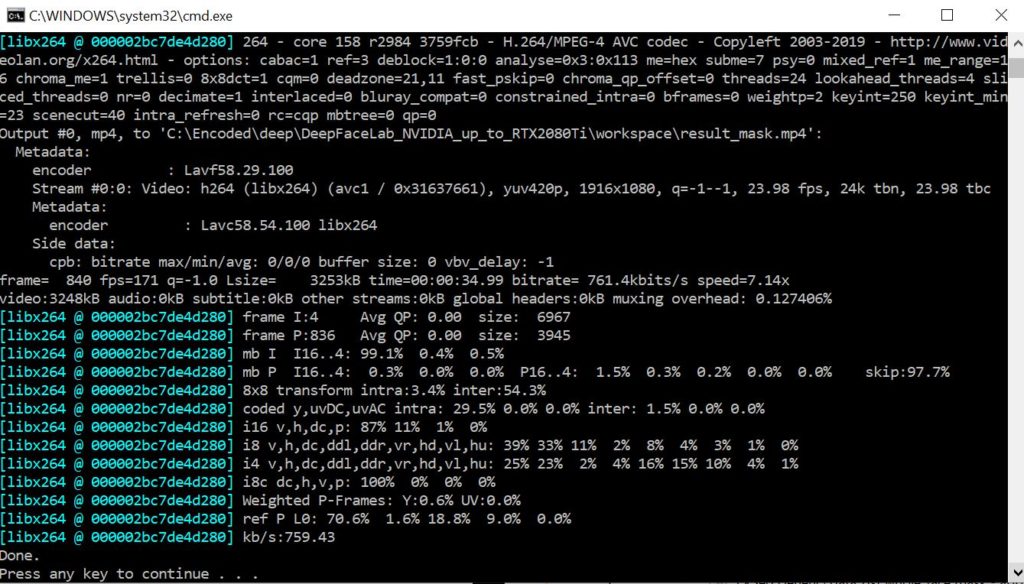
export deepfake mp4

The final step is to export the video as a MP4 file. Double click on “8) merged to mp4 lossless.bat” to begin the process. Once you see the above screen you have completed the deepfake tutorial. Navigate to “workspace” to find your video file. It will be saved as “result.mp4”.

This is the result of the process after training for 1,000,000 iterations. If you want a better result you can train for longer, use a RTX 3090 graphics card, and or provide more source video material to improve the models quality.

Questions?

If you have any questions or comments feel free to leave them below.

Related Resources

View our Deep Learning Image Style Transfer Tutorial Using Neural Style Pt.

Check our our The Best Mechanical Gaming Keyboards to Purchase in 2023 article.

Learn How to Install Ubuntu Server 22.04 [Step by Step].

Click here to learn How to Install MySQL on Ubuntu Server 22.04 LTS.

View our other Machine Learning Tutorials.

Learn How to Mount an SMB (Samba) Share in Linux with cifs-utils.

View all of our available online tools and converters at Formatswap.com.

Affiliate Disclaimer:

This website may contain affiliate links. This means we may receive a small commission if you purchase through our links. However, this does not impact our reviews and comparisons, as we only promote products we personally believe in. We are independently owned and the opinions expressed here are our own.
Deep Learning Image Style Transfer Tutorial Using Neural Style Pt

In this tutorial you will learn how to transfer the style of one image onto the content of another. This program uses deep learning with python. The project uses an algorithm based on a convolutional neural network. Style any image using machine learning image processing. We will be using Ubuntu 20.04 for this tutorial. Almost any Linux distribution should work.

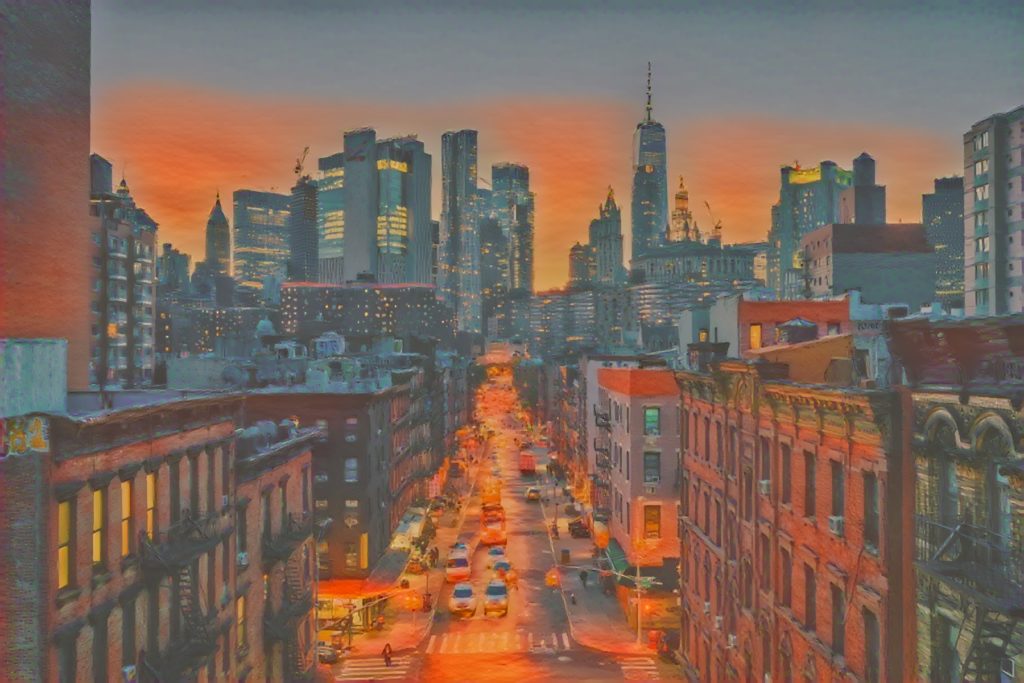
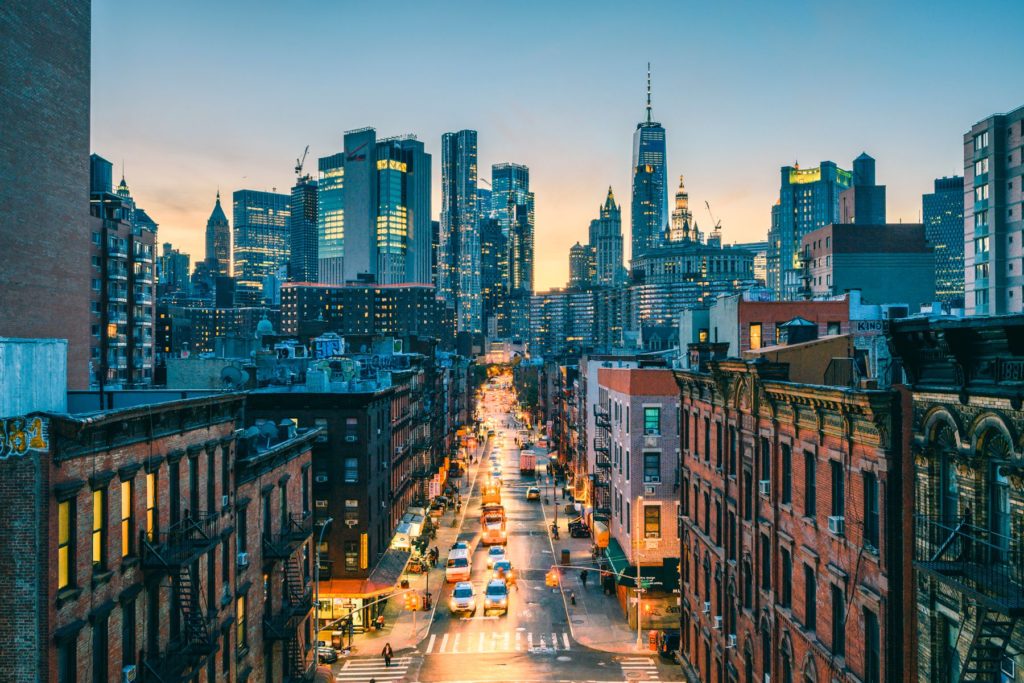
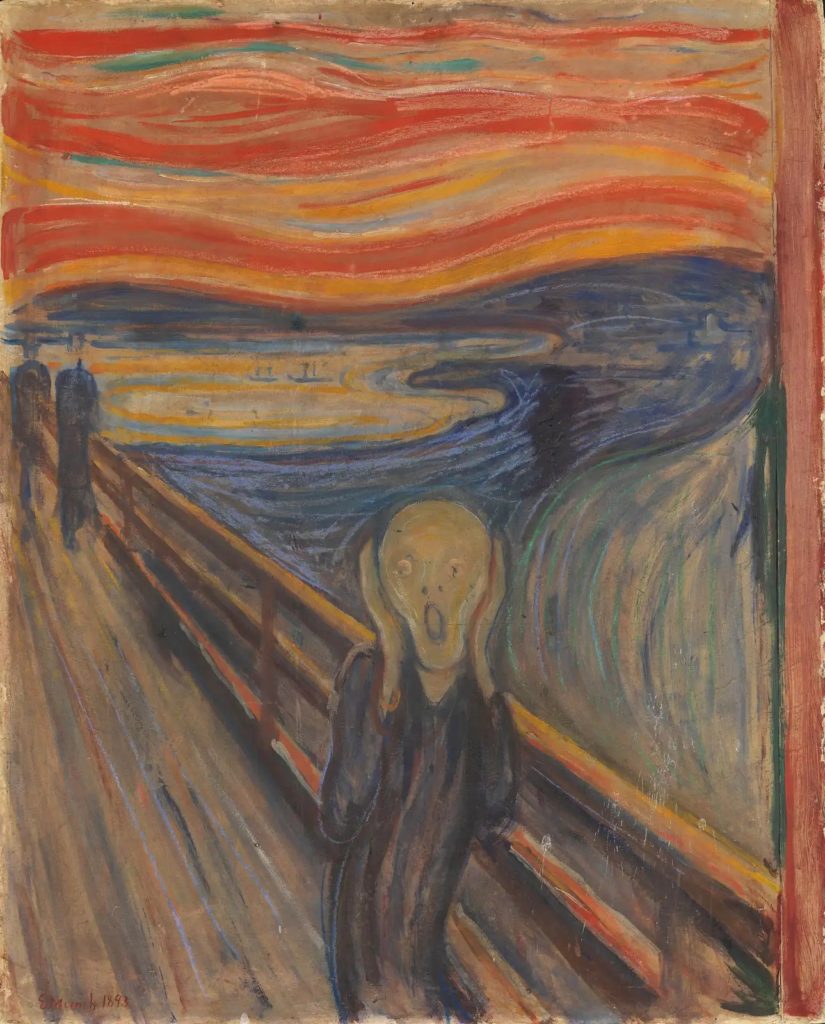
The project is based off of a PyTorch implementation of the A Neural Algorithm of Artistic Style article. It was published by Leon A. Gatys, Alexander S, Ecker, and Matthias Bethge. It is based on the Neural-Style code by Justin Johnson’s. Here is an example of The Scream painting’s style being transferred onto a picture of a New York City:

A photo of new york city
Content Image
scream painting
Style Image
style transferred image of new york
Output Image

Dependencies Installation

This project requires you to install the following

Required Dependencies:

Optional dependencies:

  • For CUDA backend:
    • CUDA 7.5 or above
  • For cuDNN backend:
    • cuDNN v6 or above
  • For ROCm backend:
    • ROCm 2.1 or above
  • For MKL backend:
    • MKL 2019 or above
  • For OpenMP backend:
    • OpenMP 5.0 or above

Setup

Navigate to the directory you would like to download neural-style-pt project to. Then git clone the repository.

git clone https://github.com/ProGamerGov/neural-style-pt.git

Download Model

Next you will cd into the cloned directory and download the VGG model files.

cd neural-style-pt/
python models/download_models.py

This will download multiple model files. If you are running on a lighter system use the option -model_file models/nin_imagenet.pth If you have a strong system with a powerful gpu use the option -model_file models/vgg19-d01eb7cb.pth The second option will provide drastically better results at the expense of more strain to the GPU. If you have issues with VGG19 or VGG18 revert back to nin_imagenet.pth.

Creating Deep Learning Style Transfer Images

In this example we will be using the cuDNN with NIN Model. Feel free to use the model of your choice. See the bottom of the tutorial for speed comparisons between the different models. Run the following command replacing -style_image with the path to the style image you want to use. You must all add the path of your content image to -content_image. Feel free to change the -image_size option to increase the resolution of your output machine learning image.

python neural_style.py -style_image examples/inputs/picasso_selfport1907.jpg -content_image examples/inputs/brad_pitt.jpg -output_image profile.png -model_file models/nin_imagenet.pth -gpu 0 -backend cudnn -num_iterations 1000 -seed 123 -content_layers relu0,relu3,relu7,relu12 -style_layers relu0,relu3,relu7,relu12 -content_weight 10 -style_weight 500 -image_size 512 -optimizer adam

Content Image

car photo

Style Image

style image

Deep Learning Output Image

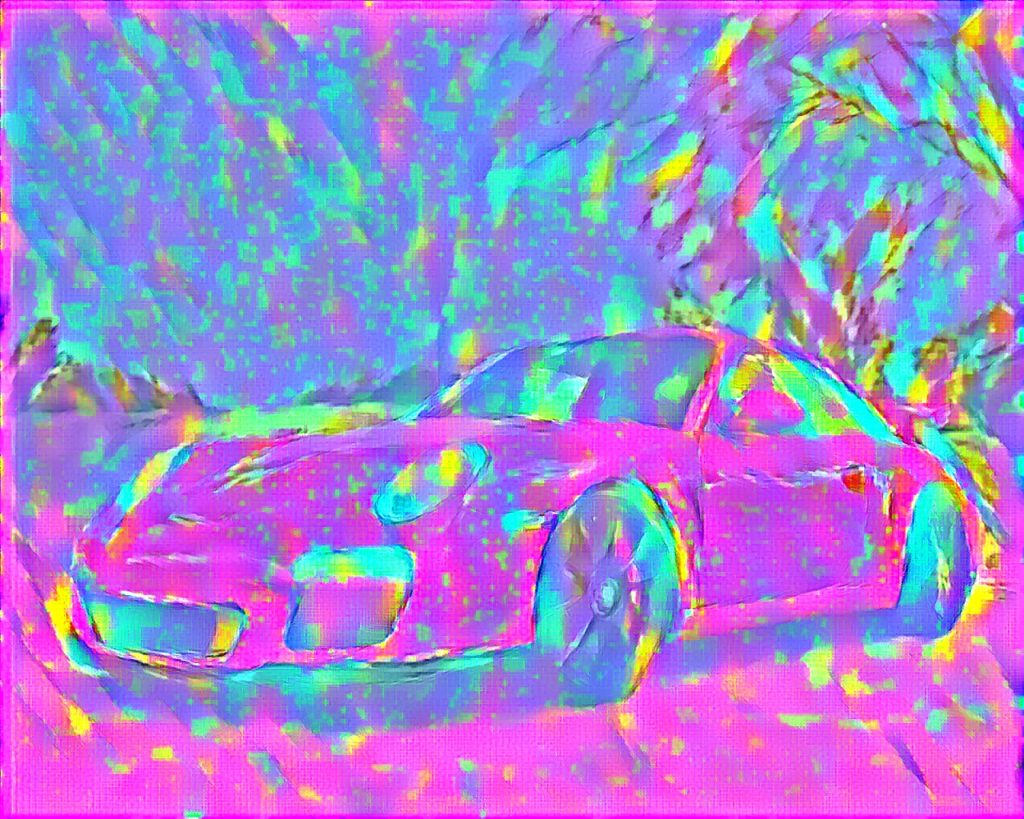
Image of a styled car

Deep Learning Image Options

  • -image_size: Maximum side length (in pixels) of the generated deep learning image. Default is 512.
  • -style_blend_weights: The weight for blending the style of multiple style images, as a comma-separated list, such as -style_blend_weights 3,7. By default all style images are equally weighted.
  • -gpu: Zero-indexed ID of the GPU to use; for CPU mode set -gpu to c.

Advanced Optimization Options

  • -content_weight: How much to weight the content reconstruction term. Default is 5e0.
  • -style_weight: How much to weight the style reconstruction term. Default is 1e2.
  • -tv_weight: Weight of total-variation (TV) regularization; this helps to smooth the image. Default is 1e-3. Set to 0 to disable TV regularization.
  • -num_iterations: Default is 1000.
  • -init: Method for generating the generated image; one of random or image. Default is random which uses a noise initialization as in the paper; image initializes with the content image.
  • -init_image: Replaces the initialization image with a user specified image.
  • -optimizer: The optimization algorithm to use; either lbfgs or adam; default is lbfgs. L-BFGS tends to give better results, but uses more memory. Switching to ADAM will reduce memory usage; when using ADAM you will probably need to play with other parameters to get good results, especially the style weight, content weight, and learning rate.
  • -learning_rate: Learning rate to use with the ADAM optimizer. Default is 1e1.
  • -normalize_gradients: If this flag is present, style and content gradients from each layer will be L1 normalized.

Output and Layer Options

  • -output_image: Name of the output image. Default is out.png.
  • -print_iter: Print progress every print_iter iterations. Set to 0 to disable printing.
  • -save_iter: Save the image every save_iter iterations. Set to 0 to disable saving intermediate results.
  • -content_layers: Comma-separated list of layer names to use for content reconstruction. Default is relu4_2.
  • -style_layers: Comma-separated list of layer names to use for style reconstruction. Default is relu1_1,relu2_1,relu3_1,relu4_1,relu5_1.

Other Deep Learning Options

  • -style_scale: Scale at which to extract features from the style image. Default is 1.0.
  • -original_colors: If you set this to 1, then the output image will keep the colors of the content image.
  • -model_file: Path to the .pth file for the VGG Caffe model. Default is the original VGG-19 model; you can also try the original VGG-16 model.
  • -pooling: The type of pooling layers to use; one of max or avg. Default is max. The VGG-19 models uses max pooling layers, but the paper mentions that replacing these layers with average pooling layers can improve the results. I haven’t been able to get good results using average pooling, but the option is here.
  • -seed: An integer value that you can specify for repeatable results. By default this value is random for each run.
  • -multidevice_strategy: A comma-separated list of layer indices at which to split the network when using multiple devices. See the Multi GPU Section for more details.
  • -backend: nn, cudnn, openmp, or mkl. Default is nn. mkl requires Intel’s MKL backend.
  • -cudnn_autotune: When using the cuDNN backend, pass this flag to use the built-in cuDNN autotuner to select the best convolution algorithms for your architecture. This will make the first iteration a bit slower and can take a bit more memory, but may significantly speed up the cuDNN backend.

GTX 1080 Benchmark Speeds


    -backend nn -optimizer lbfgs: 56 seconds
    -backend nn -optimizer adam: 38 seconds
    -backend cudnn -optimizer lbfgs: 40 seconds
    -backend cudnn -optimizer adam: 40 seconds
    -backend cudnn -cudnn_autotune -optimizer lbfgs: 23 seconds
    -backend cudnn -cudnn_autotune -optimizer adam: 24 seconds

FAQ and Issues

Problem #1:

When running the program you run out of memory.

Solution #1

Try reducing the image size: -image_size 256 (or lower). Note that different image sizes will likely require non-default values for -style_weight and -content_weight for optimal results. If you are running on a GPU, you can also try running with -backend cudnn to reduce memory usage.

Problem #2:

The -backend cudnn performs slower than the default backend.

Solution #2:

Add the flag -cudnn_autotune; This will instead use the built-in cuDNN autotuner to select the best convolution algorithm which will result in much better performance.

Problem #3:

You receive this error message.

Missing key(s) in state_dict: "classifier.0.bias", "classifier.0.weight", "classifier.3.bias", "classifier.3.weight". Unexpected key(s) in state_dict: "classifier.1.weight", "classifier.1.bias", "classifier.4.weight", "classifier.4.bias".

Solution #3:

Due to a mix up with layer locations, older models require an update to be compatible with newer versions of PyTorch. The included donwload_models.py script will perform these updates after downloading the models.

Problem #4:

The image generated is solid gray.

Solution #4:

This is a bug that sometimes occurs in cuda. You need to reduce or increase the size of the image by at least 1px.

Related Resources

View more image examples on the Computer Dreams Twitter.

If you want to learn how to generate images with neural networks click HERE.

View our other Machine Learning Tutorials.

Click here to learn How to Install MySQL on Ubuntu 22.04 LTS.

Learn more cool things in Linux with our Linux Tutorials.

View all of our available online tools at Formatswap.com.

Questions

Feel free to leave a comment below if you have any further questions. Thank you for reading the tutorial.

How to Generate Images From Text Prompts with Python and TensorFlow

In this tutorial you will learn how to generate images from text prompts using Python, VQGAN, and neural networks. You can create some very interesting machine learning generated artwork using this software. The possibility are limitless when it comes to the different types of images you can generate. This article will be using Ubuntu 22.04 for the operating system. However any Ubuntu based version of Linux should work. Keep in mind you will want to make sure to have a graphics card with at least 6GB of VRAM. If not you will have to generate lower resolution images. If creating machine learning generated artwork sounds interesting to you continue reading this tutorial below.

Step 1: Install Required Dependencies

The first thing to do is install Anaconda. You can find the latest version and instructions HERE. This tutorial has been tested on Ubuntu 16.04, Ubuntu 18.04, Ubuntu 20.04, and Ubuntu 22.04.

Step 2: Create the Conda Environment

conda create --name vqgan python=3.9
conda activate vqgan

Next you will set up the Conda environment. This is where you will run VQGAN from.

Step 3: Install Pytorch in the new environment:

Note: This installs the CUDA version of Pytorch for Nvidia graphics cards. If you are using an AMD graphics card, read our AMD section at the bottom of the article.

pip install torch==1.9.0+cu111 torchvision==0.10.0+cu111 torchaudio==0.9.0 -f https://download.pytorch.org/whl/torch_stable.html

Step 4: Install other required Python packages:

pip install ftfy regex tqdm omegaconf pytorch-lightning IPython kornia imageio imageio-ffmpeg einops torch_optimizer

Step 5: Clone the required VQGAN repositories:

git clone 'https://github.com/nerdyrodent/VQGAN-CLIP'
cd VQGAN-CLIP
git clone 'https://github.com/openai/CLIP'
git clone 'https://github.com/CompVis/taming-transformers'
pip install taming-transformers && pip install CLIP
pip install setuptools==59.5.0

Now you need to clone the git repository’s. After cloning install taming-transformers and CLIP using pip. Finally install setuptools==59.5.0. This is required as the latest version of setuptools will not work with VQGAN.

Step 6: Download at least 1 VQGAN pretrained model

mkdir checkpoints

curl -L -o checkpoints/vqgan_imagenet_f16_16384.yaml -C - 'https://heibox.uni-heidelberg.de/d/a7530b09fed84f80a887/files/?p=%2Fconfigs%2Fmodel.yaml&dl=1' #ImageNet 16384
curl -L -o checkpoints/vqgan_imagenet_f16_16384.ckpt -C - 'https://heibox.uni-heidelberg.de/d/a7530b09fed84f80a887/files/?p=%2Fckpts%2Flast.ckpt&dl=1' #ImageNet 16384

Choose at least one of the above pretrained models, and download it using the curl command. I recommend downloading both of the models so that you can try each to see which works best.

Pretrained Model Information

Visit https://github.com/CompVis/taming-transformers#overview-of-pretrained-models to learn more about VQGAN pre-trained models, including download links. The model .yaml and .ckpt files need to be the checkpoints directory.

Generating VQGAN image from basic text prompt

You have now finished installing VQGAN. You are ready to begin generating images. To generate an image from text, specify your text prompt as shown in the example below.

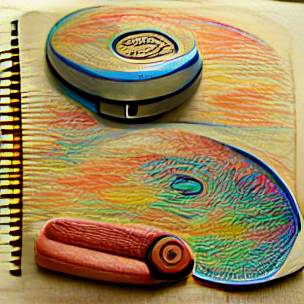
python generate.py -p "A illustration of a pineapple in a fruit bowl"
pineapple in bowl

Generating VQGAN image from multiple prompts

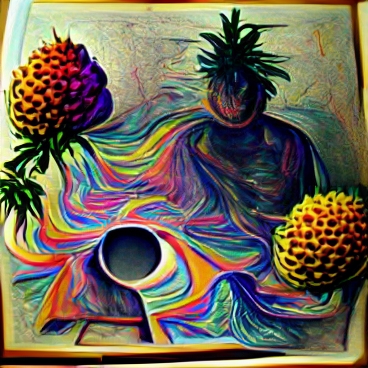
You are also able to generate images from split text prompts. In the below example you can see I am using four different descriptors to generate the image.

python generate.py -p "A painting of a pineapple in a fruit bowl | psychedelic | surreal:0.5 | weird:0.25"
A painting of a pineapple in a fruit bowl

Additionally you can use an input image as one of your split prompt inputs. This will use the supplied image as a sample during the generation process.

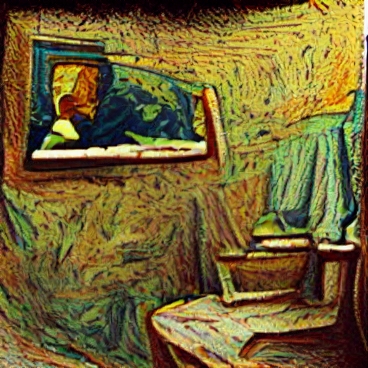
python generate.py -p "A picture of a bathroom with a portrait of Van Gogh" -ip "samples/VanGogh.jpg | samples/Bedroom.png"
A picture of a bathroom with a portrait of Van Gogh

Generating VQGAN “story mode” images

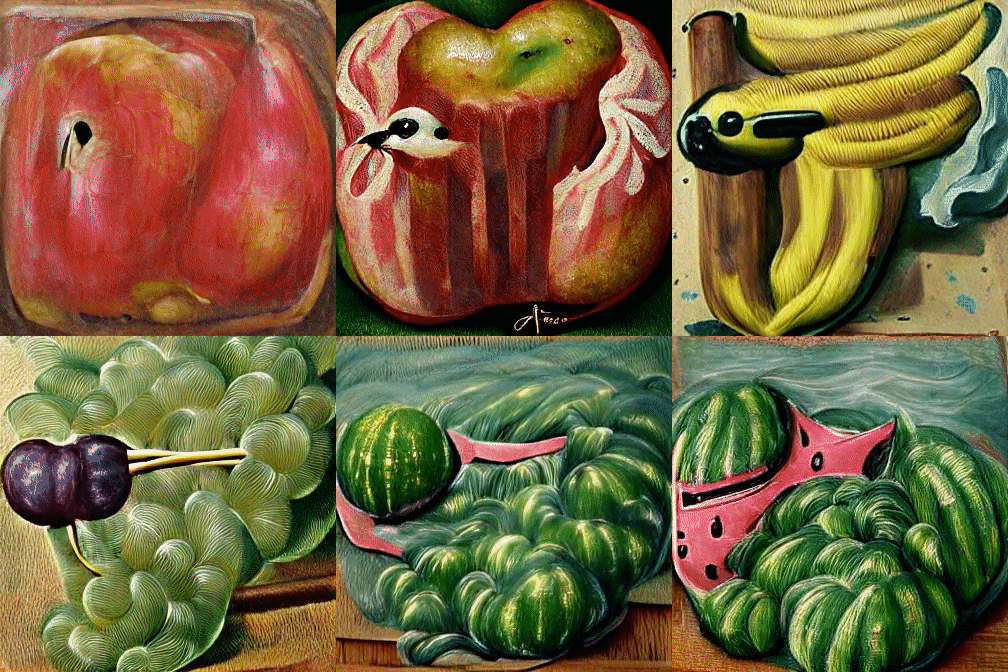
Story mode allows you to create a story from multiple text prompts using the carrot symbol. This will generate you a .mp4 video file. For example:

python generate.py -p "A painting of a apple|photo:-1 ^ a painting of a banana ^ a painting of a grape ^ a painting of a watermelon ^ a photograph of strawberry" -cpe 1500 -zvid -i 6000 -zse 10 -vl 20 -zsc 1.005 -opt Adagrad -lr 0.15 -se 6000
A painting of a apple

VQGAN Feedback loop animation’s

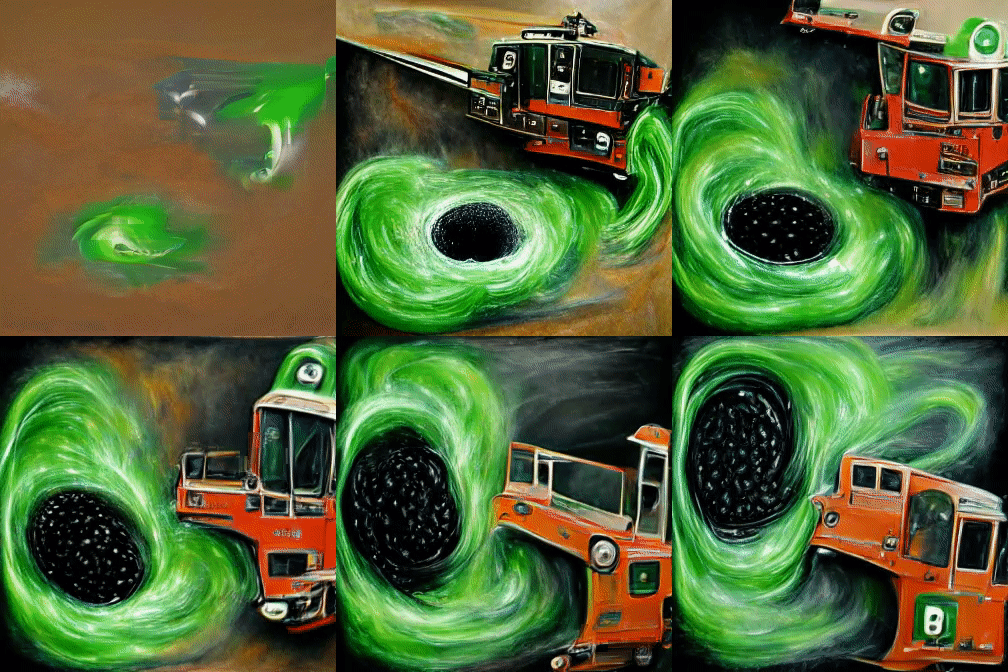
You are able to generate multiple images into a video. The script makes slight changes to each image creating a warping effect. The “150” at the end of the line is the number of frames. “blackhole.png” is your output filename. This will produce a .mp4 file named “video.mp4” by default. Example below:

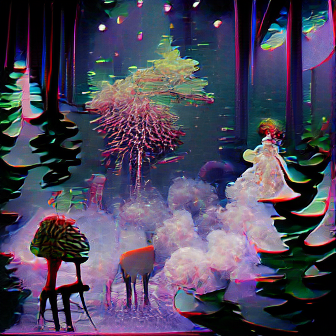
./zoom.sh "A painting of a green firetruck spinning through a black hole" blackhole.png 150

The ImageMagick package is requred to generate mp4 animated loop videos. If you don’t have it installed, you can install it using the below command.

sudo apt install imagemagick
green fire truck spinning in black hole

Generating multiple random images

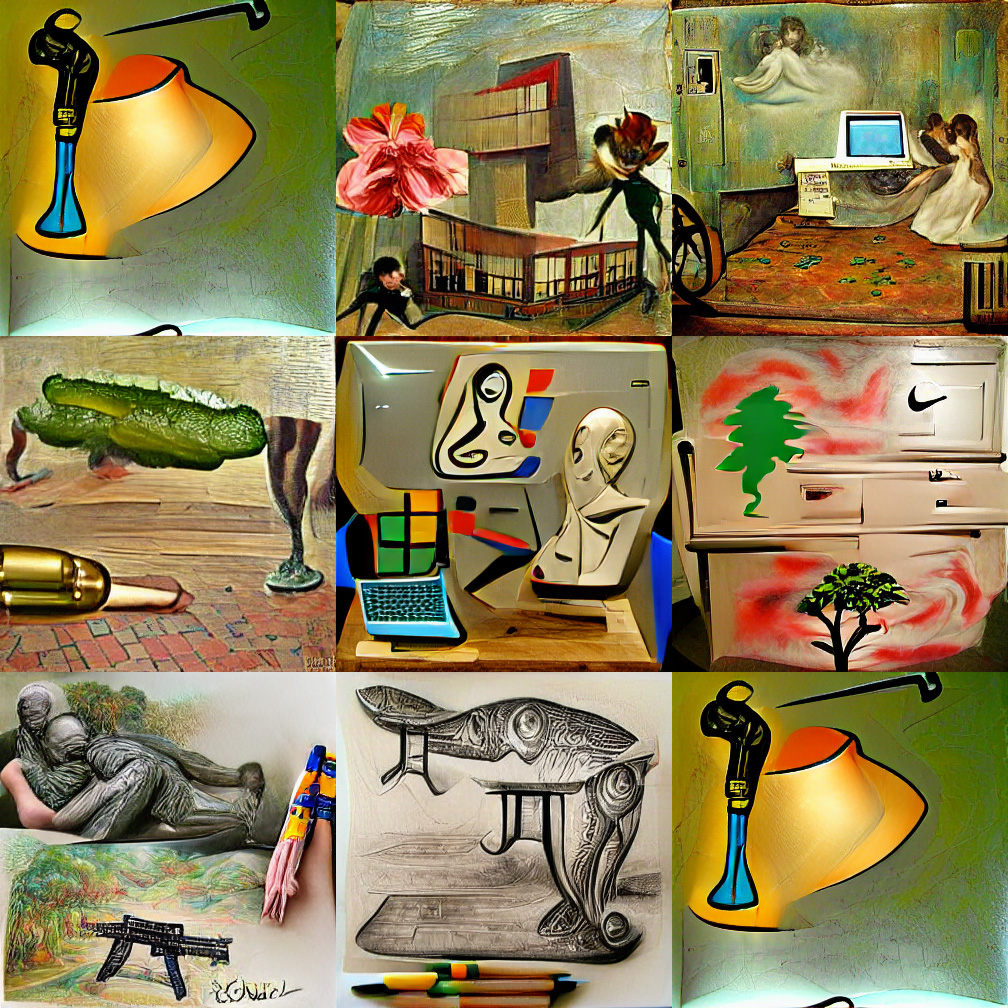
You can also supply multiple phrases to be used at random to generate multiple images. There is a random list of words in the “./zoom.sh” file. Edit this file if you want to change the words used in the random phrase generator. Here is an example of the random images put into a collage.

chmod +x ./zoom.sh
./zoom.sh
multiple image example
Left to right #1-#9
  • #1 ‘A pencil art sketch of a criticizing pickle and a menu in the style of strange colors and Futurism’
  • #2 ‘A painting of a wild hotel and a flower in the style of Constructionist and Edgar Degas’
  • #3 ‘A spray painting of a awaiting computer and a bedroom in the style of Edgar Degas and Art Nouveau’
  • #4 ‘A photograph of a benefiting AR-15 and a pickle in the style of Modern art and Edgar Degas’
  • #5 ‘A sculpture of a undertaking computer and a figurine in the style of Pop Art and Picasso’
  • #6 ‘A painting of a tree on a dresser in the style of Surreal Art and Claude Monet’
  • #7 ‘A pencil art sketch of a touching statue and a AR-15 in the style of Surreal Art and Claude Monet’
  • #8 ‘A pencil art sketch of a adding table and a fish in the style of Surreal Art and Art Nouveau’
  • #9 ‘An illustration of a raining lamp and a spanner in the style of Pop Art and Michelangelo Caravaggio’

Advanced settings

There are many advanced flags you can use in the VQGAN program. To view all of the options from the terminal use the -h flag.

python generate.py -h
usage: generate.py [-h] [-p PROMPTS] [-ip IMAGE_PROMPTS] [-i MAX_ITERATIONS] [-se DISPLAY_FREQ]
[-s SIZE SIZE] [-ii INIT_IMAGE] [-in INIT_NOISE] [-iw INIT_WEIGHT] [-m CLIP_MODEL]
[-conf VQGAN_CONFIG] [-ckpt VQGAN_CHECKPOINT] [-nps [NOISE_PROMPT_SEEDS ...]]
[-npw [NOISE_PROMPT_WEIGHTS ...]] [-lr STEP_SIZE] [-cuts CUTN] [-cutp CUT_POW] [-sd SEED]
[-opt {Adam,AdamW,Adagrad,Adamax,DiffGrad,AdamP,RAdam,RMSprop}] [-o OUTPUT] [-vid] [-zvid]
[-zs ZOOM_START] [-zse ZOOM_FREQUENCY] [-zsc ZOOM_SCALE] [-cpe PROMPT_FREQUENCY]
[-vl VIDEO_LENGTH] [-ofps OUTPUT_VIDEO_FPS] [-ifps INPUT_VIDEO_FPS] [-d]
[-aug {Ji,Sh,Gn,Pe,Ro,Af,Et,Ts,Cr,Er,Re} [{Ji,Sh,Gn,Pe,Ro,Af,Et,Ts,Cr,Er,Re} ...]]
[-cd CUDA_DEVICE]
optional arguments:
  -h, --help            show this help message and exit
  -p PROMPTS, --prompts PROMPTS
                        Text prompts
  -ip IMAGE_PROMPTS, --image_prompts IMAGE_PROMPTS
                        Image prompts / target image
  -i MAX_ITERATIONS, --iterations MAX_ITERATIONS
                        Number of iterations
  -se DISPLAY_FREQ, --save_every DISPLAY_FREQ
                        Save image iterations
  -s SIZE SIZE, --size SIZE SIZE
                        Image size (width height) (default: [512, 512])
  -ii INIT_IMAGE, --init_image INIT_IMAGE
                        Initial image
  -in INIT_NOISE, --init_noise INIT_NOISE
                        Initial noise image (pixels or gradient)
  -iw INIT_WEIGHT, --init_weight INIT_WEIGHT
                        Initial weight
  -m CLIP_MODEL, --clip_model CLIP_MODEL
                        CLIP model (e.g. ViT-B/32, ViT-B/16)
  -conf VQGAN_CONFIG, --vqgan_config VQGAN_CONFIG
                        VQGAN config
  -ckpt VQGAN_CHECKPOINT, --vqgan_checkpoint VQGAN_CHECKPOINT
                        VQGAN checkpoint
  -nps [NOISE_PROMPT_SEEDS ...], --noise_prompt_seeds [NOISE_PROMPT_SEEDS ...]
                        Noise prompt seeds
  -npw [NOISE_PROMPT_WEIGHTS ...], --noise_prompt_weights [NOISE_PROMPT_WEIGHTS ...]
                        Noise prompt weights
  -lr STEP_SIZE, --learning_rate STEP_SIZE
                        Learning rate
  -cuts CUTN, --num_cuts CUTN
                        Number of cuts
  -cutp CUT_POW, --cut_power CUT_POW
                        Cut power
  -sd SEED, --seed SEED
                        Seed
  -opt, --optimiser {Adam,AdamW,Adagrad,Adamax,DiffGrad,AdamP,RAdam,RMSprop}
                        Optimiser
  -o OUTPUT, --output OUTPUT
                        Output file
  -vid, --video         Create video frames?
  -zvid, --zoom_video   Create zoom video?
  -zs ZOOM_START, --zoom_start ZOOM_START
                        Zoom start iteration
  -zse ZOOM_FREQUENCY, --zoom_save_every ZOOM_FREQUENCY
                        Save zoom image iterations
  -zsc ZOOM_SCALE, --zoom_scale ZOOM_SCALE
                        Zoom scale
  -cpe PROMPT_FREQUENCY, --change_prompt_every PROMPT_FREQUENCY
                        Prompt change frequency
  -vl VIDEO_LENGTH, --video_length VIDEO_LENGTH
                        Video length in seconds
  -ofps OUTPUT_VIDEO_FPS, --output_video_fps OUTPUT_VIDEO_FPS
                        Create an interpolated video (Nvidia GPU only) with this fps (min 10. best set to 30 or 60)
  -ifps INPUT_VIDEO_FPS, --input_video_fps INPUT_VIDEO_FPS
                        When creating an interpolated video, use this as the input fps to interpolate from (>0 & <ofps)
  -d, --deterministic   Enable cudnn.deterministic?
  -aug, --augments {Ji,Sh,Gn,Pe,Ro,Af,Et,Ts,Cr,Er,Re} [{Ji,Sh,Gn,Pe,Ro,Af,Et,Ts,Cr,Er,Re} ...]
                        Enabled augments
  -cd CUDA_DEVICE, --cuda_device CUDA_DEVICE
                        Cuda device to use

AMD GPU Instructions

If you have an AMD graphics card you are able to use ROCm instead of CUDA. You can check if your card supports TensorFlow here: https://github.com/RadeonOpenCompute/ROCm#supported-gpus

Install ROCm accordng to the instructions and don’t forget to add the user to the video group as detailed in the link: https://docs.amd.com/bundle/ROCm-Installation-Guide-v5.1/page/How_to_Install_ROCm.html

The usage and set up instructions above are the same, except for the line where you install Pytorch. Instead of pip install torch==1.9.0+cu111 ..., use the one or two lines which are displayed here (select Pip -> Python-> ROCm): https://pytorch.org/get-started/locally/

Troubleshooting

RuntimeError: CUDA out of memory

For example:

RuntimeError: CUDA out of memory. Tried to allocate 150.00 MiB (GPU 0; 23.70 GiB total capacity; 21.31 GiB already allocated; 78.56 MiB free; 21.70 GiB reserved in total by PyTorch)

Your request doesn’t fit into your GPU’s VRAM. Reduce the image size of the image by editing “generate.py”.

What is the best optimizing agent?

The Adam agent is usually a good general purpose agent to use. If you would like more information see the Pytorch Optimizer and Optim articles.

Can I download and use all pre-trained models simultaneously?

Yes, all you need to do is set everything to true in the download_models.sh file.

Errors during video generation

Try installing ffmpeg:

sudo apt install ffmpeg


If you are running VQGAN with Ananconda try:

conda install -c conda-forge ffmpeg

Related resources

View more image examples on the FormatSwap Twitter.

Check our our The Best Mechanical Gaming Keyboards to Purchase in 2023 article.

Read our Deep Learning Image Style Transfer Tutorial Using Neural Style Pt.

View our other Machine Learning Tutorials.

Learn How to Create a Mapped Network Drive in Windows 10.

Click here to learn How to Install MySQL on Ubuntu 22.04 LTS.

View all of our available online tools at Formatswap.com.

Questions

Feel free to leave a comment below if you have any further questions. Thank you for reading the tutorial.