What is Nginx? Nginx is a opensource web server designed with developers in mind. It was created by Igor Sysoev in 2004. It supports reverse proxying, caching, load balancing, RTMP media streaming, and many more advanced features. In this tutorial you will learn how to install and set up Nginx on Ubuntu 20.04.
Setting up UFW Firewall (Optional – Highly Recommended)
If UFW is not enabled or configured, you will first need to enable it. You can check the status of the firewall using this command:
sudo ufw status
Then enable it with this command:
sudo ufw enable
If you are connected to your machine via SSH, make sure it is allowed through the firewall before disconnecting.
sudo ufw allow ssh
Next, we will be allowing Nginx through the firewall – there are 3 settings to be aware of when allowing the web server through. ‘Nginx Full’, ‘Nginx HTTP’, and ‘Nginx HTTPS’. ‘Nginx Full’ allows traffic through both HTTP (port 80) and HTTPS (port 443), whereas HTTP and HTTPS open only their respective ports. It is highly recommended that you only open port 80 to your local network or for non-secure pages (Does NOT process sensitive data!). You will only be able to use HTTPS if you have an SSL certificate – otherwise, your browser or any visitor to your site will get a ‘Site Not Secure’ warning. We will be using ‘Nginx HTTP’ for the purposes of the tutorial, but you may replace the text in the command with the other parameters for your respective use case.
sudo ufw allow 'Nginx HTTP'
If you have any other services running on the machine that you need external clients to have access to, such as port 8080 for a testing server, you may open them with the following command:
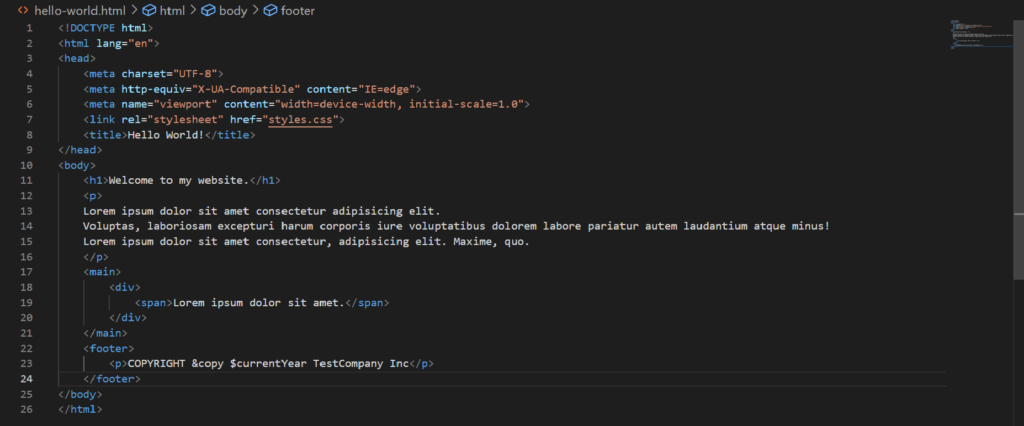
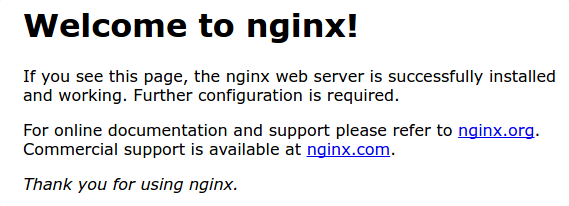
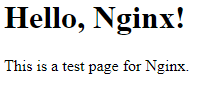
Finally, it’s time to set up your web server! We will be accessing the root directory for the site, where you will access and store your files. We will also be setting up the configuration for the enabled sites so you can access your site from the web. You should be able to see the default site when going to the URL/IP address of the server.
You can view the IP address of your server by typing the command:
ip a s
Your IP will be the address that is not the loopback address (127.0.0.1) and is usually the second “inet” address depending on your server’s configuration.
If everything is set up correctly, the above image should be the contents of the page.
Next, you will navigate to your site’s configuration to organize things properly and keep your install clean. First, you will disable your site’s default configuration. You can do this by typing the following command:
sudo unlink /etc/nginx/sites-enabled/default
Then, add a new configuration file for your site. We will be using nano for this example.
sudo nano /etc/nginx/sites-available/<site-name>
And add the following text to the file.
server {
    listen 80;
    listen [::]:80;
    root /var/www/<site-name>;
    index index.html;

    location / {
        try_files $uri $uri/ =404;
}
If you are also using SSL, you must insert the following below the first server block:
server {
    listen 443 ssl;
    root /var/www/<site-name>;
    index index.html;

    location / {
        try_files $uri $uri/ =404;
}
Press CTRL+X and then press Y to save the file.
The server is almost set! You will need to enable the site to make it accessible. You can do this by typing the command:
In this tutorial I will teach you how to download and install MySQL server on Ubuntu 22.04 LTS. Additionally you will learn how to secure your installation and setup a root account. MySQL is vital to have installed if you want to work with storing and receiving data on your website or web application. The first version of MySQL was released on the 23rd of May 1995 by a Swedish company MySQLAB. The other popular database manager MariaDB was created by the same company. Ever since MySQL has grown to be one of the most popular database software’s on the web. Before we begin make sure you have a Ubuntu 20.04 server installed onto a computer or a virtual machine. Also don’t forget to install the openssh-server package if it is not installed. This will give you the ability to ssh into the machine to setup MySQL.
Update and upgrade Ubuntu
sudo apt update && sudo apt upgrade
The above commands will both update and upgrade your Ubuntu install to the latest package versions.
This will install both the MySQL Server and the MySQL Client to your machine. Unlike previous versions of Ubuntu Server you do not have to add any SQL repository’s before installing. This is because Ubuntu 22.04 LTS contains the packages in the standard system repository.
Confirm the installed MySQL version
To confirm which version of MySQL you have installed run the following command. You will receive an output with the version number.
mysql --version
Update MySQL security settings
The default installation of MySQL has several security issues. We need to run the following commands to fix these issues.
sudo mysql_secure_installation
This will open the MySQL secure installation wizard. We need to answer a few questions in the wizard to continue. The first question will be:
Would you like to setup VALIDATE PASSWORD COMPONENT?
Type in “Y” on the keyboard and press “Enter”. This will bring us to the next question which will have us enter a password validation policy.
There are three levels of password validation policy:

LOW    Length >= 8
MEDIUM Length >= 8, numeric, mixed case, and special characters
STRONG Length >= 8, numeric, mixed case, special characters and dictionary                  file

Please enter 0 = LOW, 1 = MEDIUM and 2 = STRONG:
Choose any one of these options. I will be using option #2 MEDIUM. After you type in the number press “Enter” and you will be brought to the following screen to set your password.
Please set the password for root here.

New password:

Re-enter new password:

Do you wish to continue with the password provided?
Type in the password you would like to use and press enter. Next re-enter the password you have chosen. Finally type “Y” than press “Enter” to continue with the password provided. There is the possibility you will receive the following error.
Failed! Error: SET PASSWORD has no significance for user 'root'@'localhost' as the authentication method used doesn't store authentication data in the MySQ L server. Please consider using ALTER USER instead if you want to change authent ication parameters.
If you get this error you will have to exit the script by pressing Ctrl+C. After you exit out login to MySQL.
ALTER USER 'root'@'localhost' IDENTIFIED WITH mysql_native_password by 'SuperSecure1';
*Change the password SuperSecure1 to something secure* Afterwards exit the program by running exit;
exit;
Then just rerun the secure installation setup script again.
sudo mysql_secure_installation
The secure installation setup script will then ask you the following questions. Answer them as you see below.
Enter the password for user root: type your root password and then press "Enter".
Change the password for root? Press N, then press "Enter".
Remove anonymous users? Press Y, then press "Enter".
Disallow root login remotely? Press Y, then press "Enter".
Remove test database and access to it? Press Y, then press "Enter".
Reload privilege tables now? Press Y, then press "Enter".
Testing MySQL Server login
Once you have finished running the MySQL secure installation script and have set up the root password you will need to test the login. This will allow us to login as the root user and setup a database ,tables and or users to go with it. Type the following to login.
sudo mysql -u root
Enter the root password you created in the above steps.
Managing your Ubuntu 22.04 MySQL service
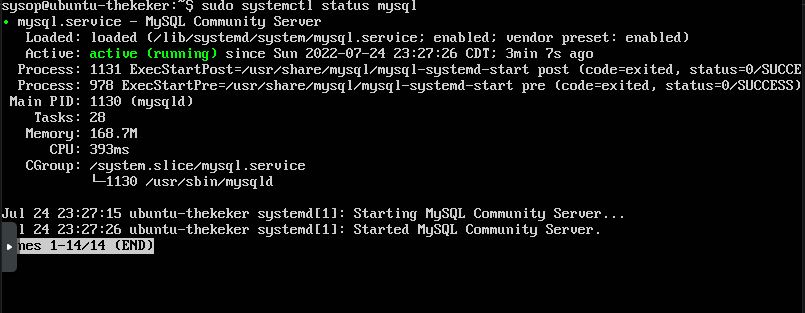
There are several commands worth knowing for managing your MySQL service. One of the most important is the command to check the status of the service.
sudo systemctl status mysql
This will generate an output similar to this. It will tell you if it is running or stopped. Furthermore it will also output any errors.
You will also want to know how to stop the MySQL service. You can do this with the following command.
If you are having any issues with your current version of MySQL or just want the latest features, just run the update command. This will update MySQL and your Linux system to the latest version.
sudo apt update && sudo apt upgrade
If you no longer want MySQL server installed you can easily remove it with the following command.
sudo apt autoremove --purge mysql-server
When you get the message “Do you want to continue?” just type “Y” than press “Enter”. MySQL will be purged and uninstalled.
If you are sick of constant forced updates, user data tracking, and malware attacks you may want to consider making the switch to the Linux operating system. One of the benefits of switching from Windows 10 to Linux is the wide variety of distributions to choose from. A distribution is a flavor of Linux which contains the GNU shell, various preinstalled programs, the Linux kernel, system utilities and just about everything you will see in your operating system. This allows for the user to decide for themselves which distribution most closely matches what they will use their computer for. Are you looking to make the switch? Here are some reasons to do so.
1. Security
Many Linux distributions take a security first approach. This means that security settings are enabled by default. Also unlike Windows 10 and Windows 11, Linux does not collect and track user data. You are able to take full control of your data privacy. Linux has constant and automatic security updates ensuring you are always secure.
2. Price (FREE)
Another benefit to using Linux versus Windows as your operating system is that it is free. Microsoft Windows 10 and 11 are also “free”, but you pay with your data being collected and sold to advertisers. With Linux you get everything Windows offers but for free and with privacy.
3. Software
More than 15,000 developers have contributed to the Linux operating system. With this comes a robust range of great software. The best part is all of the software is free to use in Linux. This is because the operating system is opensource. This means anyone can contribute there time and code to improving Linux. More and more popular software companies are releasing Linux compatible versions of their software. This also includes the gaming industry. As of 2021 there are over 7,500 Linux compatible titles on the Steam game store.
4. Hardware Compatibility
Linux is well known for being the operating system that helps to breath new life into older computers. Linux can run on almost any hardware developed in the past 30 years. If you have an old PC in the closet you can install Linux breathing new life into it. The reason Linux works so well on low performance machines is the low resource usage of the operating system. On average Linux only uses a quarter of the system resources compared to the average Windows machine.
5. Customization
With Linux you can make your operating system truly yours with advanced customization. You are able to customize almost every aspect of the system. Most Linux distributions come with a wide range of themes that are able to be installed. You can also install new icon packs and fonts. This allows you to personalize your operating system with just a few easy clicks. Whether you are looking to customize your system for aesthetic purposes, or just productivity (or a little of both). Then Linux is for you.
Choosing the best Linux distro in 2022 can be quite daunting with all of the Linux distributions to choose from. This list of the top 10 desktop Linux distributions will help to remove any confusion. Linux distributions have many desktop environments available to choose from. A desktop environment is a collection of all available GUI interfaces the user can interact with. This includes the taskbar, icons, and almost everything a user will see on there screen. Some of the items on the list will have different desktop environments while still using the same Linux flavor such as Ubuntu, Debian, Arch, etc. This is a comprehensive list of the best and most popular Linux distributions.
Ubuntu Linux
Ubuntu Linux is a distribution based on Debian. Is is by far the most used Linux distribution available. Ubuntu’s default desktop environment is Gnome but it is also available in KDE, Xfce. Mate, and more. The LTS (Long Term Support) version of Ubuntu receives regular product and security updates every 6 months. It has become the default choice for businesses looking to use Linux. Ubuntu is one of the best choices if you are looking to play games. It has the best video card driver support of any Linux distro on this list. This makes it the best Linux distro for gaming. Ubuntu Linux is available for desktop, or for servers with Ubuntu server. Overall Ubuntu is a very beginner friendly distribution. It also has some of the most robust documentation and tutorials available to new users.
Fedora Linux is a bit different than the other distributions on this list due to being sponsored by Red Hat. This makes it one of the only mainstream Linux distributions to be funded by a large corporation. This allows for desktop support plans to be provided to businesses looking to use Linux. Linus Torvalds (the creator of the Linux kernel) uses Fedora as his primary Linux distribution. A new version of Fedora Linux is released every 13 months. The default desktop environment for Fedora is Gnome so it will have a similar feel to Ubuntu out of the box. One of the primary differences of Fedora compared to Debian or Ubuntu is the use of the DNF package manager. Another benefit of Fedora is it’s use of Security-Enhanced Linux by default. This provides a security by default approach greatly increasing the security of your operating system. Overall Fedora makes for a good choice if you want stability and security.
Debian Linux is one of the oldest Linux distributions on this list. It was first released in August of 1993. Debian offers many desktop environments such as Xfce, Gnome, Mate, KDE, LXDE, Cinnamon, and LXQT. This gives you a ton of flexibility for choosing the flavor that best suits you. Debian Linux is great for both desktop and server operations alike. This is due to its increased focus on stability and security. Because of this it is one of the best Linux distros for programming Debian also has a wide range of applications to install from it’s online repositories. To date there are over 51,000 packages available. Like Ubuntu, Debian also uses the APT package manager to install packages. You can also use the GUI tool Synaptic if you want a visual way to install software. Debian is a good choice for Office work, web browsing, and gaming. This makes it a overall well rounded choice for a distribution.
Linux Mint is a great choice for those who are new to Linux or switching from Mac OS or Windows. The design of Linux Mint greatly resembles the design of Windows 7. This makes it very easy for new users to get basics down. The default desktop environment in Mint is Cinnamon. Linux mint is based on Ubuntu and provides easy access to software with the MintTools Software Manager. Linux mint comes with many applications preinstalled such as Firefox, VLC Media Player, HexChat, VirtualBox, and many more useful programs. It includes essentially almost any application you would need to switch from Windows to Linux. Linux Mint is what you will want to choose if you are new to Linux. Overall if you are looking for a Linux distribution with a lot of preinstalled packages that you can use out of the box, as well as a friendly support community. Then this is the Linux distribution for you.
Arch Linux is the operating system for someone who wants full control over there systems. By default the installation is very minimal requiring the user to install any additional software they may desire. Arch Linux uses a ‘rolling release’ schedule. This means that there are no ‘major releases’ of the operating system. All you need to update to the latest version of Arch Linux is a system update. This distribution provides bleeding edge updates for it’s packages. This means you will always have the most up to date versions of your software. This can come with both con’s as there could be bugs in the latest versions that have not been worked out yet. There is no default desktop environment on Arch as you will need to choose on yourself. I would recommend this distribution for intermediate to advanced Linux users as it takes a lot of configuration to get it usable. The benefit is once you have it fully configured it will be what you want, and only what you want. Without any additional unneeded software. If you are trying to understand how Linux works under the hood, then this distro is for you.
Latest version: Arch Linux 2022.06.01 / 2022.06.01
Manjaro is another good Linux distro to install. This operating system is based on the Arch Linux. Unlike Arch, Manjaro focuses on user friendliness and user accessibility. Unlike Ubuntu or Debian, it uses the Pacman package manager. This is used to update your system, as well as to download and install new software. The first version of Manjaro was released in July of 2012, and the first beta version was released in late 2013.There are a variety of desktop environments you can choose when installing Manjaro. You can choose from Xfce, KDE, or Gnome. Manjaro comes with both a CLI as well as a GUI installer to choose from.
Kubuntu is an Ubuntu based Linux distribution that uses the KDE desktop environment. One of its benefits is that it shares the same package repositories as Ubuntu so you will have access to the same software. The project was originally sponsored by the company Canonical LTD until late 2012. Currently Blue Systems is the main contributor and maintainer for Kubuntu releases. If you are familiar with the Windows 10 operating system you will find the KDE desktop environment to be very similar and easy to use. Kubuntu is by far one of the nicest looking distributions sporting a modern desktop layout. Another great feature of using Kubuntu is its driver support. Almost every driver for audio, video, and networking will be preinstalled.
Elementary OS is a Linux distribution that was originally released in early March of 2011. It is a Ubuntu based distribution that uses the Pantheon desktop environment. One of the main things that set it apart is its custom GTK+ icon theme, and several in house developed applications. The default window manager for Elementary OS is Gala. The latest release is Juno. It was released in October 2018. Instead of using a strict release schedule, Elementary OS uses the “release when ready” cadence. Elementary OS is a great light weight distribution to install on your laptop or desktop computer.
Lubuntu is another great lightweight Ubuntu based Linux distribution to try. The name Lubuntu is a combination of the words LXQt and Ubuntu. Lubuntu first received official recognition as a member of the Ubuntu family in May of 2011. It originally used the LXDE desktop environment, but it now uses the LXQT environment. Lubuntu aims to be a functional yet module distribution focused on letting users use their computer in the way they want to use it. Lubuntu is known as a lighter version of Ubuntu. I would recommend using Lubuntu if you have an older computer or one with lower hardware specs.
Linux Lite is a distribution that was first released in 2012. It uses a custom Xfce desktop environment, and was originally based off of Debian. It is now based off of Ubuntu. Linux Lite’s main goal is to make the transition from Windows to Linux as seamless as possible. They use many customization options to make the distribution work and look the same as Windows. Linux lite uses the “Lite Software” package manager to install new applications. The latest version of Linux lite is version 6.2 “Fluorite”. It was released in November of 2022, and is based on Ubuntu 22.04.
In this tutorial you will learn how to transfer the style of one image onto the content of another. This program uses deep learning with python. The project uses an algorithm based on a convolutional neural network. Style any image using machine learning image processing. We will be using Ubuntu 20.04 for this tutorial. Almost any Linux distribution should work.
The project is based off of a PyTorch implementation of the A Neural Algorithm of Artistic Style article. It was published by Leon A. Gatys, Alexander S, Ecker, and Matthias Bethge. It is based on the Neural-Style code by Justin Johnson’s. Here is an example of The Scream painting’s style being transferred onto a picture of a New York City:
Content Image
Style Image
Output Image
Dependencies Installation
This project requires you to install the following
Next you will cd into the cloned directory and download the VGG model files.
cd neural-style-pt/
python models/download_models.py
This will download multiple model files. If you are running on a lighter system use the option -model_file models/nin_imagenet.pth If you have a strong system with a powerful gpu use the option -model_file models/vgg19-d01eb7cb.pth The second option will provide drastically better results at the expense of more strain to the GPU. If you have issues with VGG19 or VGG18 revert back to nin_imagenet.pth.
Creating Deep Learning Style Transfer Images
In this example we will be using the cuDNN with NIN Model. Feel free to use the model of your choice. See the bottom of the tutorial for speed comparisons between the different models. Run the following command replacing -style_image with the path to the style image you want to use. You must all add the path of your content image to -content_image. Feel free to change the -image_size option to increase the resolution of your output machine learning image.
-image_size: Maximum side length (in pixels) of the generated deep learning image. Default is 512.
-style_blend_weights: The weight for blending the style of multiple style images, as a comma-separated list, such as -style_blend_weights 3,7. By default all style images are equally weighted.
-gpu: Zero-indexed ID of the GPU to use; for CPU mode set -gpu to c.
Advanced Optimization Options
-content_weight: How much to weight the content reconstruction term. Default is 5e0.
-style_weight: How much to weight the style reconstruction term. Default is 1e2.
-tv_weight: Weight of total-variation (TV) regularization; this helps to smooth the image. Default is 1e-3. Set to 0 to disable TV regularization.
-num_iterations: Default is 1000.
-init: Method for generating the generated image; one of random or image. Default is random which uses a noise initialization as in the paper; image initializes with the content image.
-init_image: Replaces the initialization image with a user specified image.
-optimizer: The optimization algorithm to use; either lbfgs or adam; default is lbfgs. L-BFGS tends to give better results, but uses more memory. Switching to ADAM will reduce memory usage; when using ADAM you will probably need to play with other parameters to get good results, especially the style weight, content weight, and learning rate.
-learning_rate: Learning rate to use with the ADAM optimizer. Default is 1e1.
-normalize_gradients: If this flag is present, style and content gradients from each layer will be L1 normalized.
Output and Layer Options
-output_image: Name of the output image. Default is out.png.
-print_iter: Print progress every print_iter iterations. Set to 0 to disable printing.
-save_iter: Save the image every save_iter iterations. Set to 0 to disable saving intermediate results.
-content_layers: Comma-separated list of layer names to use for content reconstruction. Default is relu4_2.
-style_layers: Comma-separated list of layer names to use for style reconstruction. Default is relu1_1,relu2_1,relu3_1,relu4_1,relu5_1.
Other Deep Learning Options
-style_scale: Scale at which to extract features from the style image. Default is 1.0.
-original_colors: If you set this to 1, then the output image will keep the colors of the content image.
-model_file: Path to the .pth file for the VGG Caffe model. Default is the original VGG-19 model; you can also try the original VGG-16 model.
-pooling: The type of pooling layers to use; one of max or avg. Default is max. The VGG-19 models uses max pooling layers, but the paper mentions that replacing these layers with average pooling layers can improve the results. I haven’t been able to get good results using average pooling, but the option is here.
-seed: An integer value that you can specify for repeatable results. By default this value is random for each run.
-multidevice_strategy: A comma-separated list of layer indices at which to split the network when using multiple devices. See the Multi GPU Section for more details.
-backend:nn, cudnn, openmp, or mkl. Default is nn. mkl requires Intel’s MKL backend.
-cudnn_autotune: When using the cuDNN backend, pass this flag to use the built-in cuDNN autotuner to select the best convolution algorithms for your architecture. This will make the first iteration a bit slower and can take a bit more memory, but may significantly speed up the cuDNN backend.
Try reducing the image size: -image_size 256 (or lower). Note that different image sizes will likely require non-default values for -style_weight and -content_weight for optimal results. If you are running on a GPU, you can also try running with -backend cudnn to reduce memory usage.
Problem #2:
The -backend cudnn performs slower than the default backend.
Solution #2:
Add the flag -cudnn_autotune; This will instead use the built-in cuDNN autotuner to select the best convolutionalgorithm which will result in much better performance.
Problem #3:
You receive this error message.
Missing key(s) in state_dict: "classifier.0.bias", "classifier.0.weight", "classifier.3.bias", "classifier.3.weight". Unexpected key(s) in state_dict: "classifier.1.weight", "classifier.1.bias", "classifier.4.weight", "classifier.4.bias".
Solution #3:
Due to a mix up with layer locations, older models require an update to be compatible with newer versions of PyTorch. The included donwload_models.py script will perform these updates after downloading the models.
Problem #4:
The image generated is solid gray.
Solution #4:
This is a bug that sometimes occurs in cuda. You need to reduce or increase the size of the image by at least 1px.
Example #1Example #2Example #3Example #4Example #5Example #6
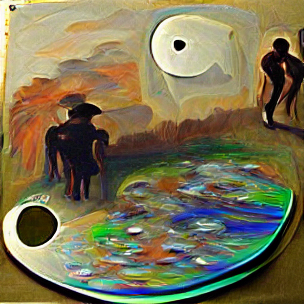
In this tutorial you will learn how to generate images from text prompts using Python, VQGAN, and neural networks. You can create some very interesting machine learning generated artwork using this software. The possibility are limitless when it comes to the different types of images you can generate. This article will be using Ubuntu 22.04 for the operating system. However any Ubuntu based version of Linux should work. Keep in mind you will want to make sure to have a graphics card with at least 6GB of VRAM. If not you will have to generate lower resolution images. If creating machine learning generated artwork sounds interesting to you continue reading this tutorial below.
Step 1: Install Required Dependencies
The first thing to do is install Anaconda. You can find the latest version and instructions HERE. This tutorial has been tested on Ubuntu 16.04, Ubuntu 18.04, Ubuntu 20.04, and Ubuntu 22.04.
Next you will set up the Conda environment. This is where you will run VQGAN from.
Step 3: Install Pytorch in the new environment:
Note: This installs the CUDA version of Pytorch for Nvidia graphics cards. If you are using an AMD graphics card, read our AMD section at the bottom of the article.
Now you need to clone the git repository’s. After cloning install taming-transformers and CLIP using pip. Finally install setuptools==59.5.0. This is required as the latest version of setuptools will not work with VQGAN.
Step 6: Download at least 1 VQGAN pretrained model
Choose at least one of the above pretrained models, and download it using the curl command. I recommend downloading both of the models so that you can try each to see which works best.
You have now finished installing VQGAN. You are ready to begin generating images. To generate an image from text, specify your text prompt as shown in the example below.
python generate.py -p "A illustration of a pineapple in a fruit bowl"
Generating VQGAN image from multiple prompts
You are also able to generate images from split text prompts. In the below example you can see I am using four different descriptors to generate the image.
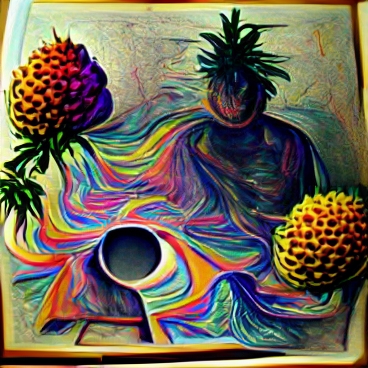
python generate.py -p "A painting of a pineapple in a fruit bowl | psychedelic | surreal:0.5 | weird:0.25"
Additionally you can use an input image as one of your split prompt inputs. This will use the supplied image as a sample during the generation process.
python generate.py -p "A picture of a bathroom with a portrait of Van Gogh" -ip "samples/VanGogh.jpg | samples/Bedroom.png"
Generating VQGAN “story mode” images
Story mode allows you to create a story from multiple text prompts using the carrot symbol. This will generate you a .mp4 video file. For example:
python generate.py -p "A painting of a apple|photo:-1 ^ a painting of a banana ^ a painting of a grape ^ a painting of a watermelon ^ a photograph of strawberry" -cpe 1500 -zvid -i 6000 -zse 10 -vl 20 -zsc 1.005 -opt Adagrad -lr 0.15 -se 6000
VQGAN Feedback loop animation’s
You are able to generate multiple images into a video. The script makes slight changes to each image creating a warping effect. The “150” at the end of the line is the number of frames. “blackhole.png” is your output filename. This will produce a .mp4 file named “video.mp4” by default. Example below:
./zoom.sh "A painting of a green firetruck spinning through a black hole" blackhole.png 150
The ImageMagick package is requred to generate mp4 animated loop videos. If you don’t have it installed, you can install it using the below command.
sudo apt install imagemagick
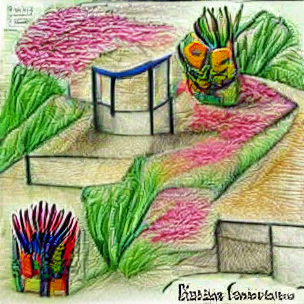
Generating multiple random images
You can also supply multiple phrases to be used at random to generate multiple images. There is a random list of words in the “./zoom.sh” file. Edit this file if you want to change the words used in the random phrase generator. Here is an example of the random images put into a collage.
chmod +x ./zoom.sh
./zoom.sh
Left to right #1-#9
#1 ‘A pencil art sketch of a criticizing pickle and a menu in the style of strange colors and Futurism’
#2 ‘A painting of a wild hotel and a flower in the style of Constructionist and Edgar Degas’
#3 ‘A spray painting of a awaiting computer and a bedroom in the style of Edgar Degas and Art Nouveau’
#4 ‘A photograph of a benefiting AR-15 and a pickle in the style of Modern art and Edgar Degas’
#5 ‘A sculpture of a undertaking computer and a figurine in the style of Pop Art and Picasso’
#6 ‘A painting of a tree on a dresser in the style of Surreal Art and Claude Monet’
#7 ‘A pencil art sketch of a touching statue and a AR-15 in the style of Surreal Art and Claude Monet’
#8 ‘A pencil art sketch of a adding table and a fish in the style of Surreal Art and Art Nouveau’
#9 ‘An illustration of a raining lamp and a spanner in the style of Pop Art and Michelangelo Caravaggio’
Advanced settings
There are many advanced flags you can use in the VQGAN program. To view all of the options from the terminal use the -h flag.
The usage and set up instructions above are the same, except for the line where you install Pytorch. Instead of pip install torch==1.9.0+cu111 ..., use the one or two lines which are displayed here (select Pip -> Python-> ROCm): https://pytorch.org/get-started/locally/
Troubleshooting
RuntimeError: CUDA out of memory
For example:
RuntimeError: CUDA out of memory. Tried to allocate 150.00 MiB (GPU 0; 23.70 GiB total capacity; 21.31 GiB already allocated; 78.56 MiB free; 21.70 GiB reserved in total by PyTorch)
Your request doesn’t fit into your GPU’s VRAM. Reduce the image size of the image by editing “generate.py”.
What is the best optimizing agent?
The Adam agent is usually a good general purpose agent to use. If you would like more information see the Pytorch Optimizer and Optim articles.
Can I download and use all pre-trained models simultaneously?
Yes, all you need to do is set everything to true in the download_models.sh file.