In recent years the number of people working from home has dramatically increased. This is due to many businesses adopting remote work policies. Working from home can be both a convenient and flexible option. However a work from home job requires reliable technology such as a good laptop to be as productive and efficient as possible. A work from home laptop is a crucial tool that enables you to access your work files and applications, communicate with colleagues and clients, and complete your daily tasks.
What makes a good work from home laptop?
A good laptop for work from home should have enough processing power, memory, and storage capacity to handle your daily workload. It should also have a high-quality display and a good battery life to ensure you can work comfortably and uninterrupted throughout the day. Additionally, a reliable internet connection and sufficient connectivity options are necessary to communicate with clients and access your online jobs resources. A good work from home laptop can significantly improve your productivity, reduce stress and make working from home a pleasant and rewarding experience.
Features to Look for When Buying a Laptop
- Fast and powerful processor
- Sufficient RAM for multitasking
- High-quality display with a comfortable size and resolution
- Reliable battery life for all-day use
- Strong internet connectivity (Wi-Fi or Ethernet)
- Sufficient USB ports and support for external displays
- Lightweight and portable or sturdy and stationary design, depending on personal preference and workspace setup
- Security features, such as bio-metric authentication and strong password encryption
- Affordable pricing and good value for the features offered.
By prioritizing these features you can find a work from home laptop that meets your specific needs. This will allow you to work efficiently, comfortably, and securely from the comfort of your home.
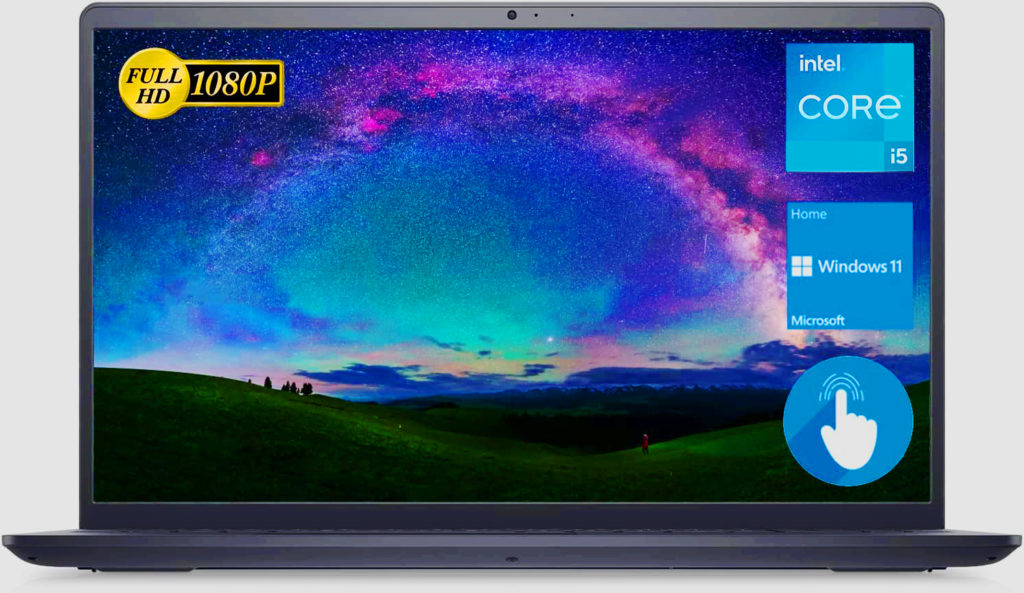
Lenovo IdeaPad 3i (2022)

The Lenovo IdeaPad 3i is an excellent mid-range laptop that is perfect for a work-from-home job. It boasts a powerful Intel Core i5-1135G7 processor. This ensures smooth and fast performance even when running multiple applications. With 8GB of DDR4 RAM, multitasking is a breeze allowing you to work on several projects simultaneously without experiencing any lag. This laptop also comes with a spacious 512GB SSD drive that provides ample space for storing all your important files and documents.
The Full-HD display of the IdeaPad 3i is stunning. It provides wider viewing angles that offer better color accuracy and contrast. This makes it easier to work for extended periods of time without eye strain. The vibrant display also means you can enjoy your favorite movies or TV shows with exceptional visual quality. In addition the laptop features a HD webcam with dual microphones that deliver crystal clear sound for virtual meetings and video calls. The two USB 3.2 and one USB Type-C ports offer an array of options for expanded connectivity to other devices. Overall, the Lenovo IdeaPad 3i is a fantastic mid-range option for anyone who needs a reliable and efficient laptop for their work from home job or daily use.
System Specifications:
- CPU: Intel Core i5-1135G7 (2.4GHz Base, 4.20Ghz Boost)
- RAM: 8GB DDR4 (3000Mhz)
- Storage: 512GB SSD
- Display: 15.6″ Full-HD (1920×1080)
- Wireless: Bluetooth, 802.11ac
HP Pavilion 15 Laptop (2022)
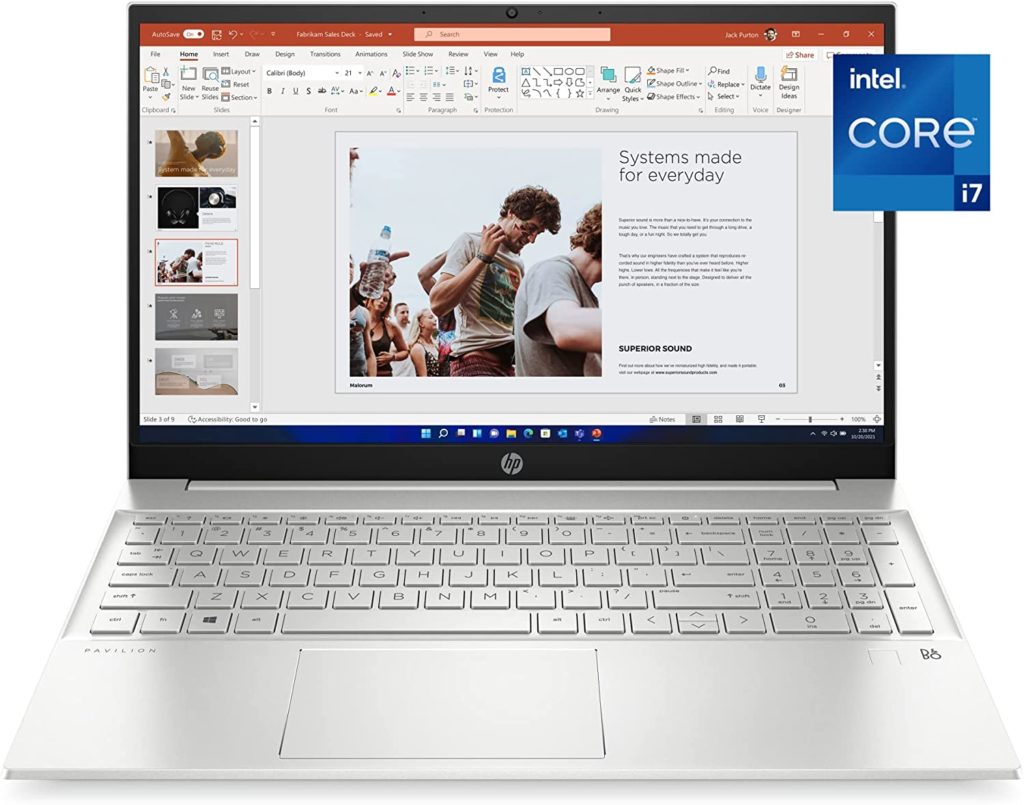
The HP Pavilion 15-eg2025nr laptop is a versatile and powerful laptop. It offers exceptional performance, entertainment, and security. Its compact size allows you to work on the go while still enjoying stunning graphics and rich audio. The laptop is equipped with an Intel Core i7-1255U processor, 16GB of DDR4 RAM, and a 512GB SSD for fast read and write speeds. With a 15.6″ FHD display, you can expect a bright and vivid visual experience. In addition to its powerful performance the HP Pavilion 15-eg2025nr also boasts a long battery life of up to 8 hours. This makes it an ideal choice for those who need to work or stream videos on the go without being tethered to a power outlet.
The laptop is also designed with enhanced security features including a fingerprint reader for quick and secure access. The fingerprint reader also ensures that your data and files remain private and protected. With the HP Pavilion 15-eg2025nr, you can enjoy all the benefits of a high-performance laptop without sacrificing portability or security. Whether you need it for work or entertainment, this laptop delivers top-notch performance, reliable security, and an exceptional user experience. Overall the HP Pavilion 15-eg2025nr is one of the best laptops for work from home.
System Specifications:
- CPU: Intel Core i7-1255U (4.7GHz Boost)
- RAM: 16GB DDR4 (3200 MHz)
- Storage: 512 GB PCIe NVMe M.2 SSD
- Display: 15.6″ Full-HD (1920×1080)
- Wireless: Bluetooth, 802.11ac
Dell Inspiron 3511 (2022)
The Dell 3511 is a fantastic option for anyone looking for a powerful and durable work from home laptop. Its chassis is well-built and constructed of solid aluminum with a carbon-black color. This gives the machine a sophisticated clean facade. The laptop features an Intel Core i5-1135G7 and 16GB of DDR4 RAM which provides the necessary processing power for any work task or personal project. Its 512GB SSD drive offers fast read and write speeds ensuring you can work quickly and efficiently. Additionally the laptop comes preinstalled with Windows 11 Home. This provides you with a user-friendly interface and a range of new features to increase your productivity.
The Dell 3511 also includes a 15.6″ Full HD anti-glare display making it easy to work for extended periods without straining your eyes. The keyboard is comfortable and responsive while providing just the slightest bit of feedback while typing. The full size keyboard also includes a dedicated number pad which is a useful addition for anyone who works with numbers frequently. The entire keyboard is spill-resistant providing additional protection against accidental spills. Overall, the Dell 3511 is an excellent option for anyone who needs a reliable and high-performing laptop for work from home use.
System Specifications:
- CPU: Intel Core i5-1135G7 (2.4GHz Base, 4.2Ghz Boost)
- RAM: 16GB DDR4 (3600MHz)
- Storage: 512GB PCIe NVMe M.2 Solid State Drive
- Display: 15.6″ Full-HD (1920×1080)
- Wireless: Bluetooth, 802.11ac
Flagship Lenovo IdeaPad (2022)
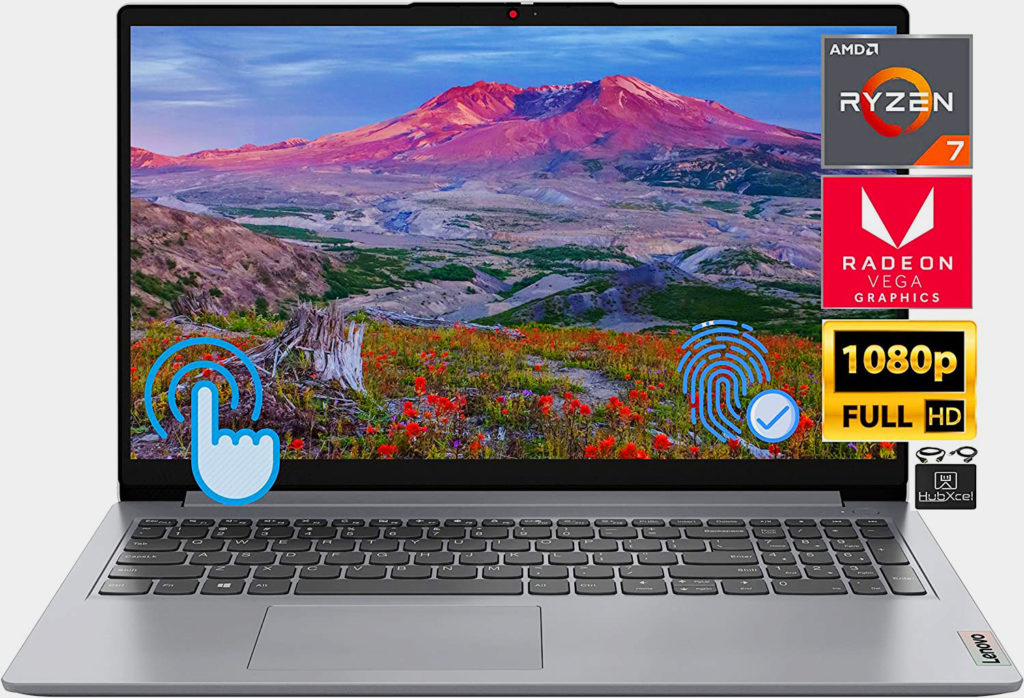
The Lenovo IdeaPad Flagship series is a reliable and high-performing laptop that comes with a range of impressive features. One of its key features is the Ryzen 7 5700U CPU which provides lightning-fast processing, and ensures that the laptop can handle multiple applications and programs at once. With 24GB of DDR4 RAM the IdeaPad is a reliable device that can keep up with even the most demanding workloads. In addition to its powerful processing capabilities the IdeaPad also features a 1TB PCIe SSD. This enables the laptop to run lots of programs simultaneously without experiencing any delays, ensuring a smooth and seamless user experience. With Windows 11 Home preinstalled, users can get started with their work or personal tasks right away.
Another standout feature of the Lenovo IdeaPad is its beautiful 1920×1080 15.6″ touchscreen display. The high-resolution display ensures that everything on the screen is crisp and clear. This makes it easy to work for extended periods without experiencing any eye fatigue. The touchscreen functionality adds an additional layer of convenience to the user experience. In summary the Lenovo IdeaPad Flagship series is a powerful and reliable laptop that is suitable for a wide range of work and personal tasks. Its combination of a high-performing CPU, ample RAM, speedy SSD, and a beautiful display make it an ideal choice for anyone who values performance and reliability from a work from home laptop.
System Specifications:
- CPU: AMD Ryzen 7 5700U (1.8GHz Base, 4.3Ghz Boost)
- RAM: 24GB DDR4 (3200Mhz)
- Storage: 1TB PCIe SSD
- Display: 15.6″ Touchscreen Full-HD (1920×1080)
- Wireless: Bluetooth 5.1, 802.11 Wireless-AX (2×2)
Dell Latitude 7490 (2022)
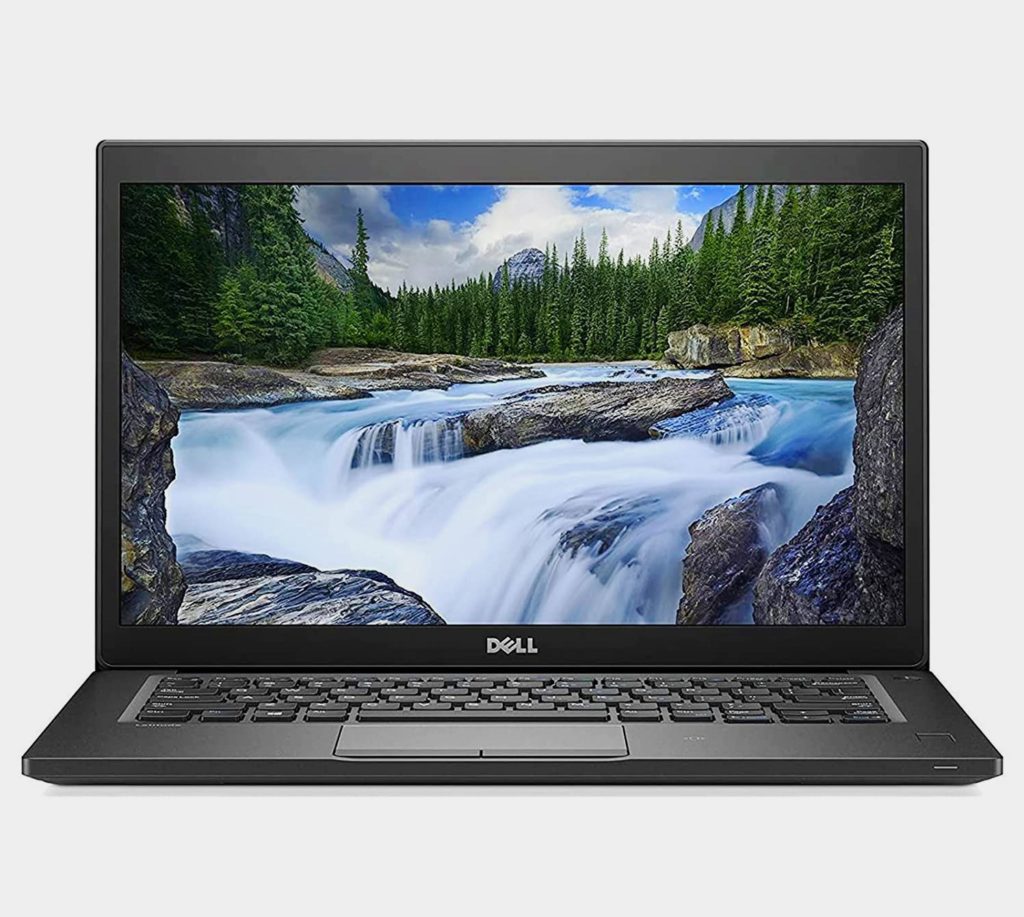
The Dell Latitude 7490 is an exceptional laptop for those who work from home. This laptop boasts impressive features including an Intel Core i7-8650U processor, 16GB of DDR4 RAM, and a 512GB SSD. With such powerful components users can expect top of the line performance from the laptop.
The laptop has a 14″ display with a resolution of 1080p which delivers clear and vibrant visuals. Additionally the backlit keyboard makes typing in low-light environments comfortable and easy. The Dell Latitude 7490 is known for its superior build quality, good input devices, and a broad range of connectivity and security options.
The laptop’s sturdy construction ensures that it can withstand daily use and frequent travel. Its high quality components make it a reliable and long-lasting choice. The Dell Latitude 7490 offers a range of connectivity options including USB-C, HDMI, and Ethernet, this makes it easy to connect to a variety of peripherals and networks. Overall, the Dell Latitude 7490 is an outstanding option for those looking for a top-tier work from home laptop that offers excellent performance, reliability, and security. It is an ideal choice for professionals who require a high-performing and durable laptop for both home and travel use.
System Specifications:
- CPU: Intel Core i7-8650U
- RAM: 16GB DDR4 (3000MHz)
- Storage: 512GB SSD
- Display: 14.1″ Full-HD (1920 x 1080)
- Wireless: Dual-Band Wireless-AC 8265, Bluetooth 4.2
ThinkPad E15 (2020)
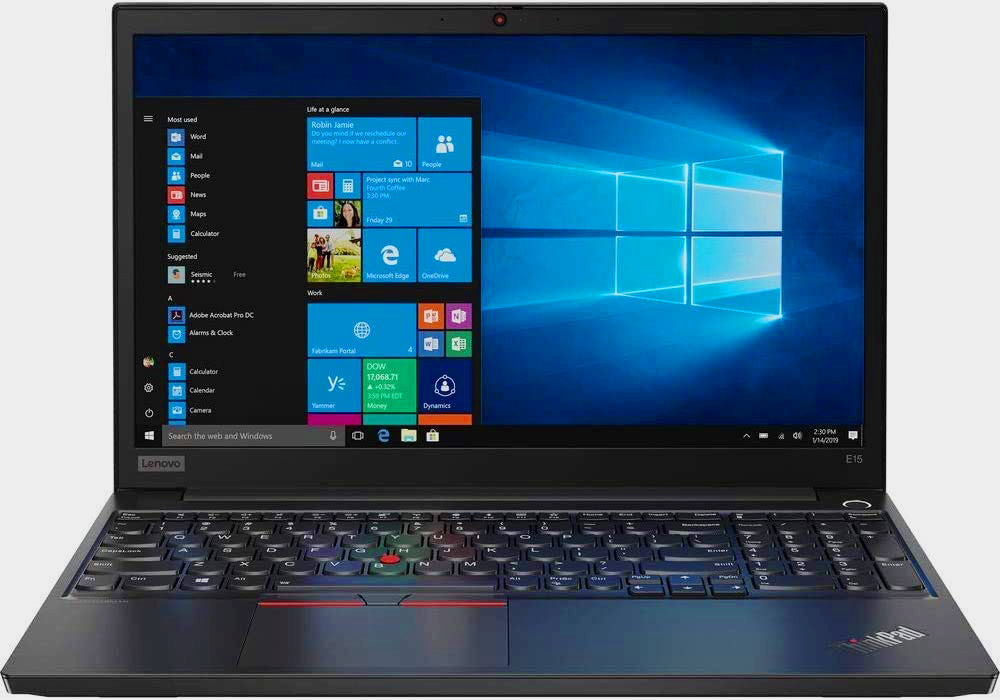
The ThinkPad E15 is a rugged laptop that offers a wide range of features. This makes it an excellent choice for anyone who needs a reliable and powerful device. It has a 15.6″ Full HD display, USB-C ports, 16GB DDR4 memory, 512GB SSD, and an Intel Core i5-10210U processor that delivers fast and efficient performance. It also comes with Windows 10 Professional preinstalled. This makes it an ideal laptop choice for business use. One of the best features of the ThinkPad E15 is its MIL-SPEC testing. This ensures that the E15 can withstand a wide range of environments from freezing Arctic cold, to hot and dry desert climates.
Additionally it is designed to handle accidental knocks, drops, and spills without losing any of its performance. As a result it is an excellent option for people who need to work on the go or in an outdoor environment. The ThinkPad E15’s durability is combined with its high-performance features such as ample storage, and a powerful intel processor. Overall its versatility, efficiency, and durability make it an outstanding option for anyone in need of a laptop that can handle challenging environments, and provide fast and efficient performance.
System Specifications:
- CPU: Intel Core i5-10210U (1.66GHz Base, 4.20GHz Boost)
- RAM: 16GB DDR4 (3200MHz)
- Storage: 512GB PCIe SSD
- Display: 15.6″ Full HD (1920×1080)
- Wireless: Wi-Fi 802.11ac (2×2), Bluetooth 5.0
Common Questions
What laptop specs do I need for Work From Home?
There are a few things to consider, mainly the processor, RAM, storage, display, and connectivity. The processor should be at least an Intel Core i5 or better. The laptop should have at least 8GB of RAM and a solid-state drive (SSD) with a minimum of 256GB storage. The display should be Full HD or 4K, and have an anti-glare coating. The laptop should have Wi-Fi, Ethernet, Bluetooth, and preferably USB-C ports for increased versatility and connectivity.
What are the benefits of purchasing a powerful laptop?
A powerful laptop can offer several benefits for those working from home. First and foremost it can provide fast and efficient performance. This enables users to complete their work quickly and easily. Additionally a powerful laptop can offer ample storage allowing users to store and access large files and data sets without experiencing lag or delays. Overall investing in a powerful laptop can greatly enhance the work from home experience by making it more efficient, comfortable, and enjoyable.
Conclusion
Choosing the right laptop is a critical decision for anyone working from home. As remote work continues to grow in popularity it is becoming increasingly important to have reliable technology that can help you be productive and efficient. By investing in a laptop that has the processing power, memory, storage, and display quality to meet your specific needs will allow you to enjoy a more comfortable and uninterrupted work experience. Additionally having a reliable internet connection and connectivity options is essential for communicating with colleagues and accessing online resources. Ultimately a good work from home laptop can help you be more productive, reduce stress, and make working from home a positive and rewarding experience.
Questions?
If you have any questions or comments feel free to leave them below.
Recommended By Our Editors
View our Best Mechanical Gaming Keyboards to Purchase in 2023 guide.
Learn How to Configure a Firewall in Linux using UFW.
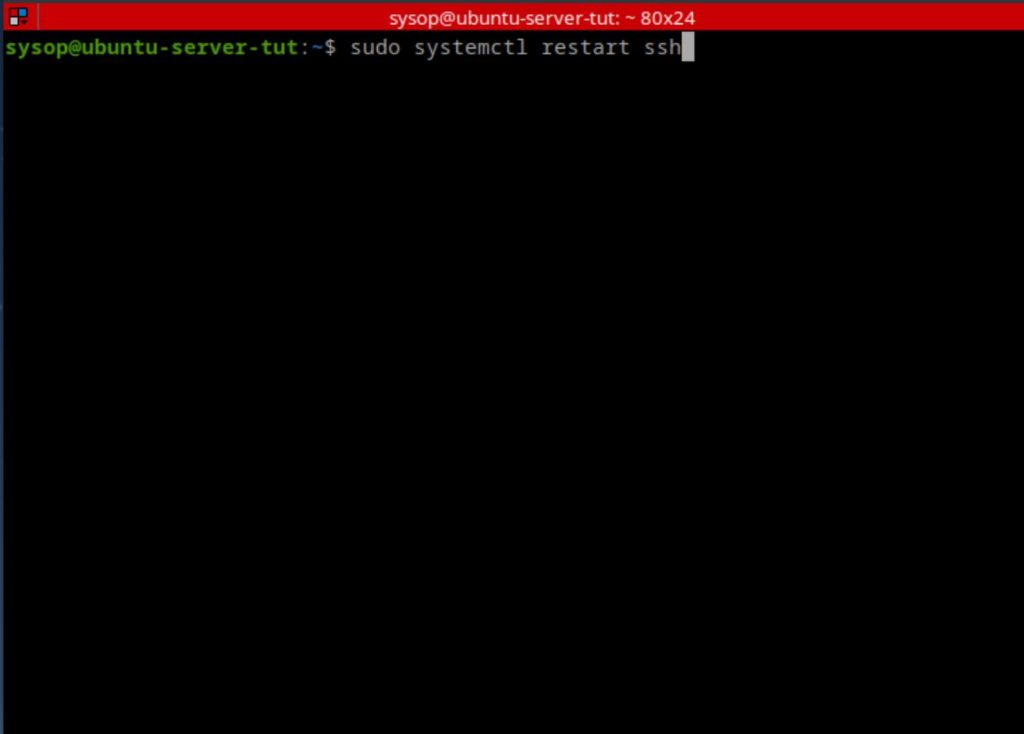
Check out How to Setup OpenSSH with Keys on Ubuntu 22.04.
View our Deep Learning Image Style Transfer Tutorial Using Neural Style Pt tutorial.
Learn How to Create a Mapped Network Drive in Windows 10.
View all of our available online tools and converters at Formatswap.com.